A 32 year old vegetarian juggles being a mom and handling her children's food dairy intolerances all while trying to find time to cook.
Monday, September 24, 2007
Apple Season
We roamed the trees, peeking at varieties we'd never heard of (orange pippin?) and tasting as many different kinds as possible. I really liked the Gravenstein varietal that I tasted. Scarlet red in color, it's flavor was bright and sweet. And then there are my favorite Galas and Honeycrisps. When it's apple season, I'm a happy camper!
We brought home 25 pounds of apples. Yes. 25 pounds. There will be a lot of apple treats coming out of my kitchen in the days and weeks to come. And I started last night.
Here is my version of a basic applesauce recipe that floats around the internet. I made it up as I went along, but there's really little way to mess it up. If you want further inspiration, a quick google of crockpot applesauce will bring you more ideas. But here's what I did.
Crockpot Applesauce
6 servings
6-8 apples (I used McIntosh, Gala, and Honeycrisp but any kind will work)
4 quart crockpot (a larger one can be used, however you will need to prepare more apples)
1 tablespoon cinnamon
4 cloves
2 tablespoons sugar (or to taste)
Peel and chop apples. I used a handy dandy apple peeler/corer machine, but a basic peeler and knife will do the trick as well. Put in crock pot. Turn on high for 4 + hours. At the 2 hour point, remove lid and add spices. Replace lid. At the 4 hour point (or when cooked to desired texture), add sugar to taste. Cool, and refrigerate.
Enjoy!
Sunday, September 09, 2007
Mezze, part one
The idea of making Middle Eastern food came from two sources. First of all, we went to one of our favorite Middle Eastern restaurants last night. And I mean favorite. Here in NYC, you have to really love a restaurant to return. After all, there are hundreds of thousands of more out there. Why return for just "okay"? But this restaurant in the East Village is fantastic. No menus, $35 for 7 plus courses and just a delicious mezze of food. But last night, they weren't up to their usual standards. Yes, the falafel was outstanding, but the hummus tasted bland. The usual fattoush salad had been changed to an avocado feta salad (also too bland) and there were several other similar changes. I was left wanting more.... wanting the fattoush salad and wanting better tasting hummus. This, coupled with the three eggplants picked from the garden this week planted the idea of making a mezze for dinner tonight into my mind. And then, I just couldn't think of anything else.
Baba Ghanouj is a personal thing. I like mine creamy, smoky from the grill but with enough tahini to make the flavor fuller. M. prefers his thinner and smokier. To each their own. Except that I was the chef tonight. :)
Baba Ghanoush (Roasted Eggplant with Tahini)
Deborah Madison
Vegetarian Cooking for Everyone
1 large or 2 medium eggplants, about 1 1/4 pounds
3 garlic cloves, coarsely chopped
1/4 cup tahini
Juice of 1 large lemon
salt
Extra Virgin Olive Oil
Chopped parsley
2 tablespoons of mayonnaise
Preheat oven to 425 degrees. Slash eggplant in several places so it won't explode, and then put in pan and bake until the point of collapse (30-40 minutes). Let skin harden and char in a few places to give it a smoky flavor. I cooked my eggplant on the grill for about 40 minutes. Let rest for 15 minutes or so. Peel eggplant, and puree in blender or food processor with the garlic and tahini. Season with lemon juice and salt to taste. I added a couple of tablespoons of mayonnaise to round out the flavor even more. Mayonnaise is a common ingredient in Israeli style baba ghanoush, but again optional. Mound puree in a bowl, create slight depression with the back of a spoon. Pour a little olive oil in to the depression, sprinkle with parsley and serve.
Thursday, September 06, 2007
Mojito Madness!
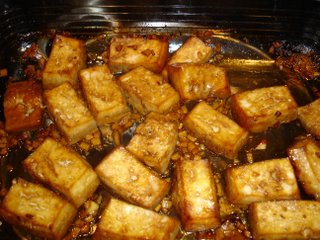
Now, I do love tofu. But I love flavorful tofu. Tofu marinated and grilled. Tofu sauced and baked. I like interesting tofu. But, I rarely take the time to make it interesting. But this recipe for a Mojito Marinade in one of my cooking magazines from earlier in the summer had lingered in my memory. See, I get a lot of cooking magazines. And while I love flipping through them, to be honest it is a good month when I actually cook something out of one. But often a recipe sticks in my mind and all of a sudden, it MUST be made. I couldn't tell you what else was in the article on marinades that I read all those months ago, but the Mojito Marinade stuck out. So I tried it.
The marinade was easy to assemble (the most time consuming step being grating some lime zest), and after a whir in the food processor - it was done. And, minus the shallots which are not usually an ingredient found in any mojito I've come across, the marinade looked almost good enough to drink. I split the marinade between the tofu, and some sliced vegetables (peppers, zuchini and the like) prepared to grill. After a about a half hour's wait, we were off to the grill.
I really liked this marinade on tofu. The tangy sweetness of the marinade carmelized on the grill, and complemented the somewhat bland taste of the plain tofu. The flavor did not come out as well on the vegetables, however I don't think that I had quite enough marinade for the amount of vegetables I prepared. With more marinade, the flavor might have come through better.
Sadly, my pictures of this meal did not come out well. I forgot to take a picture while plated, and the lighting in the kitchen was poor when I remembered to photograph. But, I plan to make this marinade again in the future and when I do so, perhaps I'll have more photographic luck.
Tuesday, August 28, 2007
Feeling Lazy These August Days....
Scandalous, I know.
The other project that has kept me hopping these days is our current "Rescue the Stray Kittens Living in Our Yard" enterprise we've embarked on. When we moved to the apartment in May, we quickly learned that there were two stray cats who happen about the neighborhood. We've nicknamed them "Stripey" and "Orange", which were our very original attempts at naming them based on their appearances. In late May, we learned that Stripey had a litter of kittens in the yard next door. We were concerned for them, but since it was not our yard we couldn't get to the kittens.
Fast forward to August. All five kittens began hanging out in our yard. We actually think some of them were living in our garden, having gotten in but being too small to climb the wall to get back out. M. has taken up kitten catching, and has successfully captured 4 of the 5 kittens through a variety of means including dumb luck in grabbing one as it ran by, cartoonish traps involving laundry baskets and other creative kitten catching methods.
We have decided to keep one kitten as a companion for Helios (the one pictured at the left and below). They remain unintroduced as the kitten we've chosen had an upper respiratory infection and is currently on antibiotics. Once the antibiotics course is completed, then he can do all the feline leukemia testing necessary to make sure he's safe to introduce to Helios. He's also unnamed at the present. Artemis was a strong contender (until it was realized that the mythological character was female). I am partial to Ezra, but M. prefers Soma. Meanwhile - he remains kitten. He's absolutely adorable, but with him sequestered upstairs, his three siblings sequestered downstairs and Helios running around in between - it's been a little crazy here in Brooklyn. Three litter boxes, five cats needing feeding, one kitten needing twice daily antibiotics .... blogging time has been limited.
Hang in there though - we've decided we MUST give the three siblings to a shelter this weekend if we can't find a home for them. So, hopefully (although we will be sad to say good-bye to the cute little kittens) life will become a bit more normal next week.
Friday, August 17, 2007
Quinoa, Corn, and Tomato Salad with PARSLEY-Infused Oil, CL August 2007
You know what's coming, don't you? Oh how the mighty fall when they become too confident.
Yes, last week I was all ready to make Quinoa, Corn, and Tomato Salad with Chive-Infused Oil from August's Cooking Light. Went to the grocery store, came home and was halfway through the recipe when I realized - I'd forgotten chives. Ooops. Typically I prefer to make recipes as written the first time through. That clearly was not going to work in this case. So, I grabbed a bunch of parsley which I DID remember to buy and made a couple changes to the recipe.
The results were delightful. This was an excellent salad - M. is particularly fond of quinoa so he was happy and I loved the PARSLEY (not chive) taste that came through from the infused oil. The oil was an additional step, but it really makes the salad and certainly wasn't hard to make. I wouldn't use a purchased equivalent - it really needs to be fresh to add that tangy essence to the salad. Any salad containing fresh corn, tomato and herbs is a winner, especially in the summer. The salad was a hit, so please don't judge it by the picture taken outside at night (as it really doesn't do it justice). I was actually inspired by this salad to create my own Mexican knock-off a few days later (which will be forthcoming on this blog). After all, imitation is the sincerest form of flattery.....
Quinoa, Corn and Tomato Salad with Chive-Infused Oil
Cooking Light Magazine
August, 2007
Cooking Light's notes - Brightly colored flavored oil coats the quinoa grains and lends the salad fresh chive flavor. Refrigerate leftover oil to use as a dressing to drizzle over grilled fish or summer vegetables. Garnish with whole fresh chives, if desired
My notes - If, like me, you forget chives, take comfort in the fact that this salad works equally well with parsley. And most likely basil as well, although that combination has not yet been confirmed.
Combine 1 1/2 cups water and quinoa in a medium saucepan; bring to a boil. Cover, reduce heat, and simmer 10 minutes or until liquid is absorbed. Remove from heat; let stand 10 minutes. Fluff with a fork.
Combine quinoa, corn, tomatoes, and parsley in a medium bowl. Combine Chive-Infused Oil and remaining ingredients, stirring with a whisk. Drizzle over salad; toss well to coat. Let stand 10 minutes before serving.
6 servings - each serving size 2/3 cup
CALORIES 179(34% from fat); FAT 6.7g (sat 0.7g,mono 4.1g,poly 1.3g); PROTEIN 5.2g; CHOLESTEROL 0.0mg; CALCIUM 20mg; SODIUM 145mg; FIBER 2.4g; IRON 2.2mg; CARBOHYDRATE 26.1g
3/4
Place all ingredients in a blender; pulse 6 times or until chives are very finely minced. Strain mixture through a fine sieve into a bowl, and discard solids. Store in refrigerator in an airtight container for up to 2 weeks.
3/4 cup (serving size: 1 1/2 teaspoons)
CALORIES 63(100% from fat); FAT 7g (sat 1g,mono 5.4g,poly 0.6g); PROTEIN 0.0g; CHOLESTEROL 0.0mg; CALCIUM 0.0mg; SODIUM 49mg; FIBER 0.0g; IRON 0.0mg; CARBOHYDRATE 0.0gWednesday, August 08, 2007
Mixed Greens and Nectarine salad....
This salad couldn't be simpler. Nothing to chop except one juicy nectarine. Nothing to prepare except the dressing, which, once prepared will keep for days in the fridge to make future replications easy to assemble. And the only ingredient I had to purchase was a bottle of walnut oil. Since originally making this salad on Sunday evening, I have replicated it several times. I really like the sweetness of the tangy vinaigrette, and recommend tossing the nectarines and greens in a separate bowl before plating to get the fullest effect of the dressing. Simply pouring a bit on will not do.
Mixed Greens and Nectarine Salad
Cooking Light, August 2007
This simple salad pairs juicy nectarines with a vinaigrette featuring walnut oil. For a delicious fall salad, substitute sliced pears or apples.
Ingredients
4
2
Preparation
Yield
4 servings (serving size: about 1 cup)
Nutritional Information
CALORIES 83(31% from fat); FAT 2.9g (sat 0.3g,mono 0.6g,poly 1.8g); PROTEIN 1.5g; CHOLESTEROL 0.0mg; CALCIUM 31mg; SODIUM 132mg; FIBER 1.7g; IRON 1mg; CARBOHYDRATE 14.1g
Walnut Oil Vinaigrette
This dressing goes with the Mixed Greens and Nectarine salad.
Combine all ingredients, stirring with a whisk. Store in refrigerator for up to 1 week.
Yield
2/3 cup (serving size: about 1 tablespoon)
CALORIES 39(62% from fat); FAT 2.7g (sat 0.3g,mono 0.6g,poly 1.7g); PROTEIN 0.1g; CHOLESTEROL 0.0mg; CALCIUM 1mg; SODIUM 118mg; FIBER 0.0g; IRON 0.1mg; CARBOHYDRATE 4g
Friday, August 03, 2007
The "BEST" chocolate chip cookies...
This recipe comes from Baking: From My Home to Yours by Dorie Greenspan which is fast becoming one of my favorite baking resources. Every recipe I've tried has turned out well, and this one is no exception. When I make chocolate chip cookies (which are my absolute favorite and therefore must be distributed as quickly as possible), I usually send some into M.'s office, keep a few around the house for us and freeze some dough balls for quick cookie fixes. I simply prepare a tray as though it were going into the oven, pop it into the freezer instead and then put the dough (once frozen) into a freezer bag or container. Then homemade cookies are only a few moments away! The dough can go into a hot oven frozen, but may require a few extra moments to cook. I'm almost out of my supply... perhaps it will be time to make these cookies again soon. :)
My Best Chocolate Chip Cookies (meaning Dorie Greenspan's best, although I agree)
Makes about 45 cookies
Dorie's notes -
In the category of "Great Chocolate Chip Cookies" these get my vote for the greatest. They are Toll House Cookies' kin, but I think my nips, tucks, tweaks and variation on the basic recipe make them their own kind of wonderful. They're thin and crisp and a bit chewy in the center from just the right mix of sugars - granulated sugar for crispiness and brown sugar for deep caramel flavor.
My notes -
I add an additional step to the recipe, and I freeze the cookie dough after mixing is completed. I find this helps the cookies gain height, and not run into each other as much. I just pop the mixing bowl into the freezer for about 20 minutes or so to chill, and return it between batches. I also just used regular chocolate chips and left out the walnuts due to personal taste. I also was quite lazy about cooling the racks between batches, and the results were still delicious.
2 cups all purpose flour
1 teaspoon salt (1 1/4 if you really like salt)
3/4 teaspoon baking soda
2 sticks (8oz) unsalted butter at room temperature
1 cup sugar
2/3 cup (packed) light brown sugar
2 teaspoons pure vanilla
2 large eggs
12 oz bittersweet chocolate chpped into chips, or 2 cups store bought chocolate chips
1 cup finely chopped walnuts or pecans (I omitted)
Center a rack in the oven and preheat to 375 degrees F. Line two baking sheets with parchment or silicone baking mats.
Whisk flour, salt and baking soda.
Working with a stand mixer, preferably fitted with a paddle attachment, or with a hand mixer in a large bowl, beat the butter on medium speed for 1 minute or until smooth. Add sugars and beat for another 2 minutes or so until well blended. Beat in the vanilla. Add the eggs one at a time, beating for one minute or so between each egg.
Reduce speed to low, and add dry ingredients in three portions, mixing only until each addition is incorporated. On low speed or by hand, mix in chocolate and nuts.
(The dough can be covered and refrigerated for up to three days, or frozen. Dough can also be frozen in mounds as discussed above in my notes)
Spoon the dough by slightly rounded tablespoonfuls onto the baking sheets, leaving about 2 inches between spoonfuls.
Bake cookies one sheet at a time, rotating at the midway point, for 10-12 minutes or until brown at edges and golden in the center. They may be soft in the middle, and that's just fine. Pull the sheet from the oven, and allow cookies to rest for one minute. Then carefully transfer with a wide metal spatula to racks to cool to room temperature. Repeat with remainder of dough, cooling the sheets between batches.
Monday, July 30, 2007
Summer's bounty continues...
I utilized one of these red, jaunty heirloom tomatoes in a hummus, cheddar cheese and basil sandwich for dinner. It was so tasty that I made two more for lunch tomorrow - one for me and one for M. With my new job keeping me travelling from classroom to classroom during the day, I've lost my access to a fridge and microwave. My busy schedule this summer has made it harder for me to plan around these challenges, and so I've resorted to purchasing food out and about. But, I'm determined to return to my brown bag roots... so hummus tomato sandwich it will be tomorrow!
Do excuse the less then perfect picture ... I was too hungry for more sophisticated food styling tonight! :) You'll see the sandwich at the top, with broccoli also picked from our garden, homemade pickles and the above described tomatoes. Summer's bounty on a plate, if I may say so myself.
One of the charms of having a garden (or a jungle as ours is now resembling) is encountering the random plantlife that develops. If you look to the back of the chair in the produce picture above, you'll notice the "friendly" little weed grabbing hold of the Adirondack chair. Here he is again working his way into our Japanese Maple tree. He continues to demonstrate more then a friendly affection for our Japanese Maple tree despite numerous cutbacks. The weed is a wild grape of sorts (deduced from the presence of a similar one bearing grapes on an opposite wall) and I had wanted it to climb the fence in an orderly fashion. But I fear his days are numbered now....
Friday, July 20, 2007
Where to begin?
The book I'm referring to is titled Animal, Vegetable, Miracle by Barbara Kingsolver. I highly recommend it to anyone even vaguely interested in any of the above topics I mentioned. But be warned, reading it will cause you to re-evaluate even the quickest of trips to the grocery store. You'll find yourself visiting farmer's markets several times a week (if available). You'll find yourself lugging heavy bags of produce with you as you go about your day, despite the inconvenience and weight. But, you'll feel better for it.
These items were the result of a Saturday at the Farmers Market in Union Square. It's still my favorite market, not only for the number of farmers and sellers who attend but for the fact it is there 4 days a week. 4 days! I cannot pass through it without stopping to browse, and buy. Especially at this time of the year when the stalls are bursting with beautiful produce, fresh fruits and veggies abound along with eggs, meats and cheeses made from the vendors who sell them. It truly is a food lover's paradise.
Still, reading Kingsolver's book not only inspired us to shop from farmers but to become better farmers ourselves. Our garden is booming - look at a few of the wonderful vegetables we've harvested, or will be harvesting soon!
Green peppers, still on the vine.
Butternut squash, growing happily.
Broccoli.
A shy, little eggplant.
Mr. Stripey, an heirloom variety green tomato.
M. and I are certainly not going to live off our tiny garden patch for a year, as Barbara Kingsolver and her family do in her book, but we have made a conscious shift towards more localized and healthy foods obtained at farmers markets not at grocery stores of late. It is an imperfect process, and I do obtain items that I need which cannot be found locally as they are required. And I will continue to do so, but for every imported package of pine nuts I purchase, I feel better about the local purchases that support not only local farmers but taste better as well.
Now, if I could only remember to take more pictures of the dishes I make with these foods, life would simply be perfect. :)
Tuesday, July 10, 2007
Changes afoot...
And here we are almost a month after my last post.
School ended. M. and I went to England for a week, and I've started a new job. Three great reasons for being busy, and they are all true. But the kitchen has been working overtime lately, but that will be its own post. Hopefully tomorrow.
But I'm here... cooking away, if not always photographing and posting away, and enjoying a blisteringly hot NYC day. It's been so hot that I'm almost starting to miss those rainy England days (see picture). Almost. :)
Monday, June 18, 2007
Caprese Pasta Salad
Having established plans to have people to dinner, the next thought that popped into my mind was of course what to make. M. is all about the grill these days. I am loving grilled veggies myself, but M. is loving experimenting with different preparations of meat. So he and our friends were browsing the meat counter at a local butcher's shop. Bored, I browsed around the perimeter of the store looking to see what I could entertain myself with while they shopped. Frozen tortellini, marinated fresh mozzarella balls, sundried tomatoes.... an idea for a pasta salad loosely based on a Caprese salad began to take shape.
This salad was delcious. The creamy cheesiness of the pasta compliments the tangy vinaigrette nicely, and the addition of the fresh parsley wakens what would have been an otherwise bland salad. The amounts in the recipe are based on my recollection of what I did. Feel free to adjust them to your tastes (more vinegar, less mustard etc) and enjoy the results.
We sure did.
Caprese Pasta Salad
original recipe
Serves 6 as a side salad
1 lb frozen (or fresh) tortellini
1/8 pound sundried tomatoes, sliced
1 pint grape tomatoes, halved
1/2 a head of Italian parsley, washed and chopped
1/2 pound marinated mozzarella balls, quartered (bocconcini)
Dressing -
1/4 cup basalmic vinegar
1 tablespoons dijon mustard
3 tablespoons olive oil
splash of red wine vinegar
salt and freshly ground pepper to taste
1. Boil water for pasta. Cook pasta according to directions on package. Rinse and drain.
2. Assemble salad ingredients. Add pasta to salad bowl.
3. Mix vinaigrette. Adjust to taste.
4. Add vinaigrette to salad. Mix until dressing is thoroughly incorporated.
5. Chill until ready to serve.
Tuesday, June 05, 2007
Sesame Brown Rice Salad with Shredded Chicken and Peanuts - Cooking Light June 2007
One of the best skills a vegetarian can acquire is learning how to adapt a recipe. In the beginning, one sees a recipe calling for chicken, beef or some other meat and tosses it aside thinking that it simply cannot be made. Eventually, one learns to be creative. I looked at this recipe in this month's Cooking Light and thought that it would be delicious made with my favorite tofu recipe. And it was. It was delicious, and even M. the non-vegetarian praised the final dish. As previously discussed, he's quite fond of the vegetarian cooking despite being a decided omnivore. But only rarely does a dish make him stop and say with frank appreciation, "This is GOOD!". This salad achieved that lofty status.
And so it is with pride that I offer my recipe for Sesame Brown Rice Salad with Sweet Ginger Tofu and Peanuts. Take it, share it and enjoy!
Sesame Brown Rice Salad with Shredded Chicken and Peanuts
Cooking Light, June 2007
1 cup long-grain brown rice
2 cups shredded cooked chicken breast
1/2 cup shredded carrot
1/3 cup sliced green onions
1/4 cup dry-roasted peanuts, divided
1 tablespoon chopped fresh cilantro, divided
1/2 teaspoon salt
2 tablespoons fresh lime juice
4 teaspoons canola oil
1 teaspoon dark sesame oil
2 garlic cloves, minced
RECIPE INSTRUCTIONS
Cook rice according to package directions, omitting salt and fat. Transfer rice to a large bowl; fluff with a fork. Cool. Add chicken, carrot, onions, 2 tablespoons peanuts, 2 teaspoons cilantro, and salt to rice; toss to combine.
Combine juice and remaining ingredients in a small bowl. Drizzle oil mixture over rice mixture; toss to combine. Place 1 1/2 cups salad on each of 4 plates. Sprinkle each serving with 1 1/2 teaspoons remaining peanuts and 1/4 teaspoon remaining cilantro.
CALORIES 393 (30% from fat); FAT 13.3g (sat 2g,mono 6.3g,poly 4g); PROTEIN 27.8g; CHOLESTEROL 60mg; CALCIUM 44mg; SODIUM 424mg; FIBER 4g; IRON 1.7mg; CARBOHYDRATE 40.2g
The Modern Vegetarian Kitchen - Peter Berley
Yield: 4 to 6 servings (I don't think we've ever gotten six servings out of this delicious tofu!)
1/4 cup soy sauce
1/4 cup mirin
1/4 cup rice vinegar
2 tablespoons honey
2 Tbs minced gingerroot
2 Tbs light sesame oil -- (note: I only use 1 Tbs)
1 tsp minced garlic
1 pound firm tofu -- rinsed, patted dry, and sliced 1/2 inch thick
Sunday, June 03, 2007
The New Digs
This is one view of the living room. I took it crouched from one corner, so that's why the angle is a touch off. It's a hard room to photograph, since it is open along one side.
Here's a view from a more central position.
Two views of the kitchen/dining room. One came out a bit blurry - sorry about that!
A couple pictures of the space fast becoming one of our favorites. M. has done all the work on making this a garden. We arrived to one Japanese maple tree and a few planted bulbs, he's done the rest. The large metal ladder is an old-school clothes line tower. A rope would run from the building out to the ladder, but since each apartment needed their own line it had to be tall enough to accommodate the three floors of the building. All the buildings have them, I don't know if they are a Brooklyn thing or common to many cities, but it was a new concept to us.
And, finally perhaps the room most important to those of us who love food but aren't gifted with high speed metabolisms - the home gym. There was a point in time I made it to the gym quite frequently, however in the past couple years my schedule has made that very difficult. As a result, I'm excited to have a means to get moving right here at home. And I'm proud to say I've used the elliptical a fair amount since it arrived, and plan on using it more and more as my schedule eases this summer.
Hope you enjoyed the peek into our new space. Now my kitchen is set up, there will be many cooking and more traditional posts to come. And, with our new grill, the world of outdoor vegetarian grilling is now beckoning. So, make sure to come back and see what's cooking! :)
A Sleepy Sunday Morning...
I'm back, and as determined to get back into the blogging world as ever! It has been a very long month. While I "know" moving is hard, it really is amazing how long it takes to get life back into order. And we're still not all the way there - we ran out of steam for one last room. Isn't that always the way?
Anyways, there wouldn't have been much to report in the past month. Not too much cooking happened around the move - although we did discover an amazing pizza at our new local delivery restaurant. :)
To celebrate my return to civilization, I treated myself to an indulgent Sunday brunch. I included an order of parbaked frozen croissants in my latest online grocer order, and tried the first one today. It bakes for about 7-10 minutes, and contained every bit of the buttery deliciousness I wanted. The jam is a new favorite of mine. How can you go wrong with Raspberry Peach Champagne Jam - there's a hint of a special occasion in the name alone!
I enjoyed this treat outside on our new patio with a fresh latte by my side. This experience gave me the strength and motivation to update my blog with the several new posts I have waiting in the wings so stay tuned . . .
Monday, April 30, 2007
Superwoman I am not.
Yep, us neither. We move on May 4th, have a busy four day weekend of unpacking planned and then hopefully life will return to normal.
Just a few short weeks ago, I approached the task of moving, working full-time, tutoring multiple children and keeping my blog updated with the utmost confidence. "I am SUPERWOMAN!" I thought. I was positive that I could do all of those things, and keep cooking interesting meals, all while writing interesting and witty blog posts.
You can see how well that turned out.
Yep, we're living in boxes. In the morning, we hop out of bed and scoot around boxes. In the kitchen, I half-heartedly attempt to use up random food as I dodge boxes. The only one happy is Helios. He is a cardboard-loving cat, and there is plenty of cardboard for him to love these days.
So that's my story... I'm looking forward to the summer when I can devote more time to my neglected blog. I hope you'll hang in there with me!
Monday, April 16, 2007
M&M Cookie Deliciousness!
Here's something I made to take to New Jersey for Easter. I'd originally thought of making a cake, but having an interview in the city before leaving for the weekend made manipulating a cake on the subway seem unappealing. M&M cookies popped into my head, and were a nice easy cookie to make.
I found a recipe on Allrecipes.com and then made my own changes to it. I did go back to try to link to the original recipe, but I couldn't find it again. My searches for M&M cookie came up empty. A little strange but ... oh well!
Here's the recipe. I would definitely make this cookie again. It was easy, had a nice chewy yet crisp proportion and was completely addictive!
M&M Cookie
originally found at allrecipes.com
1 cup Brown Sugar
1 cup sugar
1 cup butter
2 eggs
1 1/2 tsp vanilla
2 1/2 cups all-purpose flour
1 tsp baking soda
1 tsp salt
1 1/2 cups M&Ms
Preheat oven to 350 degrees. Mix dry ingredients into a medium mixing bowl.
In large mixing bowl, cream sugar and butter with electric mixer or stand mixer. Add eggs, mixing for a minute after each one. Add vanilla, and beat for a minute before scraping down sides and beating again.
Add dry ingredients by half cupfuls until just mixed. Stir in 3/4 cup M&Ms.
Chill for 20 minutes ago, or until cooled and firm. Use dough scoop or tablespoon to measure out dough on to a cookie sheet. Press several of remaining 3/4 cup of M&Ms into top of cookies. Bake for 9-11 minutes (nine will be chewier, eleven will be crispier).
Remove from oven and cool on wire rack. Will keep for several days in airtight container.
Tuesday, April 03, 2007
Movin' Movin' Movin'
So, in my downtime between brokers and phone calls and internet searches, I decided to make an old favorite. This recipe comes from one of my favorite blogs and I remember loving it the first time around. Unfortunately this time around wasn't such a big hit. And I don't think that's the recipe's fault, instead I think it is what happens when you A. double a recipe, B. use up older ingredients and C. find out after you've added it that your nutmeg (because you're out of ginger apparently) doesn't smell great. I had hoped this vegan cake would go to M.'s office tomorrow, since he has a vegan coworker who misses out on the usual baked goods I send in. But now I'm not sure. We'll see... perhaps allowing the cake to cool a bit will help.
So, my changes were to use all whole wheat flour since I'm out of all-purpose. I subbed nutmeg (both the not so great and then more fresh grated to try and mask the not so great nutmeg) and a splash of cardamom (because I'm just loving cardamom right now).
If this cake sounds at all appealing to you I urge you to try it, since I think my less then spectacular results were a result of the ingredients.
Coconut Chai Breakfast Cake
Susan V. of Fat Free Vegan
1 cup strong chai tea
1/3 cup uncooked quick (not instant) oatmeal
1 cup whole wheat flour
1/2 cup unbleached white flour
1 tsp baking soda
1/2 tsp salt
1 tsp cinnamon
1/4 tsp ginger (use more for a spicier cake)
3/4 cup vegan sugar (I used demerara)
1/3 cup unsweetened applesauce
1 tbsp vinegar
1/2 tsp almond extract
1 tsp vanilla extract
1/2 cup flaked coconut, 2 tbsp reserved
Prepare the chai ahead of time by steeping two teabags (I used decaffeinated Tazo Chai) in one cup of boiling water until cool.
Preheat oven to 350 F. Grease an 8-inch square baking pan.
Combine the dry ingredients (oatmeal through sugar) in a medium-sized mixing bowl. Add the chai, applesauce, vinegar, extracts, and all but 2 tablespoons of the coconut. Mix well, and pour the batter into the prepared pan. Sprinkle with the reserved coconut and bake for about 25 minutes, or until a tester inserted into the center of the cake comes out clean. Serve warm or at room temperature.
Monday, April 02, 2007
Carrot Cake - Cooking Light April 2007
I did make one major change. I do not care for nuts in baked goods. I barely care for nuts, but if I do choose to enjoy them, they must be solo. So, I left out the pecans. Otherwise I followed the recipe as is, and was thrilled by how easy and tasty it was. The finished cake was moist, spicy and had all the elements of the finest carrot cake for a fraction of the fat. The icing was perhaps a touch runny as opposed to the more typical buttercream-like texture, however it tasted great. And the feedback I got from M.'s coworkers indicated that they agreed. :)
Sorry about the poor lighting on the pictures. I guess it was darker in my kitchen then I thought...
Carrot Cake
Cooking Light - April 2007
Cake:
1 1/2 cups all-purpose flour (about 6 3/4 ounces)
1 1/3 cups granulated sugar
1/2 cup sweetened flaked coconut
1/3 cup chopped pecans
2 teaspoons baking soda
1 teaspoon salt
2 teaspoons ground cinnamon
3 tablespoons canola oil
2 large eggs
2 cups grated carrot
1 1/2 cups canned crushed pineapple, drained
Cooking spray
Frosting:
2 tablespoons butter, softened
1 (8-ounce) block 1/3-less-fat cream cheese, softened
3 cups powdered sugar
2 teaspoons vanilla extract
Additional grated carrot (optional)
Preheat oven to 350°.
To prepare cake, lightly spoon flour into dry measuring cups; level with a knife. Combine flour, sugar, coconut, pecans, baking soda, salt, and cinnamon in a large bowl; stir well with a whisk. Combine oil and eggs; stir well. Stir egg mixture, grated carrot, and pineapple into flour mixture. Spoon batter into a 13 x 9-inch baking pan coated with cooking spray. Bake at 350° for 35 minutes or until a wooden pick inserted in the center comes out clean. Cool completely on a wire rack.
To prepare frosting, combine butter and cream cheese in a large bowl. Beat with a mixer at medium speed until smooth. Beat in powdered sugar and vanilla just until smooth. Spread frosting over top of cake. Garnish each serving with grated carrot, if desired.
Yield: 16 servings (serving size: 1 piece)
CALORIES 322 (29% from fat); FAT 10.4g (sat 4.2g,mono 3.2g,poly 1.5g); PROTEIN 4.1g; CHOLESTEROL 40mg; CALCIUM 29mg; SODIUM 403mg; FIBER 1.4g; IRON 1mg; CARBOHYDRATE 54.4g
Cooking Light, APRIL 2007
Sunday, April 01, 2007
Cinnamon-Cardamom Squares
And the results were divine. The cake is spicy and flavorful with a strong cinnamon and cardamom taste. Still the combination of the flavors remain balanced, especially in contrast to the chocolate. The chocolate frosting compliments the cake perfectly, and the touch of espresso added a new richness and dimension of flavor to the combination of flavors. The cake was easy to prepare, and the results were easy to transport to the dinner. This will be one for the tried-and-true files!
Cinnamon-Cardamom Squares
adapted from Dorie Greenspan's From My Home to Yours
serves 9
For the Cake
1 1/4 cups plus 2 tablespoons sugar
1 T plus 2 1/2 t cinnamon (I used 1 T plus 2 t cinnamon, and 1/2 cardamom)
1 1/2 teaspoons instant espresso powder (I used freshly ground espresso beans)
1 1/4 cups all-purpose flour
2 t baking powder
pinch of salt
3/4 cup whole milk (I used 1%)
2 large eggs
1/2 t vanilla
1 stick plus 2 T unsalted butter, melted and cooled
3 oz bittersweet chocolate finely chopped (or 1/2 cup mini-chocolate chips)
For the Frosting
6 oz bittersweet chocolate, finely chopped
2 1/2 T unsalted butter, cut into four pieces
Getting Ready
Preheat oven to 350 degrees. Butter an 8 inch square baking pan, and line bottom with parchment or wax paper. Place pan on a baking sheet.
To Make the Cake
Stir two tablespoons of the sugar, 2 1/2 of the cinnamon (or cinnamon/cardamom) and the espresso together in a small bowl.
In a large bowl, whisk the flour, the remaining 1 1/4 cups sugar, the baking powder, salt and the remaining 1 T of cinnamon. In another bowl, mix together milk, eggs and vanilla. Pour the liquid ingredients over the flour mixture, and whisk gently until you have a homogenous batter. Now, using the whisk or rubber spatula, fold in the butter with a light touch until the butter is absorbed. You'll have a smooth satiny batter.
Scrape half of the batter into the pan. Smooth the top. Sprinkle the chocolate over the batter, and dust with the cinnamon-cardamom-sugar mixture. Cover the rest of the batter, and smooth the top again.
Bake for 35-45 minutes, or until cake is puffed and beginning to pull away from the sides of the pan. A thin knife inserted into the middle will come out clean. Transfer cake to a cooling rack, and let it rest for 15 minutes before unmolding it onto another rack. Peel off the paper, invert it onto the first rack, and cool to room temperature right side up.
To Make the Frosting
Put the chocolate and butter in a heatproof bowl, and fit the bowl over a saucepan of simmering water. Cook, stirring gently and often, just until they melt. Be careful not to overheat mixture, the chocolate should be smooth, very shiny, thick and spreadable.
Using an offset metal icing spatula, or table knife, spread frosting in generous sweeps and swirls over the top of the cake. Allow frosting to set at room temperature. Cut cake into 9 squares, each with about 2 1/2 inches on a side.
Thursday, March 29, 2007
This recipe attracted me simply because it seemed to be the best of both worlds. Made with real lo mein noodles, it seemed closer then any "fettucine" fried noodle stand-in. And, because it came from Cooking Light, I knew it would be healthier. And these noodles were surprisingly tasty. The bath of sesame oil and soy sauce after the noodles cook gave them the authentic mouthfeel of the higher fat lo mein noodles I recall so fondly. And the addition of the edamame and the greens makes the dish both filling as well as good for you.
M. actually made this one. He reported that once the prep was finished, it came together quite quickly. We made a couple subs - dried shitaake for the wood ear mushrooms and lacinato kale for the mustard greens. But otherwise, the reecipe was executed as written. The bok choy dish on the side was M.'s creation. He prepared a stock of veggie broth, garlic, shallots, ginger, and a few other ingredients. After simmering the ingredients for about an hour, he used them to bathe and cook the bok choy (as well as season the salmon M. prepared for himself on the side).
Vegetable Lo Mein with Edamame and Mustard Greens
Mustard greens' peppery bite contrasts with tender, fresh Asian egg noodles. If you can't find them, substitute fresh pasta such as vermicelli or spaghetti. The leftovers are tasty served warm or cold.
1/2 cup boiling water
1/4 cup dried wood ear mushrooms
2 quarts water
3 cups chopped mustard greens
1 (14-ounce) package fresh Chinese egg noodles
1/4 cup low-sodium soy sauce, divided
1 tablespoon dark sesame oil
2 tablespoons canola oil
1 tablespoon grated peeled fresh ginger
1 1/4 cups (1/4-inch-thick) red bell pepper strips (about 1 medium)
3/4 cup chopped green onions
1 garlic clove, minced
1 1/2 cups frozen shelled edamame (green soybeans), thawed
3 tablespoons hoisin sauce
Combine 1/2 cup boiling water and mushrooms in a bowl; cover and let stand 15 minutes. Drain mushrooms in a sieve over a bowl, reserving soaking liquid. Remove and discard stems. Chop mushroom caps; set aside.
Bring 2 quarts water to a boil in a Dutch oven. Add greens, and cook for 1 minute or until greens wilt. Remove greens from water with a slotted spoon. Plunge the greens into ice water; drain and squeeze dry. Set greens aside.
Return water in pan to a boil. Add egg noodles, and cook for 2 minutes or until done. Drain and rinse with cold water, and drain well. Place noodles in a large bowl. Add 1 tablespoon soy sauce and sesame oil, tossing to coat, and set aside.
Heat canola oil in a wok or large nonstick skillet over medium-high heat. Add ginger; stir-fry 5 seconds. Add mushrooms, bell pepper, onions, and garlic; stir-fry 2 minutes or until bell pepper is crisp-tender. Stir in greens and edamame; stir-fry 30 seconds. Stir in reserved mushroom soaking liquid, noodle mixture, remaining 3 tablespoons soy sauce, and hoisin sauce; cook 2 minutes or until thoroughly heated.
Yield: 6 servings (serving size: 1 1/3 cups)CALORIES 339 (26% from fat); FAT 9.8g (sat 1g,mono 4.1g,poly 3.2g); PROTEIN 15.8g; CHOLESTEROL 0.0mg; CALCIUM 73mg; SODIUM 710mg; FIBER 4.9g; IRON 2.1mg; CARBOHYDRATE 47g
Cooking Light, MARCH 2007
Wednesday, March 28, 2007
Chocolate Chip Irish Cream Pound Cake - Cooking Light, April 2007
I did make a couple changes. I didn't have mini-chocolate chips so I used regular. When I make this cake again, I would either procure the mini-chips or WAY up the regular chocolate chip proportion. Quite honestly, a quarter of a cup of regular chips was nowhere near enough. Many slices didn't even have one solitary chip in them! And that's just wrong.
The last change I made was to whip up a quick glaze of confectioner's sugar and Baileys. I think I would do it again, as I think that extra touch of sweetness added to the cake. But it certainly isn't a necessity, so feel free to omit if that doesn't appeal. But if you enjoy Irish Cream liquer, or cake, you can not go wrong with this recipe. The creamy sweet interior coupled with a delightful buttery crust - it is an excellent recipe and one that will be repeated in this kitchen.
Chocolate Chip Irish Cream Pound Cake
Category Finalist, Desserts. "This cake is even better on the second day." --Anna Ginsberg, Austin, TX
1/4 cup semisweet chocolate minichips
1 teaspoon cake flour
2 3/4 cups cake flour (about 11 ounces)
1 teaspoon baking powder
1/2 teaspoon salt
3/4 cup fat-free cream cheese, softened
10 tablespoon butter, softened
1 cup granulated sugar
1 cup packed brown sugar
1 teaspoon vanilla extract
3 large eggs
3/4 cup Irish cream liqueur
Baking spray with flour
2 tablespoons powdered sugar
Preheat oven to 325°.
Combine chocolate chips and 1 teaspoon flour in a small bowl; toss.
Lightly spoon 2 3/4 cups flour into dry measuring cups; level with a knife. Sift together flour, baking powder, and salt.
Place cream cheese and butter in a bowl; beat with a mixer at high speed to blend. Add granulated sugar, brown sugar, and vanilla; beat until blended. Add eggs, 1 at a time; beat well after each addition. Beat on high speed 1 minute. With mixer on low, add flour mixture and liqueur alternately to sugar mixture, beginning and ending with flour mixture; beat well after each addition. Fold in chocolate chips. Pour batter into a 12-cup Bundt pan coated with baking spray. Bake at 325° for 55 minutes or until a wooden pick inserted in center comes out clean. Cool 10 minutes on a wire rack; remove from pan. Cool completely on wire rack. Sift powdered sugar over cake.
Yield: 16 servings (serving size: 1 slice)
CALORIES 308 (30% from fat); FAT 10.1g (sat 5.9g,mono 2.5g,poly 0.5g); PROTEIN 5g; CHOLESTEROL 59mg; CALCIUM 60mg; SODIUM 231mg; FIBER 0.6g; IRON 2.3mg; CARBOHYDRATE 48.9g
Cooking Light, APRIL 2007
Monday, March 26, 2007
Believe it or not there has been some cooking going on....
But first, I wanted to share one of my favorite snacks. It is simple, it is homely and for me it is the ultimate comfort food. I tend to go through popcorn kicks - I'll get it into my mind to make some and then keep making it over the span of a couple weeks. And then I won't make it again for months on end. Right now I think I've started a new kick. So there will be lots of corn a poppin' round here for the next few weeks.
I stopped making microwave popcorn after the whole trans-fat debacle. I'm not going to pretend I live a virtous trans-fat free life, however I do try to minimize wherever possible. And that seemed an easy place to cut it out. I do know there are trans-fat free brands, but one day I caught Michael Chiarello's Food Network show and watched him make it on the stove in a large pan. It blew me away. No fancy popcorn popper needed. Just a big pot with a lid, a cup of popcorn kernels and little bit of oil and voila! Enough popcorn to keep me snacking for several days. So that has become my modus operandi of late.
Here's my recipe:
Popcorn
1 cup popcorn kernels
1/4 cup oil (canola or other mild oil preferred)
salt to taste
Add oil to large pot (the size you would make a batch of soup in). Allow to heat to a gentle sizzle.
Add popcorn kernels and put lid on. Listen to sizzle, shaking occasionally. As popcorn begins to pop, continue to shake occcasionally.
When popcorn pops become more infrequent (several seconds pass between pops) turn off heat. Allow for final pops, and stir with a large spoon. Add salt or flavoring to taste (chili powder, grated cheese etc) and enjoy.
Yield - I find this proportion makes enough for two generous snacks on the spot plus four sandwich baggies stuffed to the brim for later.
Monday, March 12, 2007
Fontina and Mascarpone Baked Pasta
Sometimes when you tinker with a recipe, things go great. This was not one of those times. I subbed rigatoni for penne and I think that altered the sauce to pasta ratio. I also rushed the thickening step in the sauce, so we were left with a thinner sauce with clumps of cheese on pasta that was a touch too big. Now, cheese is cheese and the dish was still good overall. But it wasn't as good as I wanted it to be. I will try again and repeat it in the future, with the appropriate ingredients and minus the rushing. After all, how can rich creamy cheesy pasta be wrong?
I forgot to photograph my version of the dish (which is probably a good thing) so I'll just borrow Cooking Light's!
Fontina and Mascarpone Baked Pasta
Cooking Light - November 2006
The nutty flavor of fontina and creaminess of mascarpone create a delicious updated version of mac and cheese. If your supermarket doesn't stock mascarpone cheese, substitute full-fat cream cheese. For a dinner party, bake the pasta in individual gratin dishes for 15 minutes.
1 pound uncooked penne
1/4 cup all-purpose flour (about 1 ounce)
3 cups fat-free milk
2 cups (8 ounces) shredded fontina cheese
1/4 cup (2 ounces) mascarpone cheese
3/4 teaspoon salt
1/4 teaspoon freshly ground black pepper
Cooking spray
3 (1-ounce) slices white bread
1 tablespoon butter
1 small garlic clove, minced
1 1/2 tablespoons chopped fresh parsley
Cook pasta according to package directions, omitting salt and fat. Drain; keep warm.
Preheat oven to 350°.
Lightly spoon flour into a dry measuring cup; level with a knife. Combine flour and milk in a large saucepan over medium heat, stirring with a whisk. Cook 10 minutes or until thick, stirring constantly with a whisk. Remove from heat; add cheeses, stirring with a whisk until smooth. Stir in salt and black pepper. Add cooked pasta, stirring to coat. Spoon pasta mixture into a 13 x 9-inch baking dish coated with cooking spray.
Tear bread into several pieces. Place bread in a food processor; process until fine crumbs measure 1 1/2 cups.
Melt butter in a small skillet over medium heat. Add garlic; cook 30 seconds. Remove from heat. Stir in breadcrumbs until well combined. Sprinkle breadcrumb mixture evenly over pasta mixture. Bake at 350° for 25 minutes or until bubbly. Sprinkle with parsley.
Yield: 8 servings (serving size: 1 1/4 cups)
CALORIES 423 (30% from fat); FAT 14.3g (sat 8.2g,mono 3.7g,poly 0.7g); PROTEIN 19.3g; CHOLESTEROL 46mg; CALCIUM 298mg; SODIUM 550mg; FIBER 2.1g; IRON 2.4mg; CARBOHYDRATE 54.6g
Tuesday, March 06, 2007
Chocolate Decadence...
As far as I'm concerned, a dessert cannot go wrong with chocolate. But I'm quite particular - chocolate and nuts usually will not do. Pure chocolate only need apply! Yep, I definitely have a sweet tooth, and am always looking for tasty ways to keep it in check. This lighter recipe is one way to fit the bill. Chocolatey, relatively easy to prepare and tasty enough to serve for company. Chocolate Decadence was still tasty despite my baker's error. - I think I undercooked it. Pizza stones are not supposed to affect baking times, but ours seems to. I followed the recipe anyways, and the cake came out quite moussey. Delicious, but more like chocolate mousse in the shape of a cake then the cake intended.
Oh well, I'll just have to make it again to get it right!
Chocolate Decadence
Cooking time: About 40 minutes
Prep time: About 25 minutes, plus at least 8 hours to chill
Notes: For longer storage, wrap airtight and chill 2 days or freeze up to 2 months.
Makes: 12 servings
5 ounces bittersweet or semisweet chocolate, finely chopped
2 large eggs
1 large egg white
1 teaspoon vanilla
1/8 teaspoon cream of tartar
1/2 cup plus 1/2 tablespoon unsweetened alkaline-treated (Dutch process) or regular cocoa
2 tablespoons all-purpose flour
2/3 cup plus 1/4 cup sugar
3/4 cup low-fat (1%) milk
1. Place oven rack in the lower third of the oven, and turn heat to 350 [degrees].
2. With a nonstick cooking spray, lightly coat inside rim of an 8-inch-wide, 1 1/2- to 2-inch-deep round cake pan. Line pan bottom with cooking parchment cut to fit.
3. Place chopped chocolate in a large bowl, and set aside.
4. Break 1 egg into a small bowl. Separate remaining egg. Put yolk with whole egg. Put white in a separate, larger bowl, and add the remaining egg white.
5. Add vanilla to the bowl with yolk. Add cream of tartar to egg whites.
6. Combine cocoa, flour, and 2/3 cup sugar in a 1 - to 1 1/2-quart pan. Mixing smoothly with a whisk, gradually add milk. Stir over medium heat until mixture simmers, about 6 minutes; don't scorch. Stir and cook 1 1/2 minutes longer, then pour hot mixture over chopped chocolate. Stir until the chocolate is completely melted and smooth. Whisk in whole egg and yolk mixture. Set aside.
7. Beat egg whites with cream of tartar at medium speed until whites hold soft peaks. Beating at high speed, gradually add the remaining 1/4 cup sugar, then beat until whites hold stiff but not dry peaks.
8. Stir 1/4 of the egg whites into the chocolate mixture, then gently fold in the remaining whites. Scrape batter into prepared cake pan, and smooth the top.
9. Set cake pan in another pan that is at least 2 inches wider and 2 inches deep. Set pans in oven. Fill outer pan with boiling water to 1/2 the depth of the cake pan. Bake just until center of cake springs back when very gently pressed - it will still be quite gooey inside - about 30 minutes.
10. Lift cake pan from water, and set on a rack to cool. When cake is cool to the touch, cover it with plastic wrap, and chill until thoroughly cold, at least 8 hours or up to 2 days.
11. To release cake, slide a thin knife between rim and cake. Cover pan with a sheet of waxed paper, then invert a flat plate onto paper. Hold pan and plate together and invert; shake gently, if needed, to loosen cake. If cake sticks to pan, place a hot, damp towel on pan bottom for a few minutes; then gently shake pan with plate. Remove pan. Peel off and discard parchment. Invert serving dish onto cake. Supporting with flat plate, turn cake over onto serving dish. Remove flat plate, and discard waxed paper.
12. Cut cake into Wedges with a thin, sharp knife, dipping blade in hot water and wiping clean between cuts. Garnish wedges with raspberries and meringue cream.
Per serving decadence: 153 cal., 34% (52 cal.) from fat; 3.4 g protein; 5.8 g fat (2.9 g sat.); 26 g carbo.; 50 mg sodium; 36 mg chol.
Saturday, March 03, 2007
"Veggie" Sausage Rolls
It wouldn't be Boxing Day without sausage rolls. My mother would cook up sausage, roll out puff pastry dough and line strips of dough with the sausage filling. Next, she would roll over the dough and seal with a little egg wash. The process was simple, quick and the yield made the recipe perfect for a cocktail party as many rolls could be quickly produced at one time. I decided to replicate this with "veggie" sausage filling for our Oscar party last week. It was a success, the rolls were easy to prepare and well received by a non-vegetarian crowd. I don't have a picture since my camera was still held hostage at school, but there's still a piece of puff pastry dough in the freezer - perhaps more rolls will be forthcoming in the weeks to come.
"Veggie" Sausage Rolls
My notes - I found one tube of "veggie sausage" was just about enough for one piece of puff pastry dough. I had a little bit of sausage stuffing left, but I was generous in my application of sausauge to the rolls.
1 roll of "Gimme Lean" or vegetarian sausage
1 piece of puff pastry dough, thawed (boxes typically contain 2 pieces)
1 egg
Preheat oven to 350 degrees. Beat the egg in a small bowl and set aside.
Open sausage packet, and place in small bowl. Stir with a fork.
Unroll pastry. Roll into square/rectangle and cut into long strips about 2 inches wide.
Spread "sausage" down the center of one strip of puff pastry. Paint egg wash along edge of strip and roll over, pressing dry side of pastry into egg wash. Cut into small 1 inch sized pieces and place on cookie sheet. Brush top of pieces with egg wash. Repeat as necessary.
Bake for about 10-12 minutes or until golden brown. Enjoy!