Showing posts with label desserts. Show all posts

Sunday, May 10, 2009

Wacky Cake

How has it been almost a month since my last post? The veggie kitchen has actually been quite busy these days, but the taking pictures and typing up recipes piece of blogging hasn't been going as well. And since that's a key part in keeping a blog going, things have been slow. Hopefully one day soon I'll be able to tell you about the roasted potato gruyere tart we've made, or the brownies, or there was the lemon pasta Mike created...

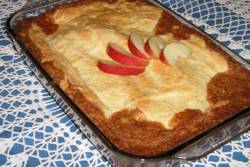
But this was something I made just this past Friday. One of my mommy friends has a baby with a dairy/soy allergy. Needless to say this means she must pass on most baked goods that come out of my kitchen. Since it was her birthday last week, I decided to make something she could enjoy. And this cake sprang to mind. I made it once years ago, but remembered it as being tasty and EASY. The glaze posed a bit more of a problem for this particular situation. I subbed rice milk for the dairy milk, but was a bit stumped by the butter. My first thought was to buy vegan butter, but when I had it home I realized it contained soy which wouldn't do. As it turned out butter is okay for this friend, and so I did just use regular butter.

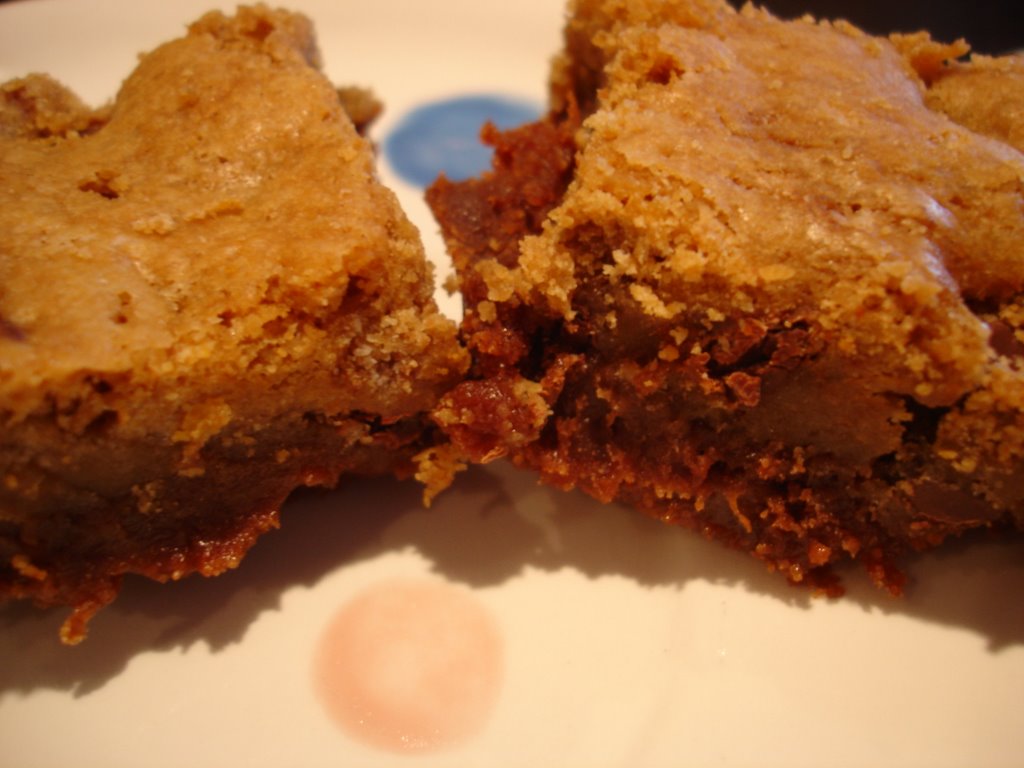
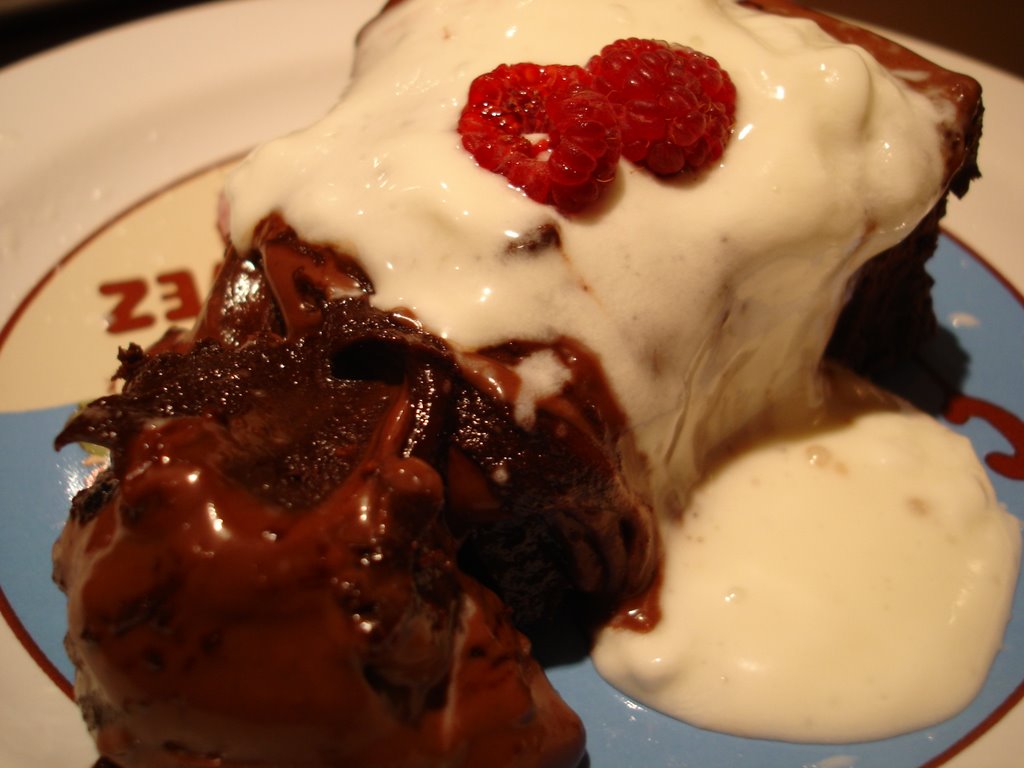
The cake was rich and chocolatey. Mike thought the texture was a bit different from a standard cake, however we both enjoyed the pieces I snuck home from the gathering. And the cake was quite a big hit at the social event to which it was taken. No one could believe that it was dairy free (mostly) and easy.

I think this cake's value lies in its versatility. Need an easy vegan cake for a vegan friend? This cake fits the bill. Need a chocolate fix readily filled by ingredients likely to be on hand? Again, this cake will definitely do. I was quite glad only a slice or two came home, as more would have been quite dangerous for Mike and I both! :)


Wacky Cake
From Simple Vegetarian Pleasures by Jeanne Lemlin

"Wacky" cake is so called because it has no eggs in it, and is mixed together in an unusual way. Because it only takes a few minutes to make this cake batter (you don't even have to butter the pan beforehand) you must turn on your oven at least 10 minutes before you begin so it has time to preheat.

1 1/2 cups unbleached flour
1 cup sugar
1/3 cup unsweetened cocoa powder
1 teaspoon baking soda
1/2 teaspoon salt
1 cup warm water
1 teaspoon vanilla extract
1/3 cup vegetable oil
1 teaspoon distilled white or apple cider vinegar

The Chocolate Glaze
1/2 cup sugar
4 tablespoons unsalted butter (or vegan butter)
2 tablespoons milk (I used rice milk for our situation, soy milk would also work)
2 tablespoons unsweetened cocoa powder
2 teaspoons vanilla extract

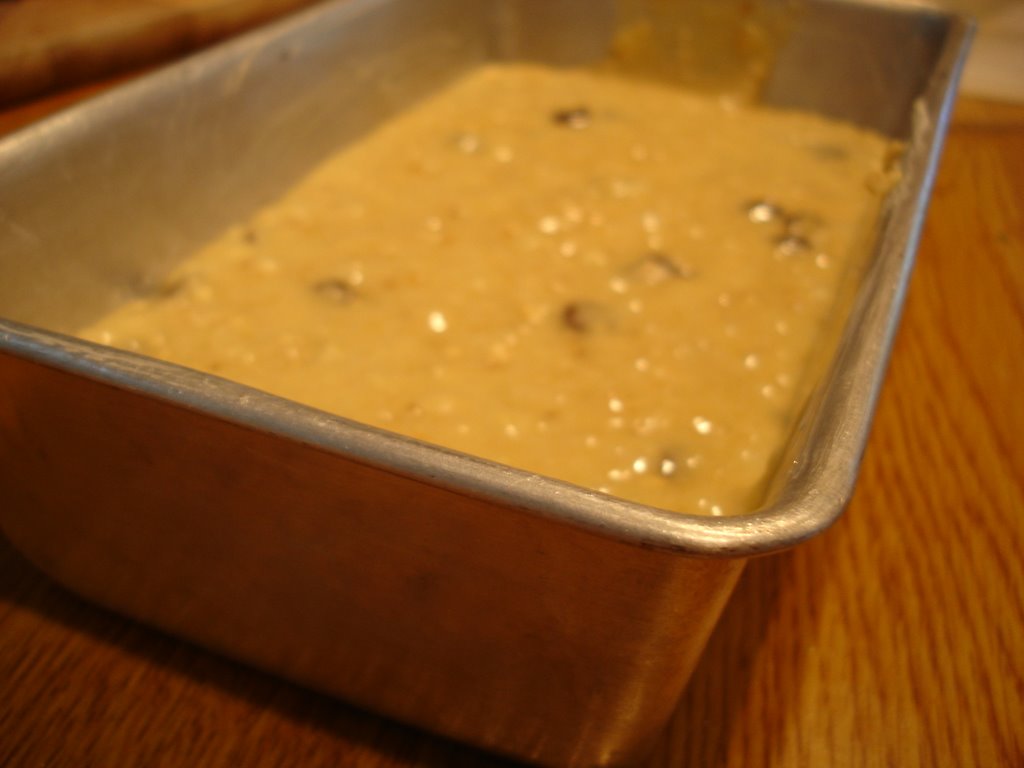
1. Preheat oven to 350 degrees. If using a glass baking dish, heat to 325. A good ten minutes later, begin to make the cake. Place flour, sugar, cocoa, baking soda, and salt in an 8x8 inch cake pan. Using a fork, stir the dry ingredients together until completely blended and uniform in color with no visible streaks.
2. Pour on the water, vanilla, oil, and vinegar and immediately stir with the fork until completely blended. Using a spatula at this point is helpful for getting batter out of the corners.
3. Put cake in oven and bake for 30 minutes, or until a knife inserted in the center of the cake comes out clean. Cool the cake completely on a wire rack, about 2 hours. This cake is meant to be served out of the pan, not unmolded.
4. To make glaze, combine sugar, butter, milk, and cocoa in a small saucepan and bring to a boil, stirring constantly. Remove pan from the heat, and stir until cool (about 5 minutes). Add vanilla extract, then pour onto cake. Let cool completely before serving (about 1 hour).

For a 9x13 cake, use 1.5 times the recipe and cook about 25 minutes.
For a 9 inch round spring form pan, use 1.5 times the recipe and cook about 50 minutes. (butter and flour the pan before hand, mix batter in large bowl and pour into pan. Unmold after baking).
For a sheet cake, use a 17x11 inch jelly roll pan that has been buttered and floured beforehand. Mix 3 times the batter in a large bowl, and pour into prepared pan. Bake 35 minutes, unmold after baking.
For cupcakes, this recipe as above will make 1 dozen. Place 12 paper liners in a muffin pan. Mix batter in a bowl, then fill liners. Bake 22 minutes.

Monday, March 30, 2009

Root Beer Bundt Cake

One of my favorite things about going to Baked is never knowing what cakes will be offered that day. There are usually three cakes available for purchasing by the slice, and the offerings change daily. I can go craving one cake, but if isn't available that day then I'm FORCED to try something new. Which, as a creature of habit is probably a good thing for me. :)

On one of our trips, M. tried the coca cola bundt cake. He was really taken with it, and asked me to research a recipe so we could make it at home. Well, that never happened. But when I saw the root beer bundt in the Baked cookbook, I decided it would be the perfect dessert for a dinner party we had this weekend. It could be made in advance, and ready to go at the conclusion of the meal. I learned the hard way recently that this is key, particularly these days with babies being a baking factor. I did debate swapping the root beer for coke (which I will do in the future) but we both decided we'd try the "authentic" version first.

The cake was easy to prepare, although it doesn't use a mixer. The wet ingredients (including the root beer) are heated on the stove, and then the dry ingredients are mixed in. The recipe cautions over-mixing. Accordingly, I was very careful not to over-mix. So careful that I actually undermixed and my cake was studded with pockets of flour. Oops. Next time I'll mix a little harder, and not worry so much about it. But the results were still delicious, if a little unusual to the eye. There was also a lot of frosting to this cake. I happen to LOVE frosting, but if you are not such a big fan then I would recommend cutting the glaze recipe in half. I also really liked how easy the glaze was to make - the recipe called for making it in the food processor. A bit unconventional, but oh so quick and easy to whip up!

Overall, the cake was well received by all and the leftovers are still sitting and taunting me as I write. Very very dangerous. :)

Root Beer Bundt Cake
for 1 (10-inch) Bundt cake
From Baked: New Frontiers In Baking by Matt Lewis and Renato Poliafito

for the cake:

2 cups root beer (do not use diet root beer)
1 cup dark unsweetened cocoa powder
1/2 cup (1 stick) unsalted butter, cut into 1-inch pieces
1 1/4 cups granulated sugar
1/2 cup firmly packed dark brown sugar
2 cups all-purpose flour
1 1/4 teaspoons baking soda
1 teaspoon salt
2 large eggs

for the frosting:
2 ounces dark chocolate (60% cacao), melted and cooled slightly
1/2 cup (1 stick) unsalted butter, softened
1 teaspoons salt
1/4 cup root beer
2/3 cup dark unsweetened cocoa powder
2 1/2 cups confectioners’ sugar

For the cake:

Preheat the oven to 325 degrees F. Generously spray the inside of a 10-inch bundt pan with nonstick cooking spray; alternatively, butter it, dust with flour, and knock out the excess flour.

In a small saucepan, heat the root beer, cocoa powder, and butter over medium heat until the butter is melted. Add the sugars and whisk until dissolved. Remove from the heat and let cool.

In a large bowl, whisk the flour, baking soda, and salt together.

In a small bowl, whisk the eggs until just beaten, then whisk them into the cooled cocoa mixture until combined. Gently fold the flour mixture into the cocoa mixture. The batter will be slightly lumpy–do not overbeat, as it could cause the cake to be tough.

Pour the batter into the prepared pan and bake for 35 to 40 minutes, rotating the pan halfway through the baking time, until a small sharp knife inserted into the cake comes out clean. Transfer the pan to a wire rack to cool completely. Gently loosen the sides of the cake from the pan and turn it out onto a platter.

For the frosting:

Put all the ingredients in a food processor. Pulse in short bursts until the frosting is shiny and smooth.

Use a spatula to spread the fudge frosting over the crown of the Bundt in a thick layer. Let the frosting set before serving, with the ice cream on the side.


Saturday, February 07, 2009

Smitten Kitchen Chocolate Pudding

Signs I need to post more often:

My last post was on the first day of this year (okay, it is only February but STILL).
It took me a minute to remember how to create a new post.  I went to the website first, and was puzzled for a second about how to log in and write a new post.  

Ah, lack of sleep. It boggles the mind.  

The veggie kitchen has actually been a'cookin these days.  Maybe not every day, but at least several times a week.  Still, the whole photography blogging piece has been lagging.  I'll keep working on it, but in the meantime I want to start sharing what I (we ... cooking is often a tag team event round here) have been up to.  

Starting with  ... chocolate pudding.  Yes, be very impressed.  

This week I had a crazy craving for chocolate pudding.  Homemade, of course.  This was puzzling to me as I didn't grow up with chocolate pudding in a regular dessert rotation at my house.  In fact, I don't think we EVER had chocolate pudding.  As a young adult, my only concept of chocolate pudding was the small brown JELLO box.  It would do from time to time, but nothing to get excited about.  But this week, I wanted pudding and I wanted it to be real.  I googled for a recipe, and up popped Smitten Kitchen's.  I've made several recipes off of her site lately, and figured this would be good place to start.  

I was stumped by the lack of whole milk in the house.  It isn't something we keep around, and I was afraid that if I made the pudding with skim it wouldn't set.  Several of the commenters on Smitten Kitchen seemed to have that problem.  But, I plucked up my courage, threw in a half a cup of heavy cream lying around for one half cup of the milk and held my breath.  And it worked.  Perhaps the pudding would have been richer and lusher had it been made with whole milk, or even 2%.  But it was plenty rich and chocolatey for my taste buds, and I like to think that it was perhaps a touch better for me as a result of the lighter milk.  A touch.  

M. thought the pudding was just okay.  When making the pudding, I added 3 oz from a Trader Joe's bittersweet chocolate, and planned on adding 3 oz of semisweet chocolate chips.  M. had to take over for me, and he misunderstood my directions and added 3 oz of milk chocolate chips instead.  I thought the results were tasty, perhaps milder then had we used the semisweet but still rich and silky smooth.  M. thought the quality of the chocolate could have been better and wasn't quite as impressed.  Apparently when it comes to chocolate I'm an easy sell!  

Still, the recipe came together inside of a half hour, and kept very well for several days in the fridge.  Served with a dollop of whipped cream on top, this customer was quite happy and has spent the past couple days in a chocolate cloud of anticipation of the evening's pudding dessert. 

You can find the recipe here... along with amazing photographs. 

Monday, February 18, 2008

Vanilla Bean Loaves

Hello February! January, where did you go? Things have actually been bubbling away here in the Veggie Kitchen, but a number of factors have collided to make my sharing of them somewhat more challenging. First of all, our computer has begun a slow descent into the depths it shall not resurface from. It is old, as computers go, and has begun to struggle to handle the demands I place upon it. It tends to get stuck between wesbites, churning away desperately trying to get somewhere, but stuck in blankness. The other trick of which I am so fond is randomly closing and opening windows on me. That's fun for everyone involved. This growing technological crisis, plus an increase to my work schedule has meant less time spent both on the computer and in the kitchen (at least during the week).

Still, I hope the backlog of pictures and recipes I have will enable to me to move forwards, dragging my unwilling technology partner as I go. Today's offering is a delightful poundcake encrusted with a delicious vanilla-y sugary crust. I made the recipe as written, although I did not take the time to make the vanilla sugar called for in the recipe. Ms. Hesser's instructions are to place a vanilla pod into a pound of sugar and allow to sit for several days. Easy enough to do, but not fast enough for my "I want to bake this cake NOW!" mood experienced on Saturday. Between the tablespoon of vanilla also in the cake, not to mention frequent applications of a vanilla steeped simple syrup to the cooling cake, I did not find this cake lacked vanilla-ness in any way. But, if you are a purist then I suppose a little vanilla sugar will never hurt.

M. and I both liked the crunchy crust created by applying the sugar syrup to the cooling cake. That stuff got everywhere, but the results were worth the sticky fingers (and tables, and utensils, and books and....). I used all of it (although I will admit the last application was primarily dumping the syrup onto the cake because I'd grown a bit weary of delicately applying it with a brush). The cakes were baked on Saturday, sampled and then refrigerated in multiple layers of Saran Wrap. Sunday's tasted was denser but still tasted fresh and delicious. This is a dense and sweet cake, a little definitely goes a long way. Small portions are key to not suffering a tremendous sugar high! But, served with a touch of whipped cream, this was a delicious and easy dessert. Since the recipe makes 2 loaves, this is a perfect cake to make for yourself and a friend (or in my case, M.'s coworkers).
Vanilla Bean Loaves
Cooking For Mr Latte by Amanda Hesser

3 sticks unsalted butter, room temp.
2 1/2 cups vanilla sugar
1 vanilla bean
1 tablespoon vanilla extract
8 large eggs, room temp.
3 cups All Purpose flour
1 1/2 teaspoons baking powder
1/2 teaspoon salt

for the syrup:
1 3/4 cups sugar
2 vanilla beans, split and scraped

1. Heavily butter two 8 x 4 inch loaf pans. Preheat oven to 325 degrees. Cream butter and sugar until fluffy and pale. Scrape the vanilla bean and flick the seeds into the mixer, along with the vanilla extract and eggs. Beat to mix.
2. Sift together the flour, baking powder, and salt. Add to the butter mixture and mix just until smooth. Take the bowl off the mixture and scrap the bottom with a spatula and fold the batter a few times. Divide the batter between the two buttered pans. Bake for 30 minutes, then rotate the pans. Bake an additional 25 to 40 minutes, or until a skewer comes out almost clean.
3. While the loaves are baking, prepare the syrup. In a small pan dissolve the sugar in one cup water over medium heat. Add the vanilla beans and stir a little so the seeds and fragrance disperse. When the sugar mixture is completely dissolved, remove from heat.
4. When the loaves are done, cool for 10 minutes on racks and then turn them out of the pans onto racks over parchment paper. Brush generously with the vanilla syrup on all sides and tops and bottoms. Brush a couple of times as the loaves cool. These cakes store well. They may be wrapped and frozen.

2 fragrant cakes

Wednesday, January 09, 2008

It is a New Year.

Accordingly, it is time to make a new start.

I guess I needed a little bit of a hiatus from blogging. Life happened. But now I hope to get back into it. Back into the kitchen, back into trying new recipes, and back into speaking to the probably now nonexistent people who no longer read my blog since I took so much time off. Helloo!!! (echo, echo!)

Well, this post is definitely for the bakers. I was whiling away an hour at Whole Foods one day last December when I happened across a seat in the cafe with an abandoned New York Times newspaper. Now, I don't normally read the paper during the week but this seemed fortuitous because not only was it a paper which was something new to read, but it was Wednesday which is the Dining and Wine day. So, I flipped through it. There was an interesting article by Mark Bittman about 100 easy to prepare appetizers, an article about one writer's family Christmas cookie tradition.... then I turned the page. There it was in chocolate and raspberry glory - Melissa Clark's Triple Chocolate Brownie Trifle with Raspberries. Up until that point my contribution to Christmas dessert had been in the air, but was now decided. This trifle was too good to pass up.

The trifle involved several steps - making the brownies, making the pudding and making the chocolate whipped cream. Each step was in of itself not too challenging, but all were time consuming especially when considered together. This dessert is truly a labor of love. I had trouble with the pudding. It never really set despite adequate hours in the fridge. But, once mixed into the trifle it wasn't readily apparent and did not hamper anyone's enjoyment of the dessert. The brownies were fudgy, and I did choose to infuse them with rum. The taste was not overwhelming (my brother-in-law who does not drink probably had no idea until I admitted this fact in print) but I would omit were children to be present at the table.

Overall, the dessert was a success. In fact, there were calls from tasters to make this a Christmas family tradition. You never know....

Triple Chocolate Trifle with Raspberries
New York Times, December 19th, 2007

Time: 1 1/2 hours plus 3 hours’ chilling

FOR THE BROWNIES:

1 cup plus 2 tablespoons unsalted butter, more for greasing pan

3 ounces finely chopped unsweetened chocolate

1/2 cup cocoa powder, sifted

2 1/2 cups granulated sugar

3 eggs, beaten

1 tablespoon vanilla extract

1 1/2 cups all-purpose flour

1/2 teaspoon kosher salt

3 tablespoons Cognac, rum or bourbon, optional

FOR ASSEMBLY:

1/2 cup granulated sugar

8 tablespoons unsweetened cocoa powder, sifted

2 tablespoons cornstarch

Pinch salt

1 3/4 cups whole milk

3 cups heavy cream

2 large egg yolks

10 ounces bittersweet chocolate, finely chopped (2 cups)

2 tablespoons unsalted butter

1 teaspoon vanilla extract

1/4 cup confectioners’ sugar for whipped cream

1 to 2 pints fresh raspberries.

1. To make brownies, preheat oven to 350 degrees. Grease a 9-by-13-inch baking pan.

2. In a large saucepan, melt butter. Remove pan from heat and stir in chopped chocolate until fully melted. Stir in cocoa and sugar until combined. Slowly add eggs, whisking chocolate mixture constantly, then whisk in vanilla. Fold in flour and salt.

3. Pour batter into prepared pan. Bake until just firm, about 25 minutes (do not overbake). Transfer pan to a rack to cool. If using spirits, prick holes in hot brownies and drizzle evenly over pan.

4. In a large bowl, mix together granulated sugar, 3 tablespoons cocoa powder, cornstarch and salt. Whisk in 3/4 cup milk. In a large saucepan, bring remaining 1 cup milk and 1/2 cup cream to a boil over medium heat. Whisk hot milk mixture slowly into cocoa mixture. Return to saucepan. Cook over medium heat, whisking gently, until slightly thickened, about 2 minutes. (A simmering bubble or two is O.K., but do not let it boil.)

5. In a medium heat-resistant bowl, whisk yolks. Whisking them constantly, very slowly dribble about half the cocoa-milk mixture into yolks until fully combined. Pour yolk mixture into saucepan with remaining cocoa-milk mixture, whisking constantly. Cook, whisking occasionally, over medium-low heat, until thickened, about 5 minutes. (Do not let mixture come to a simmer. If pan begins to steam thickly, remove from heat for a few moments and stir well before continuing.) Let cool slightly.

6. Melt 5 ounces chopped chocolate with butter. Stir until smooth. Stir in vanilla. Cool 5 minutes, then fold into thickened egg mixture. Place plastic wrap directly against pudding (to prevent a skin from forming), and chill until set, about 3 hours. (Pudding and brownies can be made up to 5 days ahead, and refrigerated.)

7. Just before assembling, in an electric mixer, beat remaining 2 1/2 cups cream with remaining 5 tablespoons cocoa powder and 1/4 cup confectioners’ sugar until it forms soft peaks. Scrape down sides and fold in any excess cocoa or sugar.

8. Cut brownies into 1-inch squares. Fit a layer of brownie squares in bottom of a 4-quart trifle, glass, or other bowl. Top with half the pudding, a third of the whipped cream, a third of the remaining chopped chocolate and a third of the raspberries. Repeat layering until all ingredients have been used. Serve immediately, or cover with plastic wrap and chill for up to 24 hours before serving.

Yield: 8 to 10 servings.


Monday, September 24, 2007

Apple Season

Luckily for us, there were plenty of apples that were ripe and ready to be picked this last weekend. M., myself and two of our friends travelled upstate and picked apples on Saturday. We had a moment of panic as we drove when the sky opened and a torrential downpour soaked us, but when we arrived at the orchard it was dry albeit a bit cloudy.

We roamed the trees, peeking at varieties we'd never heard of (orange pippin?) and tasting as many different kinds as possible. I really liked the Gravenstein varietal that I tasted. Scarlet red in color, it's flavor was bright and sweet. And then there are my favorite Galas and Honeycrisps. When it's apple season, I'm a happy camper!

We brought home 25 pounds of apples. Yes. 25 pounds. There will be a lot of apple treats coming out of my kitchen in the days and weeks to come. And I started last night.


Here is my version of a basic applesauce recipe that floats around the internet. I made it up as I went along, but there's really little way to mess it up. If you want further inspiration, a quick google of crockpot applesauce will bring you more ideas. But here's what I did.

Crockpot Applesauce
6 servings

6-8 apples (I used McIntosh, Gala, and Honeycrisp but any kind will work)
4 quart crockpot (a larger one can be used, however you will need to prepare more apples)
1 tablespoon cinnamon
4 cloves
2 tablespoons sugar (or to taste)

Peel and chop apples. I used a handy dandy apple peeler/corer machine, but a basic peeler and knife will do the trick as well. Put in crock pot. Turn on high for 4 + hours. At the 2 hour point, remove lid and add spices. Replace lid. At the 4 hour point (or when cooked to desired texture), add sugar to taste. Cool, and refrigerate.

Enjoy!

Friday, August 03, 2007

The "BEST" chocolate chip cookies...

... that I've come across lately. I actually made these weeks ago, and have been meaning to post them for a while. Still, no time like the present!

This recipe comes from Baking: From My Home to Yours by Dorie Greenspan which is fast becoming one of my favorite baking resources. Every recipe I've tried has turned out well, and this one is no exception. When I make chocolate chip cookies (which are my absolute favorite and therefore must be distributed as quickly as possible), I usually send some into M.'s office, keep a few around the house for us and freeze some dough balls for quick cookie fixes. I simply prepare a tray as though it were going into the oven, pop it into the freezer instead and then put the dough (once frozen) into a freezer bag or container. Then homemade cookies are only a few moments away! The dough can go into a hot oven frozen, but may require a few extra moments to cook. I'm almost out of my supply... perhaps it will be time to make these cookies again soon. :)

My Best Chocolate Chip Cookies (meaning Dorie Greenspan's best, although I agree)
Makes about 45 cookies

Dorie's notes -
In the category of "Great Chocolate Chip Cookies" these get my vote for the greatest. They are Toll House Cookies' kin, but I think my nips, tucks, tweaks and variation on the basic recipe make them their own kind of wonderful. They're thin and crisp and a bit chewy in the center from just the right mix of sugars - granulated sugar for crispiness and brown sugar for deep caramel flavor.

My notes -
I add an additional step to the recipe, and I freeze the cookie dough after mixing is completed. I find this helps the cookies gain height, and not run into each other as much. I just pop the mixing bowl into the freezer for about 20 minutes or so to chill, and return it between batches. I also just used regular chocolate chips and left out the walnuts due to personal taste. I also was quite lazy about cooling the racks between batches, and the results were still delicious.

2 cups all purpose flour
1 teaspoon salt (1 1/4 if you really like salt)
3/4 teaspoon baking soda
2 sticks (8oz) unsalted butter at room temperature
1 cup sugar
2/3 cup (packed) light brown sugar
2 teaspoons pure vanilla
2 large eggs
12 oz bittersweet chocolate chpped into chips, or 2 cups store bought chocolate chips
1 cup finely chopped walnuts or pecans (I omitted)

Center a rack in the oven and preheat to 375 degrees F. Line two baking sheets with parchment or silicone baking mats.

Whisk flour, salt and baking soda.

Working with a stand mixer, preferably fitted with a paddle attachment, or with a hand mixer in a large bowl, beat the butter on medium speed for 1 minute or until smooth. Add sugars and beat for another 2 minutes or so until well blended. Beat in the vanilla. Add the eggs one at a time, beating for one minute or so between each egg.

Reduce speed to low, and add dry ingredients in three portions, mixing only until each addition is incorporated. On low speed or by hand, mix in chocolate and nuts.

(The dough can be covered and refrigerated for up to three days, or frozen. Dough can also be frozen in mounds as discussed above in my notes)

Spoon the dough by slightly rounded tablespoonfuls onto the baking sheets, leaving about 2 inches between spoonfuls.

Bake cookies one sheet at a time, rotating at the midway point, for 10-12 minutes or until brown at edges and golden in the center. They may be soft in the middle, and that's just fine. Pull the sheet from the oven, and allow cookies to rest for one minute. Then carefully transfer with a wide metal spatula to racks to cool to room temperature. Repeat with remainder of dough, cooling the sheets between batches.

Monday, April 16, 2007

M&M Cookie Deliciousness!

Where does the time go? I've actually been quite busy in the kitchen. I've baked several delicious things lately, and made several excellent meals (if I may say so myself! :) ). Still, as always, life gets in the way. It's report card season again, and that plus preparations for packing, moving and M.'s recent birthday have kept me busy. I doubt it'll get much better in the next few weeks as we get ready to move. But I'll try to keep up!

Here's something I made to take to New Jersey for Easter. I'd originally thought of making a cake, but having an interview in the city before leaving for the weekend made manipulating a cake on the subway seem unappealing. M&M cookies popped into my head, and were a nice easy cookie to make.

I found a recipe on Allrecipes.com and then made my own changes to it. I did go back to try to link to the original recipe, but I couldn't find it again. My searches for M&M cookie came up empty. A little strange but ... oh well!

Here's the recipe. I would definitely make this cookie again. It was easy, had a nice chewy yet crisp proportion and was completely addictive!

M&M Cookie
originally found at allrecipes.com

1 cup Brown Sugar
1 cup sugar
1 cup butter
2 eggs
1 1/2 tsp vanilla
2 1/2 cups all-purpose flour
1 tsp baking soda
1 tsp salt
1 1/2 cups M&Ms

Preheat oven to 350 degrees. Mix dry ingredients into a medium mixing bowl.

In large mixing bowl, cream sugar and butter with electric mixer or stand mixer. Add eggs, mixing for a minute after each one. Add vanilla, and beat for a minute before scraping down sides and beating again.

Add dry ingredients by half cupfuls until just mixed. Stir in 3/4 cup M&Ms.

Chill for 20 minutes ago, or until cooled and firm. Use dough scoop or tablespoon to measure out dough on to a cookie sheet. Press several of remaining 3/4 cup of M&Ms into top of cookies. Bake for 9-11 minutes (nine will be chewier, eleven will be crispier).

Remove from oven and cool on wire rack. Will keep for several days in airtight container.

Monday, April 02, 2007

Carrot Cake - Cooking Light April 2007

I just can't get enough of baking these days. I tell myself I'm "using up ingredients before we move" but I think some baking bug has just grabbed me lately. Luckily for M.'s coworkers, the bug is showing no sign of slowing down. For some reason I was totally in the mood for carrot cake this weekend. Not a craving I have very often, but it was a craving I simply had to cater to. So, I took my trusty copy of April's Cooking Light in one hand and my trusty hand mixer in the other and I made some carrot cake!

I did make one major change. I do not care for nuts in baked goods. I barely care for nuts, but if I do choose to enjoy them, they must be solo. So, I left out the pecans. Otherwise I followed the recipe as is, and was thrilled by how easy and tasty it was. The finished cake was moist, spicy and had all the elements of the finest carrot cake for a fraction of the fat. The icing was perhaps a touch runny as opposed to the more typical buttercream-like texture, however it tasted great. And the feedback I got from M.'s coworkers indicated that they agreed. :)

Sorry about the poor lighting on the pictures. I guess it was darker in my kitchen then I thought...

Carrot Cake
Cooking Light - April 2007

Cake:
1 1/2 cups all-purpose flour (about 6 3/4 ounces)
1 1/3 cups granulated sugar
1/2 cup sweetened flaked coconut
1/3 cup chopped pecans
2 teaspoons baking soda
1 teaspoon salt
2 teaspoons ground cinnamon
3 tablespoons canola oil
2 large eggs
2 cups grated carrot
1 1/2 cups canned crushed pineapple, drained
Cooking spray

Frosting:
2 tablespoons butter, softened
1 (8-ounce) block 1/3-less-fat cream cheese, softened
3 cups powdered sugar
2 teaspoons vanilla extract
Additional grated carrot (optional)

Preheat oven to 350°.

To prepare cake, lightly spoon flour into dry measuring cups; level with a knife. Combine flour, sugar, coconut, pecans, baking soda, salt, and cinnamon in a large bowl; stir well with a whisk. Combine oil and eggs; stir well. Stir egg mixture, grated carrot, and pineapple into flour mixture. Spoon batter into a 13 x 9-inch baking pan coated with cooking spray. Bake at 350° for 35 minutes or until a wooden pick inserted in the center comes out clean. Cool completely on a wire rack.

To prepare frosting, combine butter and cream cheese in a large bowl. Beat with a mixer at medium speed until smooth. Beat in powdered sugar and vanilla just until smooth. Spread frosting over top of cake. Garnish each serving with grated carrot, if desired.


Yield: 16 servings (serving size: 1 piece)

CALORIES 322 (29% from fat); FAT 10.4g (sat 4.2g,mono 3.2g,poly 1.5g); PROTEIN 4.1g; CHOLESTEROL 40mg; CALCIUM 29mg; SODIUM 403mg; FIBER 1.4g; IRON 1mg; CARBOHYDRATE 54.4g

Cooking Light, APRIL 2007

Sunday, April 01, 2007

Cinnamon-Cardamom Squares

I love any opportunity to bake. When a good friend offered to cook an Indian feast for M., me and a few other friends, I welcomed the chance to try a new recipe. The recipe for Dorie Greenspan's Cinnamon Squares practically jumped at me when I took From My Home to Yours down off the shelf. I looked at a couple others, but I kept returning to the Cinnamon Squares. I had all the ingredients, and I even thought that if I added a touch of cardamom to the recipe, it would compliment our Indian feast perfectly.

And the results were divine. The cake is spicy and flavorful with a strong cinnamon and cardamom taste. Still the combination of the flavors remain balanced, especially in contrast to the chocolate. The chocolate frosting compliments the cake perfectly, and the touch of espresso added a new richness and dimension of flavor to the combination of flavors. The cake was easy to prepare, and the results were easy to transport to the dinner. This will be one for the tried-and-true files!

Cinnamon-Cardamom Squares
adapted from Dorie Greenspan's From My Home to Yours
serves 9


For the Cake
1 1/4 cups plus 2 tablespoons sugar
1 T plus 2 1/2 t cinnamon (I used 1 T plus 2 t cinnamon, and 1/2 cardamom)
1 1/2 teaspoons instant espresso powder (I used freshly ground espresso beans)
1 1/4 cups all-purpose flour
2 t baking powder
pinch of salt
3/4 cup whole milk (I used 1%)
2 large eggs
1/2 t vanilla
1 stick plus 2 T unsalted butter, melted and cooled
3 oz bittersweet chocolate finely chopped (or 1/2 cup mini-chocolate chips)

For the Frosting
6 oz bittersweet chocolate, finely chopped
2 1/2 T unsalted butter, cut into four pieces

Getting Ready
Preheat oven to 350 degrees. Butter an 8 inch square baking pan, and line bottom with parchment or wax paper. Place pan on a baking sheet.

To Make the Cake
Stir two tablespoons of the sugar, 2 1/2 of the cinnamon (or cinnamon/cardamom) and the espresso together in a small bowl.

In a large bowl, whisk the flour, the remaining 1 1/4 cups sugar, the baking powder, salt and the remaining 1 T of cinnamon. In another bowl, mix together milk, eggs and vanilla. Pour the liquid ingredients over the flour mixture, and whisk gently until you have a homogenous batter. Now, using the whisk or rubber spatula, fold in the butter with a light touch until the butter is absorbed. You'll have a smooth satiny batter.

Scrape half of the batter into the pan. Smooth the top. Sprinkle the chocolate over the batter, and dust with the cinnamon-cardamom-sugar mixture. Cover the rest of the batter, and smooth the top again.

Bake for 35-45 minutes, or until cake is puffed and beginning to pull away from the sides of the pan. A thin knife inserted into the middle will come out clean. Transfer cake to a cooling rack, and let it rest for 15 minutes before unmolding it onto another rack. Peel off the paper, invert it onto the first rack, and cool to room temperature right side up.

To Make the Frosting
Put the chocolate and butter in a heatproof bowl, and fit the bowl over a saucepan of simmering water. Cook, stirring gently and often, just until they melt. Be careful not to overheat mixture, the chocolate should be smooth, very shiny, thick and spreadable.

Using an offset metal icing spatula, or table knife, spread frosting in generous sweeps and swirls over the top of the cake. Allow frosting to set at room temperature. Cut cake into 9 squares, each with about 2 1/2 inches on a side.

Wednesday, March 28, 2007

Chocolate Chip Irish Cream Pound Cake - Cooking Light, April 2007

Sometimes, a woman just wants some cake. And this weekend was one such an occasion. I got April's issue of Cooking Light, and was thrilled to see this new recipe. I've already made clear my love for the Irish Cream. I don't go much for liquers but I cannot pass up a nice glass of Baileys, either to drink or to bake with. So this recipe had my name all over it.

I did make a couple changes. I didn't have mini-chocolate chips so I used regular. When I make this cake again, I would either procure the mini-chips or WAY up the regular chocolate chip proportion. Quite honestly, a quarter of a cup of regular chips was nowhere near enough. Many slices didn't even have one solitary chip in them! And that's just wrong.

The last change I made was to whip up a quick glaze of confectioner's sugar and Baileys. I think I would do it again, as I think that extra touch of sweetness added to the cake. But it certainly isn't a necessity, so feel free to omit if that doesn't appeal. But if you enjoy Irish Cream liquer, or cake, you can not go wrong with this recipe. The creamy sweet interior coupled with a delightful buttery crust - it is an excellent recipe and one that will be repeated in this kitchen.

Chocolate Chip Irish Cream Pound Cake
Category Finalist, Desserts. "This cake is even better on the second day." --Anna Ginsberg, Austin, TX

1/4 cup semisweet chocolate minichips
1 teaspoon cake flour
2 3/4 cups cake flour (about 11 ounces)
1 teaspoon baking powder
1/2 teaspoon salt
3/4 cup fat-free cream cheese, softened
10 tablespoon butter, softened
1 cup granulated sugar
1 cup packed brown sugar
1 teaspoon vanilla extract
3 large eggs
3/4 cup Irish cream liqueur
Baking spray with flour
2 tablespoons powdered sugar

Preheat oven to 325°.

Combine chocolate chips and 1 teaspoon flour in a small bowl; toss.

Lightly spoon 2 3/4 cups flour into dry measuring cups; level with a knife. Sift together flour, baking powder, and salt.

Place cream cheese and butter in a bowl; beat with a mixer at high speed to blend. Add granulated sugar, brown sugar, and vanilla; beat until blended. Add eggs, 1 at a time; beat well after each addition. Beat on high speed 1 minute. With mixer on low, add flour mixture and liqueur alternately to sugar mixture, beginning and ending with flour mixture; beat well after each addition. Fold in chocolate chips. Pour batter into a 12-cup Bundt pan coated with baking spray. Bake at 325° for 55 minutes or until a wooden pick inserted in center comes out clean. Cool 10 minutes on a wire rack; remove from pan. Cool completely on wire rack. Sift powdered sugar over cake.


Yield: 16 servings (serving size: 1 slice)

CALORIES 308 (30% from fat); FAT 10.1g (sat 5.9g,mono 2.5g,poly 0.5g); PROTEIN 5g; CHOLESTEROL 59mg; CALCIUM 60mg; SODIUM 231mg; FIBER 0.6g; IRON 2.3mg; CARBOHYDRATE 48.9g

Cooking Light, APRIL 2007

Tuesday, March 06, 2007

Chocolate Decadence...

.. light!

As far as I'm concerned, a dessert cannot go wrong with chocolate. But I'm quite particular - chocolate and nuts usually will not do. Pure chocolate only need apply! Yep, I definitely have a sweet tooth, and am always looking for tasty ways to keep it in check. This lighter recipe is one way to fit the bill. Chocolatey, relatively easy to prepare and tasty enough to serve for company. Chocolate Decadence was still tasty despite my baker's error. - I think I undercooked it. Pizza stones are not supposed to affect baking times, but ours seems to. I followed the recipe anyways, and the cake came out quite moussey. Delicious, but more like chocolate mousse in the shape of a cake then the cake intended.

Oh well, I'll just have to make it again to get it right!


Chocolate Decadence

Cooking time: About 40 minutes
Prep time: About 25 minutes, plus at least 8 hours to chill
Notes: For longer storage, wrap airtight and chill 2 days or freeze up to 2 months.

Makes: 12 servings

5 ounces bittersweet or semisweet chocolate, finely chopped
2 large eggs
1 large egg white
1 teaspoon vanilla
1/8 teaspoon cream of tartar
1/2 cup plus 1/2 tablespoon unsweetened alkaline-treated (Dutch process) or regular cocoa
2 tablespoons all-purpose flour
2/3 cup plus 1/4 cup sugar
3/4 cup low-fat (1%) milk

1. Place oven rack in the lower third of the oven, and turn heat to 350 [degrees].

2. With a nonstick cooking spray, lightly coat inside rim of an 8-inch-wide, 1 1/2- to 2-inch-deep round cake pan. Line pan bottom with cooking parchment cut to fit.

3. Place chopped chocolate in a large bowl, and set aside.

4. Break 1 egg into a small bowl. Separate remaining egg. Put yolk with whole egg. Put white in a separate, larger bowl, and add the remaining egg white.

5. Add vanilla to the bowl with yolk. Add cream of tartar to egg whites.

6. Combine cocoa, flour, and 2/3 cup sugar in a 1 - to 1 1/2-quart pan. Mixing smoothly with a whisk, gradually add milk. Stir over medium heat until mixture simmers, about 6 minutes; don't scorch. Stir and cook 1 1/2 minutes longer, then pour hot mixture over chopped chocolate. Stir until the chocolate is completely melted and smooth. Whisk in whole egg and yolk mixture. Set aside.

7. Beat egg whites with cream of tartar at medium speed until whites hold soft peaks. Beating at high speed, gradually add the remaining 1/4 cup sugar, then beat until whites hold stiff but not dry peaks.

8. Stir 1/4 of the egg whites into the chocolate mixture, then gently fold in the remaining whites. Scrape batter into prepared cake pan, and smooth the top.

9. Set cake pan in another pan that is at least 2 inches wider and 2 inches deep. Set pans in oven. Fill outer pan with boiling water to 1/2 the depth of the cake pan. Bake just until center of cake springs back when very gently pressed - it will still be quite gooey inside - about 30 minutes.

10. Lift cake pan from water, and set on a rack to cool. When cake is cool to the touch, cover it with plastic wrap, and chill until thoroughly cold, at least 8 hours or up to 2 days.

11. To release cake, slide a thin knife between rim and cake. Cover pan with a sheet of waxed paper, then invert a flat plate onto paper. Hold pan and plate together and invert; shake gently, if needed, to loosen cake. If cake sticks to pan, place a hot, damp towel on pan bottom for a few minutes; then gently shake pan with plate. Remove pan. Peel off and discard parchment. Invert serving dish onto cake. Supporting with flat plate, turn cake over onto serving dish. Remove flat plate, and discard waxed paper.

12. Cut cake into Wedges with a thin, sharp knife, dipping blade in hot water and wiping clean between cuts. Garnish wedges with raspberries and meringue cream.

Per serving decadence: 153 cal., 34% (52 cal.) from fat; 3.4 g protein; 5.8 g fat (2.9 g sat.); 26 g carbo.; 50 mg sodium; 36 mg chol.

Tuesday, January 09, 2007

Football, Friends and Brownies.

My husband is a big football fan. I'm not (and that's an understatement). To keep my sanity, while feeding his football frenzy, it has been his custom over the last few years to meet up with friends every Sunday to watch the games. I'm happy being football-free, and he's happy to hang with the guys.

Apparently this week was a big deal - playoffs or something. :) So instead of the guys hanging at the bar they usually choose for football viewing pleasure, they went to one of the guys' apartments. Less distractions, you see. And so M. asked me to bake something. It's rare he requests a baked treat, so I allowed him to pick from several recipes that didn't involve more than a quick trip to the store. He chose this recipe for Double-Decker Chocolate-Chip Brownies from The Weekend Baker by Abigail Johnson Dodge. I haven't made much from the cookbook, so I was happy to comply. The one recipe I did try looked good, but ended up tossed due to my error (undercooking). So, I was eager to try again.

The one thing that is unique about the recipes in the Weekend Baker is that they utlize unusual steps in the intent of being quicker then most. Don't get me wrong, there are days I'll happily spend hours baking. And then there are days I'd much rather not. And this was the latter. The author regularly calls for melting butter, and then simply adding the dry ingredients. The results of this recipe were well received by the guys, or so the report came back. While they competed with pizza and wings, the double-decker brownies did very well for themselves and not too many were left.

I made a few couple changes but the recipe still worked. My brownie layer was a bit too fudgy - I was out of cocoa powder and NOT returning to the store, so I subbed an equal amount of fancy cocoa mix which had both powder and chunks of chocolate. I wouldn't repeat the recipe this way, but it worked. The chocolate chip layer was delicious - it was hard not to steal crumbs as they fell off of pieces. I chilled the cooked brownies overnight, and this was still a challenging recipe to cut. Perhaps I should have allowed for more warming before wrestling with a knife. At any rate, this would definitely be a recipe I'd repeat in the future. The recipe was quick, easy and made a multitude of brownies. What more could a busy chef ask for?

Chocolate-chip brownie double-deckers

The Weekend Baker by Abigail Johnson Dodge

Makes 2 dozen 2 inch (5 cm) double-deckers

Author’s notes – One afternoon, I was testing both the brownie and chocolate chip cookie recipes for this book and my husband Chris was in the kitchen looking for a sample or two. Eyeing both batters, Chris asked what would happen if they were baked layered together. A great idea and, as it turned out, with a few tweaks to the chocolate chip recipe, I ended up with bar cookies that offer the best of both cookies.

Do aheads

The double deckers can be prepared through step 7, cut, tightly wrapped and frozen for up to one month. There’s almost no thawing necessary, about 20 minutes, as these brownies are delicious even when partially frozen.

For the Chocolate Chip layer

12 tablespoons unsalted butter
1 cup firmly packed light brown sugar
1 ½ cups all-purpose flour
½ teaspoon baking soda
¼ teaspoon salt
1 large egg
1 teaspoon pure vanilla extract
1 cup semi-sweet chocolate chips

For the Brownie layer

12 tablespoons unsalted butter cut into 6 pieces
¾ cup unsweetened Dutch-process cocoa powder, sifted if lumpy
1 ½ cups granulated sugar
¼ teaspoon table salt
2 large eggs
1 ½ teaspoons vanilla
¾ cup all purpose flour

  1. Position an oven rack on the middle rung. Heat the oven to 325 degrees. Lightly grease the bottom and sides of a 9 by 13 inch baking pan.
  2. TO MAKE CHOCOLATE CHIP LAYER -- Put the butter in a medium saucepan and set over medium heat, stirring occasionally until butter is melted. Slide pan from heat and add the brown sugar. Whisk until no lumps remain. Set aside to cool while you make the brownie layer.
  1. TO MAKE THE BROWNIE LAYER -- Put the butter in a medium saucepan and set over medium heat, stirring occasionally until butter is melted. Slide pan from heat and add the cocoa powder. Whisk until mixture is smooth. Add the sugar and salt and whisk until blended. Add the eggs one at a time, whisking after each addition until just blended. Whisk in vanilla with second egg. Sprinkle flour over chocolate mixture, and stir with a rubber spatula until just blended.
  1. Scrape batter into prepared baking dish and spread evenly with offset or rubber spatula. Set aside while you finish chocolate chip layer.
  2. TO FINISH CHOCOLATE CHIP LAYER -- In a small bowl, combine the flour, baking soda, and salt. Whisk until well blended. Once the butter mixture has cooled, add the egg and vanilla to it and whisk until blended. Stir in the chocolate chips.
  1. Drop the dough over the brownie batter in large scoopfuls and spread evenly with spatula. Bake until a toothpick or cake tester inserted into the center comes out with small, gooey clumps of brownie sticking to it (about 40 minutes). Don’t overbake, or they won’t be fudgy. Transfer baking pan to a rack to cool completely.
Using bench scraper or knife, cut into small squares measuring about 2 inches across. The cooler the double-deckers are, the cleaner cutting will be but these fudgy treats will always leave some sticky crumbs on the knife.

Wednesday, October 25, 2006

Gooey Apple Sheet Cake

I'm swimming in apples. Or I could be. If there were a swimming pool out there, I might actually be able to fill it. Well maybe not a swimming pool but we could definitely fill a wading pool. Anyways, our CSA keeps throwing apples at us as fast as I can use them. Actually, faster since they're piling up on the counter. And I'm funny about apples. I love them, but I prefer them sliced. I'm weird that way. So I carry apples back and forth to school, but don't really eat them. I've already mentioned my preference for sliced apples which is tricky in a classroom environment, but the more pressing issue as to why these apples live in my bag going back and forth to school is that I never seem to have much time to eat apples during the day. I obviously can't eat them when the kids are around because I'm busy doing other things, and after school I'm too busy becauseI want to go home. The time I could take to wash the apple, slice it and eat it is also time I could spend copying math or reading homework. And after a long day at school, the second takes preference. So the apples are accumulating faster then they're being consumed.

So, yes we have an apple pile-up situation. Last Saturday we went over to a friend's house for dinner, and I volunteered to make something with apples for dessert. I decided to try this recipe which used a grand total of 2 apples. But two more then I would have otherwise used, so I guess that's good. I halved the cake - there were only 6 of us, after all. The recipe listed below is the full 9 x 13 sheet cake version, not the halved version. I made it in a glass 8 x 8 ish pan, and it came out really well. The flavor was sweet, but the texture was both nice and gooey and yet crunchy and full of bite. Don't be fooled by the picture - it is a somewhat unusual looking cake but it does taste great! And, the picture isn't mine. It's from the original website. I forgot to take a picture before I toted the dessert uptown.

Gooey Apple Sheet Cake
Diana's Desserts
serves 24

My notes - Again I halved this recipe with great success baking in a glass 8 x 8 dish. I didn't have buttermilk, and so I added half a tablespoon of vinegar to milk in order to curdle and create a buttermilky type substance. I googled for buttermilk substitutions - no I'm not that clever on my own. I think I used the whole 2 cups of apples, though, as part of my plan to use up as many apples as possible. The cake was delicious, and the recipe will be repeated!

For the Cake:
2 cups all-purpose flour
2 cups granulated sugar
1 cup butter
2 eggs
1 tsp. baking soda
½ cup buttermilk
1 generous cup shredded apples
1 tsp. ground cinnamon

For the Topping (to be put over cake batter BEFORE baking cake):
3 cups powdered sugar
8 oz. cream cheese
2 eggs
¼ cup oatmeal

Garnish, (optional)
Sliced apples

For Cake:
Melt butter, stir in sugar and eggs. Add flour and baking soda alternately with buttermilk, mixing well. Fold in shredded apples, the raisins, and the pecans. Spread batter into well greased (or sprayed) 13 x 9 baking pan. (Mix Topping ingredients and put over cake BEFORE baking).

Bake in a 350ºF (175ºC) oven for 35-45 minutes. If using a convection oven, bake for 25 minutes. If desired, garnish cake with sliced apples.

For Topping:
(Mix and put over cake batter BEFORE baking)
3 cups powdered sugar
8 oz. cream cheese
2 eggs
¼ cup quick cooking oats

Mix all ingredients together and put over cake batter BEFORE baking.

Sunday, October 08, 2006

Apple Picking

On Friday, my class went apple-picking. This was a Lower School fieldtrip, and so the five classes in the Lower School went together. Parents were invited, a few therapists from the school accompanied us and off we went. So, here's the thing about fieldtrips. They're quite stressful for teachers! And this was even more so, simply because I didn't plan it and thus there were moments of ambiguity that are killer for kids with special needs. Standing around and waiting - definitely leads to trouble with any kids, especially the ones I teach. But we survived. The other thing that made this trip in particular stressful is the fact that parents of special education students vary tremendously in their personalities, and ability to chaperone. There is a saying in special education, "The apple doesn't fall far from the tree." Some of the parents of my students have similar issues to my students, and so having them as chaperones really means I have to watch the parents as well as my kids! But all in all it was a success. No blood was shed (minus a student who lost his tooth into his sandwich), and we all made it back to school in one piece!

When I got home, I was exhausted. Way too tired to cook. But, I did have a burst of energy that lasted long enough for me to whip up the Irish Cream Brownies from Cooking Light's October 2006 issue. I'm really loving the October issue, and have cooked a surprising number of recipes from it in recent weeks. This one was another winner.

I have a love/hate relationship with Cooking Light baked dessert recipes. Sometimes they're just too lightenend, and therefore don't taste good enough to warrant the calories. Or, they taste great, really aren't that light at all and thus the serving size is tiny to make the recipe qualify as light. This recipe had neither problem, and was an all out winner. The brownies were dense, fudgey and you could taste the Bailey's in a pleasing way. The serving size was appropriate, and the recipe was really easy to prepare. I had them in the oven ready to go within ten minutes, which is a definite plus. And, they taste great chilled from the fridge so this would be a great recipe to make ahead. I am so taken with this recipe that I think I might make it again to serve to the teachers at my weekly team meeting on Tuesday (thank goodness for three day weekends). Even if I don't, I know this will be a recipe I will often repeat both for the ease of preparation and just how wonderfully the brownies came out.


Irish Cream Brownies
Cooking Light, October 2006

My notes - I made this recipe with the new Chocolate Mint Bailey's. I think this only added to the recipe, but I would make the recipe again with regular Bailey's Irish Cream if it were on hand.

1 cup flour
1/2 cup unsweetened cocoa
1/4 teaspoon baking soda
1/4 teaspoon salt
1/3 cup semisweet chocolate chips
1/4 cup butter
1 cup sugar
1/2 cup egg substitute
1/4 cup Bailey's Irish Cream
1 teaspoon vanilla extract
Cooking spray

Preheat oven to 350°.

Lightly spoon flour into a dry measuring cup; level with a knife. Combine flour, cocoa, baking soda, and salt in a small bowl, stirring with a whisk.

Place the chocolate chips and the butter in a large microwave-safe bowl. Microwave at HIGH 1 1/2 minutes or until the chocolate chips and butter melt, stirring every 30 seconds. Cool slightly. Add sugar and next 3 ingredients (through vanilla extract), stirring well with a whisk. Microwave at HIGH 1 minute or until sugar dissolves, stirring every 30 seconds. Fold in the flour mixture, stirring just until moist. Spread batter in a thin layer into a 9-inch square baking pan coated with cooking spray. Bake at 350° for 20 minutes or until a wooden pick inserted in center comes out almost clean. Cool on a wire rack.

Yield: 16 servings (serving size: 1 brownie)

NUTRITION PER SERVING fo CL's recipe
CALORIES 145(30% from fat); FAT 4.9g (sat 3g,mono 0.9g,poly 0.2g); PROTEIN 2.5g; CHOLESTEROL 8mg; CALCIUM 8mg; SODIUM 93mg; FIBER 1.1g; IRON 0.9mg; CARBOHYDRATE 23.8g

Monday, October 02, 2006

Fall is here!

I love fall. I love the crisp coolness in the air. I love the change in the light - a bright summer day is definitely not the same as a bright fall day. I love sweaters, and yet not being strapped into winter coats (yet). I love apples, squash, pumpkin and all the foods of fall especially roasted veggies and rich, creamy soups. And when I don't live in New York City, I love the colors of fall. We're a little short on foliage 'round these parts, but I remember living upstate and just the gloriousness of fall color. So this is absolutely my favorite time of year.

When I saw these cookies on Crystal's blog, I knew that I just had to try them. They just look so ... fall-y! The candy corn, the chocolate - they're like Halloween in a cookie! I initially wanted to test drive them at home before making them with my class. And I'm glad I did. I was thrilled to see Crystal's note that they could be made without a mixer, however I really kind of struggled with this dough. It was very crumbly and I found it tricky to work with. No way would I want my students getting as frustrated as I did as I tried to roll it into little shapes for baking! I did double it, perhaps that's where the error lies. But at any rate, the recipe is quick, the results are cute and the teachers attending my class's weekly team meeting tomorrow afternoon will be required to dispose of the results.

I've got another couple cooking projects happening in the kitchen. It is amazing how motivated I feel on days when school is closed! It's like a little cooking (and laundry :( ) gift! But, I'll share those projects as the week wears on just to keep life interesting. No point in revealing all my secrets in one day when I can stretch a week's worth of posts out of them...

Chocolate Candy-Corn Cookies
Courtesy of Poco-Cocoa aka Crystal

4 tablespoons unsalted butter, very soft
1/2 cup sugar
1 large egg yolk
1/4 teaspoon vanilla extract
1/4 teaspoon baking powder
1/4 teaspoon salt
1/2 cup all-purpose flour
1/4 cup unsweetened cocoa powder
about 36 candy corns

Preheat oven to 325˚F. Place butter and sugar in a medium bowl; beat with a wooden spoon until combined. Beat in egg yolk, vanilla, baking powder, and salt. Add flour, and mix until a dough forms.

Scoop out level teaspoons of dough, and roll into balls (chill dough briefly if it becomes to soft to handle). Place balls on baking sheets, 2 inches apart.

Bake, rotating sheets halfway through, until edges are firm and cookies are dry to the touch (do not let cookies color), 10 to 12 minutes.

Remove from oven; gently press a candy corn into center of each cookie (surface of cookies may crack slightly). Cool on sheets 1 minute; transfer to a rack to cool completely.

Notes: You can make a non-chocolate version by eliminating the cocoa powder and increasing the flour to 3/4 cup.

Makes about 36 cookies.

Crystal's source: Everyday Food magazine.

Monday, August 28, 2006

Back to work ...

... the fun's over folks!

Well, not entirely. But my mind is definitely aflutter with "must do's" of a school based nature. So there will not be as many recipes posted this week, but perhaps more random musings. Or maybe I'll get myself together and cook by the end of the week. We'll have to see.

But, I can tell you about the fantastic dinner party M. and I threw on Saturday night. It was fun, fun, and more fun. And a ton of work - we were both exhausted yesterday. Behold, my beautiful table setting. Doesn't it look pretty?

And yes, the flowers look like a brain. You can click on the pictures if you don't believe me. We had purple brain flowers courtesy of our CSA flower share - who knew such a thing even existed?

So, M. planned the menu. He worked very hard. He cooked DUCK (for the non-vegetarians obviously - I had portabello mushrooms), he made pasta by hand, he baked a tart and I did dessert. Which I usually do quite well. But not this time. No, this time I had to go and totally mess it up. I didn't pay enough attention and put too much chocolate into the cake. It was like fudge, people, fudge. Not cake, not even a morsel of cakey goodness to be had. Just dense fudge.


People were very polite and ate it anyways. But I knew better. So disappointing. So here is the recipe I wish I could rave and glow about. I will try it again, it does sound delicious and came together quite quickly. But, what I created was definitely not a flourless chocolate cake. If you'd like to see what it should look like, you can find the cake on the cover of the September issue of Bon Appetit.

Such a waste. And totally my fault, not the recipes. 18 ounces of chocolate and 28 ounces of chocolate are so not the same thing. One cannot put 28 ounces of chocolate into a recipe that calls for 18 and expect it to work. Apparently.

La Bete Noire

Bon Appetit's notes - This phenomenal take on a classic flourless chocolate cake lives up to its translation, "The Black Beast".

16 servings (supposedly)

Cake

1 cup water
3/4 cup sugar

9 tablespoons (1 stick plus one tablespoon) diced
18 ounces bittersweet (not unsweetened) or semisweet chocolate, chopped
6 large eggs

Ganache
1 cup heavy whipping cream
8 oz bittersweet (not unsweetened) or semisweet chocolate, chopped

Lightly sweetened whipped cream

For cake-
Preheat oven to 350 degrees F. Butter 10 inch diameter springform pan. Line bottom of pan with parchment round, butter parchment. Wrap three layers of heavy duty foil around the outside of the pan, bringing the foil to top of rim. Combine 1 cup water and sugar in small saucepan. Bring to boil over medium heat, stirring until sugar dissolves. Simmer five minutes. Remove from heat.

Melt chocolate in large saucepan over low heat. Add chocolate and whisk until smooth. Whisk sugar syrup into chocolate, cool slightly. Add eggs to chocolate mixturem and whisk until well blended. Pour batter into prepared pan, and place cake in large roasting pan. Add enough hot water to roasting pan to come halfway up sides of cake in pan.

Bake cake until center no longer moves when pan is gently shaken, about 50 minutes. Remove from water bath, and transfer to rack. Cool completely n pan.

For Ganache -
Bring whipping cream to simmer in small saucepan over medium heat. Remove from heat. Add chocolate, and whisk until smooth. POur over top of cake still in pan. Gently shake pan to distribute ganache evenly over top of cake. Refrigerate cake in pan until ganache is set, about two hours.

DO AHEAD - can be made 2 days ahead. Cover and keep refrigerated.

Run knife around pan to loosen cake. Release sides, cut into wedges and serve with whipped cream.

Sunday, August 20, 2006

Fudge Brownies Supreme

Last night, M. and I hung out with friends and neighbors here in Brooklyn. It was a wonderfully low-key evening, a chance to re-connect with friends after busy summers and a chance to go out for a drink at several local establishments. We enjoyed the evening thoroughly. But, in my sudden burst of kitchen energy yesterday morning, I decided to make brownies to take along. I love to bake, but when its just M. and myself to eat the baked goods, the portions can escalate quickly. So an event, like the one last night, to which I can bring something baked, taste a piece but leave the leftovers for my hosts to enjoy is really an ideal opportunity for me to try a new recipe.

I flipped through a couple books, and found the recipe for Fudge Brownies Supreme in The All-American Cookie book, a book which I've used but not recently. I had all the ingredients on hand, and the description of these densely fudgy brownies sounded irresistable. These brownies were really good, and one of the guests declared them the "best brownies ever". I do think, as I mention in my notes, that I undercooked them slightly. They were especially fudgy, and needed chilling to hold their shape. But, undercooked or not, they were definitely rich, chocolatey and delicious. And the author's description of "A friend commented that if great fudge were baked, it might taste like these brownies," was certainly apt. While I will keep trying brownie recipes to see which ones I like, this was a quick and easy recipe that I will make again. Since the recipe is plain and simple with few ingredients to dislike, I think this recipe will be great for taking to potlucks or as a host/hostess gift when the recipients' tastes might be unknown.

Fudge Brownies Supreme
The All-American Cookie Book

Nancy Baggett's Notes- These are the ones! The moistest, fudgiest, most succulent brownies ever. No frosting, no fruit, no crunchy munchies of any sort to distract from the mousse-like texture and the deep, full-blown chocolate flavor. A friend commented that if great fudge were baked, it might taste like these brownies. If you feel strongly that brownies should have nuts, you could add some walnuts to these. However, the effect will be similar to eating nuts in a chocolate mousse.

My notes - I used dark brown sugar since it was what I had on hand. I also used half a block of semi-sweet chocolate, again because it was what was on hand. I also slightly underbaked these, despite giving them 38 minutes in the oven. They still received glowing reviews, but remained a bit too moist.

1/2 cup plus 2 tablespoons (1 stick plus 2 tablespoons) unsalted butter
5 oz bittersweet (not unsweetened) or semi-sweet chocolate, broken up or coarsely chopped
2/3 cup all-purpose white flour
1 1/2 tablespoons unsweetened American-style cocoa powder, sifted after measuring
1/4 tsp salt
1 cup sugar
1/3 cup packed light brown sugar
3 large eggs
2 1/2 teaspoons vanilla extract

Preheat oven to 350 degrees F. Lightly grease an 8 inch square baking pan, or coat with nonstick spray. Line the pan with aluminum foil, letting the foil overhang two opposing sides of the pan by about 2 inches. Grease or spray foil with cooking spray.

In a large, microwave-safe bowl, microwave the butter and chocolate on 100-percent power for one minute. Stir well. Continue microwaving on 50-percent power, stirring at 30 second intervals. Stop microwaving before the chocolate completely melts, and let the residual heat finish the job. (Alternatively, in a large, heavy saucepan, melt the chocolate and butter over lowest heat, stirring frequently being very careful not to burn. Immediately remove from heat.) Let cool to warm.

In a small bowl, thoroughly stir together the flour, cocoa powder, and salt and set aside. Stir the sugar and brown sugar into the chocolate-butter mixture until well combined. Add the eggs and vanilla, and stir until sugar dissolves and the mixture is well blended and smooth. Stir in the flour mixture just until evenly incorporated. Turn out the batter into the baking pan, spreading to the edges.

Bake in the middle of the oven for 28-33 minutes, or until the center is almost firm when tapped and a toothpick inserted in the center comes out clean except for the bottom 1/4 inch which should still look moist. Transfer the pan to a wire rack and let stand until brownie is completely cooled. Refrigerate until well chilled.

Using the overhanging foil as handles, transfer the brownie to a cutting board. Carefully peel off and discard foil. If desired, cut away and discard any overbaked edges. Using a large, sharp knife, cut the brownie into 12 bars, wiping knife clean between cuts.

Store in an airtight container for up to three days, or freeze for up to a month. If freezing, leave brownie slab whole and cut into bars when partially thawed.

Monday, August 14, 2006

Florida Adventures, part 3 ...

... the final adventure (until Thanksgiving). I've had a wonderful trip, but its definitely time to go home. All this travel in the past month has quite worn me out. I look forward to a couple weeks in New York before the craziness of back to school ensues. Of course, tomorrow morning I will get the distinct pleasure of having airport craziness ensue at 7:00 am (leaving the house at 6:20 am!). A 9:00 am flight seemed like a great idea three weeks ago but was it really? Stay tuned to find out.

Anyways, tonight I made banana bread using my mom's recipe. When I was growing up, this was THE banana bread. It could often be found as an after school snack, or even dessert if I was really lucky (we weren't a big dessert during the week family). It is a quick and easy recipe, mixes right into one bowl and can easily be adapted. My mom traditionally makes it with raisins, which is a delicious variation. Today I subbed chocolate chips for raisins, both because I do love a chocolate chip banana bread (or anything really) and because my mom is serving it as a dessert option at a dinner tomorrow. And we threw in some oats, but that too is optional. The bread is equally divine without. I would perhaps not suggest trying all three variations at once, that might be overkill, but feel free to substitute your own preferred banana bread flavorings (rum, coconut, nuts or whatever).

This is the banana bread batter heading into the oven.


And this is the final result -yum!


Banana Bread
Mom's recipe


3 ripe bananas (4 if small)
1 cup of sugar
1 egg
1 1/2 cups of flour
1/4 cup melted butter
1 tsp baking soda
1 tsp salt
1/2 cup oats (optional)
1/2 cup of chocolate chips (or to taste, also optional
1/2 cup of raisins

Mash bananas with fork. Stir in other ingredients. Pour into buttered loaf pan (ideally 8 1/2 x 4 1/2 x 2 1/2 inches). Bake for one hour in a preheated 325 degree oven.


Technorati Tags: , , , ,

Friday, August 04, 2006

Another night on the town...

... and so once again this veggie kitchen is closed. But, I was browsing blogs I love to read, and a chocolate-chip oatmeal cookie recipe caught my eye. Now, I am still determined to keep my diet light and veggie-heavy into the near future, but the girlfriends I'm meeting for dinner are under no such restrictions. And one of them is moving to Virginia in a couple days. Perhaps some oatmeal chocolate chip cookies might aid the stress in that mighty endeavor. So, on the spur of the moment I decided to whip up a half batch of cookies to take to them.

The original recipe came from Nic at bakingsheet. Something about her tantalizing description of the cookies made me want to try them, even if I wouldn't be enjoying them myself. Althought I did freeze a few lumps of dough for ready-made cookies at the drop of a hat .... for when this pesky healthy phase passes!

And I must report that the occasional chocolate chip that wandered away from the bowl wearing a coat of cookie dough that I had to rescue tasted absolutely delicious! :)


Oatmeal Chocolate Chip Cookies

Courtesy of Nic at Bakingsheet

My notes: I halved this recipe quite successfully. And I must have a tiny cookie scoop, because I got three- dozen cookies after halving the recipe! I used regular Old-Fashioned Quaker oats because I had them on hand.

Nic’s Notes:
- If you chill the dough for about 30 minutes before baking, you will have a slightly puffier cookie.
- You can substitute raisins for the chocolate chips.
- You can add up to 1 1/2 cups chopped nuts in addition to raisins or chocolate chips. You might want to make the cookies slightly larger if this is the case.

1 cup butter, room temperature
1 cup sugar
1 cup brown sugar
2 large eggs
2 tbsp milk
2 tsp vanilla extract
2 cups all-purpose flour
1 tsp baking soda
1 tsp baking powder
1 tsp salt
2 1/2 cups oats (rolled or "quick," but not "instant")
2 cups chocolate chips (about 12-oz.)


Preheat the oven to 350F. Line a baking sheet with parchment paper.
In a large bowl, cream together the butter and the sugars until mixture is light in color. Beat in the eggs one at a time, followed by the milk and the vanilla extract.
In a medium bowl, stir together the flour, baking soda, baking powder and salt. Either by hand or with the mixer on low speed, gradually beat the flour in to the sugar mixture until just incorporated.
Stir in the oats and chocolate chips by hand.
Drop 1-inch balls of dough onto the cookie sheet, placing about 1 1/2 inches apart so they have room to spread.
Bake at 350F for 10-13 minutes, until golden brown at the edges and light golden at the center.
Cool on baking sheet for at least 1-2 minutes before transfering to a wire rack to cool completely.

Makes 4 dozen.


Technorati Tags: , , , ,