Showing posts with label Vegetables. Show all posts

Tuesday, June 22, 2010

CSA Farm Share Quiche


CSA season is in full swing, and I am loving the challenge of so many vegetables and greens to get through each week.  We were away this weekend, and so lost two precious days to work on this week's haul.  With Friday looming, I needed something quick that would also work on our well stocked fridge to make for lunch.  

I zoomed onto facebook quickly in that "the toddler isn't currently in danger so I have 30 seconds to see what's happening" way that I'm sure most parents are familiar with, and am so glad I did.  A high school friend has recently started a blog, and had updated it with a quiche recipe.  I recalled some frozen crusts lounging in our downstairs freezer, did a quick tally of various greens and veggies I could use in the quiche, calculated the likelihood of getting the quiche made while making and feeding the cranky toddler his lunch ... and decided it was worth the gamble.  I'm not going to lie - it was one crazy hour and the kitchen looked a little worse for wear when all was said and done.  But the quiche made it into the oven before Q's nap, and was ready for lunch right on time.

Quiche is nothing groundbreaking, but I liked the proportions in this recipe.  I used 2 garlic scapes, one and a half small zucchinis and a handful of dandelion greens.  Otherwise I followed the recipe as written, although I did add some salt and pepper to the cooked veggies.  I did have a little too much filling (aka a little spillage) but that could have been due to my haste and or ingredient adjustments.  The flavor was creamy, cheesey and seemed well balanced by the inclusion of the greens.  I think this will definitely be a repeater recipe as I'm sure there will be more occasions when I need to use up produce while creating a delicious and not too heavy meal.  

EASY BASIC QUICHE 
Aroz@lettuceeatlocally.blogspot.com

Pie crust, frozen or home made
4 eggs
2/3 c. half & half/milk or 1/3 c. plain yogurt & 1/3 c. milk
1 c. cheddar cheese
FILLINGS:
1/2 c. chopped broccoli
1/2 c. chopped zucchini
1/4 c. onion
1 garlic scape, finely diced 
salt and freshly ground pepper to taste

Preheat oven to 375 degrees. Whip eggs until fluffy and add milk. Meanwhile, saute filling ingredients in olive oil in a pan on medium heat, adding salt & pepper to taste. Add filling mixture to the pie crust and then add egg mixture. Sprinkle cheese over the top and season with salt and pepper. Bake at 375 degrees 35 to 40 minutes. Top will be golden brown. Allow to cool some before serving. 

Friday, June 11, 2010

Garlic Scape Pesto

M. and I have been members of CSA (Community Supported Agriculture) organizations several times in the past.  Now we've left New York City and live in the Hudson Valley, we've joined a local, organic farm.  It's kind of fun going to the actual farm where the produce is grown to pick it up.  And there are nice perks like freezers with grass fed meats for purchase (for M. and the little sprout), delicious whole grain breads for purchase as well as flowers for picking and the farm's herb garden to raid.  And Little Sprout loves to watch the chickens in their chicken coop, which makes a trip to the farm a fun family outing.

We purchased a full share, but are clearly going to have to be on our game to keep up as this week's share was quite substantial.  Two pounds of mesclun - two pounds.  That can be measured by putting a ton of mesclun into the scale, and then when you find yourself cringing at how much mesclun there is realizing you're only at a pound!  Two heads of Napa cabbage, two large bunches of greens, two bunches of spring onions, two bunches of mystery greens, two bunches of baby carrots, two bunches of beets (with greens attached - yum!) and a quarter pound of garlic scapes.  Oh, there were also 2 pints of strawberries as well.  Those we had no problem polishing off.

I had lofty ambitions for the garlic scapes, however time got the best of me. As I switched into "CSA day is coming up - time to empty the fridge" panic last night, I went with the old standby of garlic scape pesto.  Now that we are the proud owners of a chest freezer, I planned on freezing most of it for a treat later in the summer using only what we needed for dinner last night.  I worked off of this recipe from the Washington Post (which was the first one that came up in my google search that sounded appealing) but I did make a few changes. I eyeballed about a half cup of pignolis instead of using the walnuts called for in the recipe due to (my) personal preference.  And I made a batch and a half of the recipe so as to use up all of my scapes. I also discovered myself perilously short on olive oil, and mixed the pesto with a blend of olive oil and pasta cooking water which made for a nice light texture.

The pesto was definitely pungent though - not for the faint of heart (or faint of garlic).  I froze some without cheese, as it freezes better that way.  And I added enough cheese to our dinner portion to make it taste "right" without really measuring.  I served the pasta with a big pile of the sauteed mystery greens, and a mesclun salad.  I'd say we've gotten through a pound of the mesclun so far, only a pound to go!


Garlic Scape Pesto
Ingredients:
1 cup garlic scapes (about 8 or 9 scapes), top flowery part removed, cut into ¼-inch slices
1/3 cup walnuts
¾ cup olive oil
¼-1/2 cup grated parmigiano
½ teaspoon salt
black pepper to taste
Method:
Place scapes and walnuts in the bowl of a food processor and whiz until well combined and somewhat smooth. Slowly drizzle in oil and process until integrated. With a rubber spatula, scoop pesto out of bowl and into a mixing bowl. Add parmigiano to taste; add salt and pepper. Makes about 6 ounces of pesto. Keeps for up to one week in an air-tight container in the refrigerator.
For ½ pound short pasta such as penne, add about 2 tablespoons of pesto to cooked pasta and stir until pasta is well coated.

Sunday, September 09, 2007

Mezze, part one

Mezze. It is such a great word. According to Wikipedia, it means a selection of appetizers or small dishes taken with alcohol. What can be more perfect then that? And the alcohol is optional. In fact, I didn't actually know that was part of the definition until now but it certainly makes me love the concept even more. Enjoying a mezze-style meal is like having a little party. So tonight, we had a little mezze. No occasion. Sunday night. Football. Mezze.

The idea of making Middle Eastern food came from two sources. First of all, we went to one of our favorite Middle Eastern restaurants last night. And I mean favorite. Here in NYC, you have to really love a restaurant to return. After all, there are hundreds of thousands of more out there. Why return for just "okay"? But this restaurant in the East Village is fantastic. No menus, $35 for 7 plus courses and just a delicious mezze of food. But last night, they weren't up to their usual standards. Yes, the falafel was outstanding, but the hummus tasted bland. The usual fattoush salad had been changed to an avocado feta salad (also too bland) and there were several other similar changes. I was left wanting more.... wanting the fattoush salad and wanting better tasting hummus. This, coupled with the three eggplants picked from the garden this week planted the idea of making a mezze for dinner tonight into my mind. And then, I just couldn't think of anything else.

Baba Ghanouj is a personal thing. I like mine creamy, smoky from the grill but with enough tahini to make the flavor fuller. M. prefers his thinner and smokier. To each their own. Except that I was the chef tonight. :)

Baba Ghanoush (Roasted Eggplant with Tahini)
Deborah Madison
Vegetarian Cooking for Everyone

1 large or 2 medium eggplants, about 1 1/4 pounds
3 garlic cloves, coarsely chopped
1/4 cup tahini
Juice of 1 large lemon
salt
Extra Virgin Olive Oil
Chopped parsley
2 tablespoons of mayonnaise

Preheat oven to 425 degrees. Slash eggplant in several places so it won't explode, and then put in pan and bake until the point of collapse (30-40 minutes). Let skin harden and char in a few places to give it a smoky flavor. I cooked my eggplant on the grill for about 40 minutes. Let rest for 15 minutes or so. Peel eggplant, and puree in blender or food processor with the garlic and tahini. Season with lemon juice and salt to taste. I added a couple of tablespoons of mayonnaise to round out the flavor even more. Mayonnaise is a common ingredient in Israeli style baba ghanoush, but again optional. Mound puree in a bowl, create slight depression with the back of a spoon. Pour a little olive oil in to the depression, sprinkle with parsley and serve.

Thursday, September 06, 2007

Mojito Madness!

I've already made my feelings about mojitos known. So, last week I was feeling in a Cuban mood again. I made a nice pot of black beans (the same recipe as in the link above) and cooked up some brown rice. Then, I decided to get creative with some tofu I had lying around.

Now, I do love tofu. But I love flavorful tofu. Tofu marinated and grilled. Tofu sauced and baked. I like interesting tofu. But, I rarely take the time to make it interesting. But this recipe for a Mojito Marinade in one of my cooking magazines from earlier in the summer had lingered in my memory. See, I get a lot of cooking magazines. And while I love flipping through them, to be honest it is a good month when I actually cook something out of one. But often a recipe sticks in my mind and all of a sudden, it MUST be made. I couldn't tell you what else was in the article on marinades that I read all those months ago, but the Mojito Marinade stuck out. So I tried it.

The marinade was easy to assemble (the most time consuming step being grating some lime zest), and after a whir in the food processor - it was done. And, minus the shallots which are not usually an ingredient found in any mojito I've come across, the marinade looked almost good enough to drink. I split the marinade between the tofu, and some sliced vegetables (peppers, zuchini and the like) prepared to grill. After a about a half hour's wait, we were off to the grill.

I really liked this marinade on tofu. The tangy sweetness of the marinade carmelized on the grill, and complemented the somewhat bland taste of the plain tofu. The flavor did not come out as well on the vegetables, however I don't think that I had quite enough marinade for the amount of vegetables I prepared. With more marinade, the flavor might have come through better.

Sadly, my pictures of this meal did not come out well. I forgot to take a picture while plated, and the lighting in the kitchen was poor when I remembered to photograph. But, I plan to make this marinade again in the future and when I do so, perhaps I'll have more photographic luck.

Monday, August 21, 2006

Japanese Grilled Eggplant

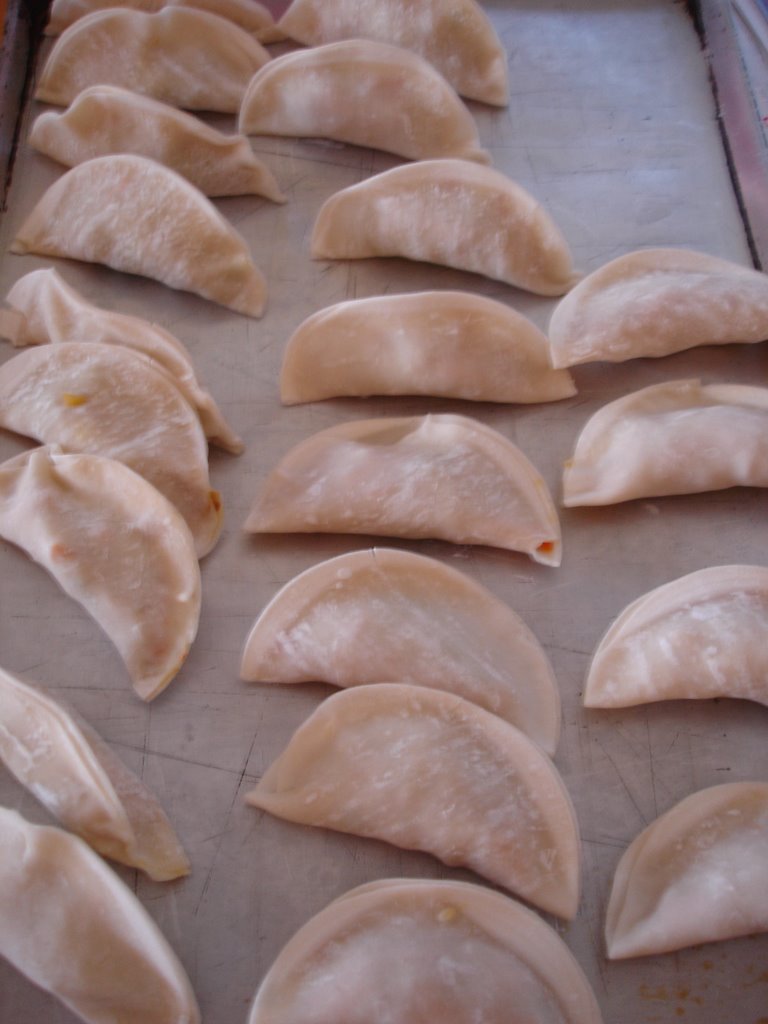
This recipe made a nice, low calorie side dish to our Asian inspired meal of General Tso's "fake" Chicken, sauteed green beans and vegetable dumplings. I broiled the eggplant which was a little problematic since they remained somewhat dry. I think the recipe would be better grilled, however we don't have access to an outdoor grill in our current living situtaion. The sauce was easy to put together, and gave the dish its flavor. Over all, I think I prefer the Miso Grilled Eggplant preparation to this recipe in terms of flavor and final presentation. Perhaps it was broiling versus grilling, but this dish came out a bit homely in the end.

Japanese Grilled Eggplants
Weight Watchers Recipe

1 pound raw eggplant, Japanese (about 4 medium), sliced crosswise on the diagonal into 1/2-inch-thick pieces
1 sprays cooking spray
2 Tbsp low-sodium soy sauce
1 Tbsp fresh lemon juice
1 1/2 tsp rice wine vinegar
1 tsp ginger root, freshly grated
1/4 tsp minced garlic
1/4 cup scallion(s), thinly sliced on the diagonal

Preheat outdoor grill, stove-top grill pan or broiler. Coat eggplant with cooking spray.

Grill or broil eggplant, turning as needed, until lightly charred and tender, about 7 to 9 minutes.

Whisk together soy sauce, lemon juice, vinegar, ginger and garlic in a small bowl until blended; drizzle over grilled eggplant and then sprinkle eggplant with scallions. Yields about 3/4 cup per serving.

Sunday, August 13, 2006

Florida Adventures, part 2

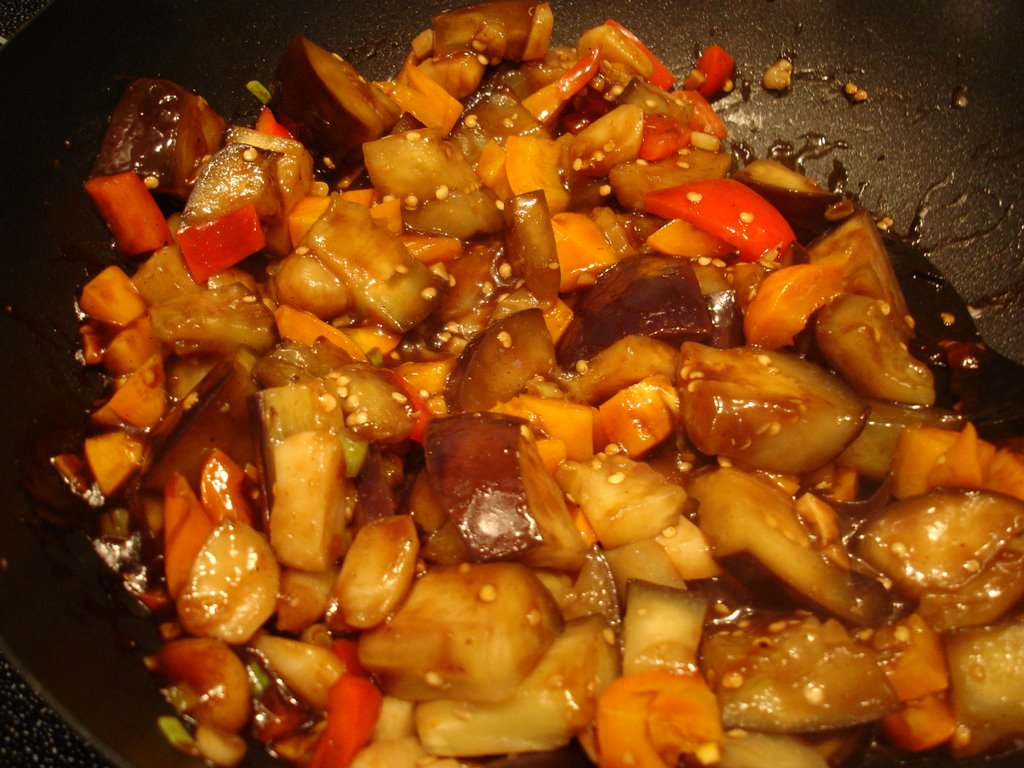
After an afternoon organizing old pictures and sorting through a couple boxes of childhood memories, my mom and I made an old favorite for dinner. This (thought to originally hail from Gourmet) Szechwan-Style Eggplant recipe was originally intended to be a dip, served with pita bread (?). Quite odd really, so we chop the pieces a little bit bigger and turn it into a main dish kind of recipe. It seems lengthy, however when the sauce is prepared first (and this is key - right Mom? :) ), it comes together quite quickly and is not as involved as it might seem. And the results are divine - if you're a fan of the glossy eggplant and garlic sauce found at most Chinese establishments, you'll be thrilled with the taste of this dish. The addition of cornstarch to the sauce gives it that glossy restaurant mouthfeel, and the components of the sauce provide enough heat to make the dish seem more impressive then the sum of its parts.

To accompany the eggplant, my mom used up some old veggies lying around to create veggie dumplings. I introduced her to my favorite Sesame Dipping Sauce and we had some steamed edamame, and a couple baked veggie spring rolls on the side. Altogether, the meal was delightful and just as tasty as having called in a delivery order. And, with the dumpling making, it was a lot more fun!


Szechwan-Style Eggplant
adapted from Gourmet (?)

My Notes -Mise en place is key. Putting all the sauces in little bowls is such a time saver as actual cooking time is very small.
This is supposed to be an appetizer served with pita wedges (?!?!). If doing main course style - small chopping isn't really necessary and larger pieces would be better. The recipe is somewhat flexible - we added chopped water chestnuts which added a nice contrasting crunch to the otherwise smooth textured dish.


1/4 cup vegetable oil (we used cooking spray with water, sometimes I use a tablespoon of oil and extra broth, whatever works for your dietary preferences)
1 1/4 lb eggplant (peeled if deisred, cut into 1/2 inch cubes - about 6 cups)
1 tsp cornstarch
1/2 cup vegetable broth (recipe calls for chicken but I use veggie)
1 tsp minced garlic
1 tablespoon minced peeled gingerroot
2-3 tsp Szechwan chili paste (or to taste - I recommend 2 as that's what I used and it was pretty spicy)
1 tsp hoisin sauce
1 tablespoon rice vinegar
1 tablespoon Sherry
3 scallions sliced thin
2 tablespoons soy sauce
1 tablespoon brown sugar packed (I used 2 packets of Splenda I think ... out of brown sugar)
1 red bell pepper minced (or chopped in small chunks)
1/2 tsp oriental sesame oil to taste

In wok or large skillet heat the veg. oil over high heat until it is hot but not smoking. Stir-fry eggplant over moderately high heat for 3-5 minutes or until tender and browned. Transfer to paper towel lined plate to drain.

In a small bowl, dissolve the cornstarch in the broth. To the wok add the garlic, the gingerroot, the chilil paste, the hoisin sauce, the vinegar, and the sherry and stirfry misture for 30 seconds. Add scallions and stirfry for 30 seconds. Add soy sauce, sugar, cornstarch mixture (stirred), the bell pepper and the eggplant and stirfry for 1 mintue until eggplant absorbs most liquid. Remove wok from heat, add sesame oil and salt and pepper to taste. Toss mixture well.


Technorati Tags: , , ,

Monday, August 07, 2006

Sweet Corn and Parmesan Flans

There is no really good reason as to why there was no post yesterday. I just totally lost all motivation. I wheedled M. into making me brunch (which turned into lunch by the 3 o'clock hour when we finally ate) and we ordered Chinese food for dinner. Today, however, I am back in action and have concocted a feast worthy of luring M. home from the office in time for a late dinner and the second-to-last Hell's Kitchen episode. What will Monday nights be like when the season ends next week? Tragic.

Anyways, I planned my meal around the recipe for Sweet Corn and Parmesan Flans which was a recipe featured in June's Cooking Light magazine. I thought a veggie-heavy meal would complement what I anticipated to be a creamy/eggy dish, and I was pleased to see I was correct. After putting the flans into the oven, I concocted a quick quinoa pilaf, glazed some sliced portabello mushrooms in a basalmic glaze and then braised some yellow beans in a vegetable broth/light butter sauce. Served with a chilled Pinot Grigio, the meal was pleasing and leftovers are eagerly anticipated by us both.

M.'s plate (which was considered most photogenic) shows quinoa pilaf, yellow beans, sliced tomato, sweet corn and parmesan flan, and basalmic glazed portabello mushrooms.

Sweet Corn and Parmesan Flans

Cooking Light’s Notes -For a pretty presentation, use a combination of red, orange, and yellow tear-drop tomatoes.

My notes – This dish was surprisingly easy to prepare, once the corn kernels were removed from the cob. Even with my corn zipper, it was surprisingly annoying as kernels popped out of the bowl almost as quickly as they were dropped in. Still, the dish is delicious and the corn battles are completely worth it!

Cooking spray

2 1/2 cups fresh corn kernels (about 5 ears)

1 cup 1% low-fat milk

1/3 cup grated Parmesan cheese

1 teaspoon flour

1/2 teaspoon salt

1/4 teaspoon freshly ground black pepper

4 large eggs

18 small tear-drop cherry tomatoes (pear-shaped), halved

2 tablespoons thinly sliced basil

Preheat oven to 350°.

Heat a large nonstick skillet over medium heat. Coat pan with cooking spray. Add corn, and cook 5 minutes or until tender, stirring occasionally. Remove from heat. Set aside 1 cup corn kernels.

Place remaining corn in a food processor; pulse 5 times or until coarsely chopped. Add milk and next 5 ingredients (through eggs) to food processor; pulse 4 times or until combined.

Pour about 1/2 cup corn mixture into each of 6 (6-ounce) ramekins coated with cooking spray. Place ramekins in a 13 x 9-inch baking pan; add hot water to pan to a depth of 1 inch. Bake at 350° for 35 minutes or until the center barely moves when ramekins are touched. Remove ramekins from pan; cool 5 minutes on a wire rack. Invert flans onto each of 6 plates. Garnish each serving with about 2 1/2 tablespoons corn kernels, 6 tomato halves, and 1 teaspoon basil.

Yield: 6 servings

CALORIES 152(35% from fat); FAT 5.9g (sat 2.2g,mono 2g,poly 1g); PROTEIN 9.8g; CHOLESTEROL 147mg; CALCIUM 125mg; SODIUM 344mg; FIBER 2.4g; IRON 1.2mg; CARBOHYDRATE 17g

Quinoa Pilaf

Serves 4

My notes - This recipe represents what I had ready access to, and what was lying around my kitchen. Substitutions welcome. And, as a presentation note, this particular combination was particularly "molding" friendly meaning that the pilaf retained the shape of the utensil by which it was served (spoon, glass or measuring cup etc).

2 cups vegetable broth

2 cloves of garlic, chopped

1 cup quinoa (rinsed in a sieve)

1 orange pepper (rough chopped)

2 tablespoons thyme leaves

1/2 teaspoon salt (or to taste)

1 teaspoon pepper (or to taste)

1/2 cup corn kernels

1/3 cup edamame beans (shelled soybeans)

Add all ingredients, and bring to a boil. Simmer for 10-15 minutes until quinoa is tender and most of the liquid has disappeared. Serve.

Basalmic Glazed Portabello Mushrooms

serves 2 with generous portions (4 with small portions)

1 package sliced portabello mushrooms

Cooking spray

1 garlic clove chopped

2 tablespoons basalmic vinegar

1/2 teaspoon salt

1 teaspoon ground pepper

1 teaspoon light butter (optional)

Coat cooking pan with cooking spray. Add mushrooms and garlic clove to pan heated to high heat. Add vinegar, salt, pepper and light butter. Stir vigorously for a moment to allow all ingredients to mix (mushroom slices should be well coated with basalmic vinegar). Turn heat down to medium high, and allow mushrooms to cook stirring every two to three minutes. In five to ten minutes, the basalmic glaze will thicken and mushrooms will cook down creating a sauce. Turn off heat, and serve.

Braised Yellow Beans

serves 4

Yellow beans (approximately 3/4 of a pound)

Cooking spray

1 garlic clove chopped

1/2 teaspoon salt

1 teaspoon ground pepper

1 tablespoon light butter

1/2 cup vegetable broth

Coat pan with cooking spray and heat on high heat. Add beans, and cook for two-three minutes. Add garlic, and other ingredients through butter. Cook for three minutes, and add broth. Reduce heat to medium-high, and cook stirring frequently until broth reduces and beans are tender. Serve immediately.


Technorati Tags: , , , , , , , ,

Wednesday, August 02, 2006

It is so hot in NYC ....

... the only good thing about it is that for the first time, I'm not teaching summer camp! Several summers ago, New York City had a similar heat wave to the one we're suffering now, but I was teaching at an outdoors camp from 8:00 am until 6:00 pm. That was misery. I feel for all those who are not as privileged as I, and who are working (especially outdoors) through this stinking heat. I just checked weather.com, and it says the temperature in my area of Brooklyn is 91 degrees. But because of the heat index, it feels like 100. It's almost 9 pm at night folks! That's hot.

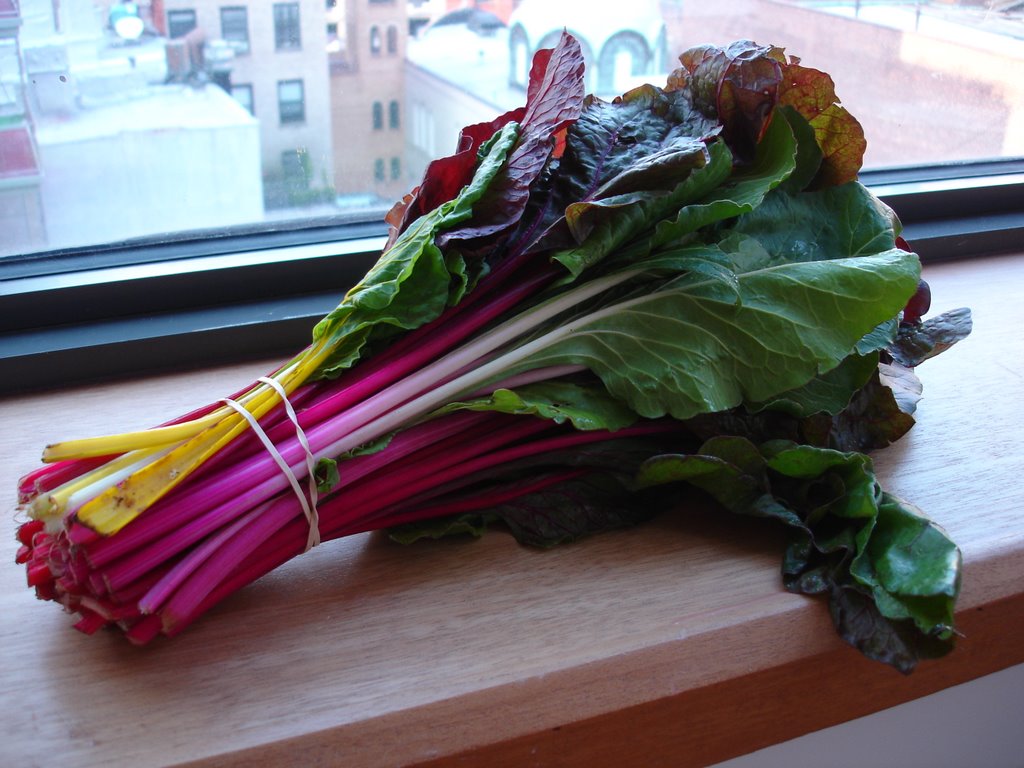
Anyways, I soldiered on and actually cooked this evening (thank goodness for air conditioning). I didn't do a CSA post this week (much to M.'s disappointment), but I can't resist sharing this picture of a beautiful bunch of rainbow chard. It came in our CSA share, and I felt like a child at Christmas. For some reason, even though M. and I are big fans of swiss chard, I've never gotten rainbow. And its just so pretty! Hope you all enjoy the peek into our neighborhood behind the chard. We have one ledge in our apartment that provides the best natural light, so we keep using it for pictures. That's apartment living in downtown Brooklyn for you!

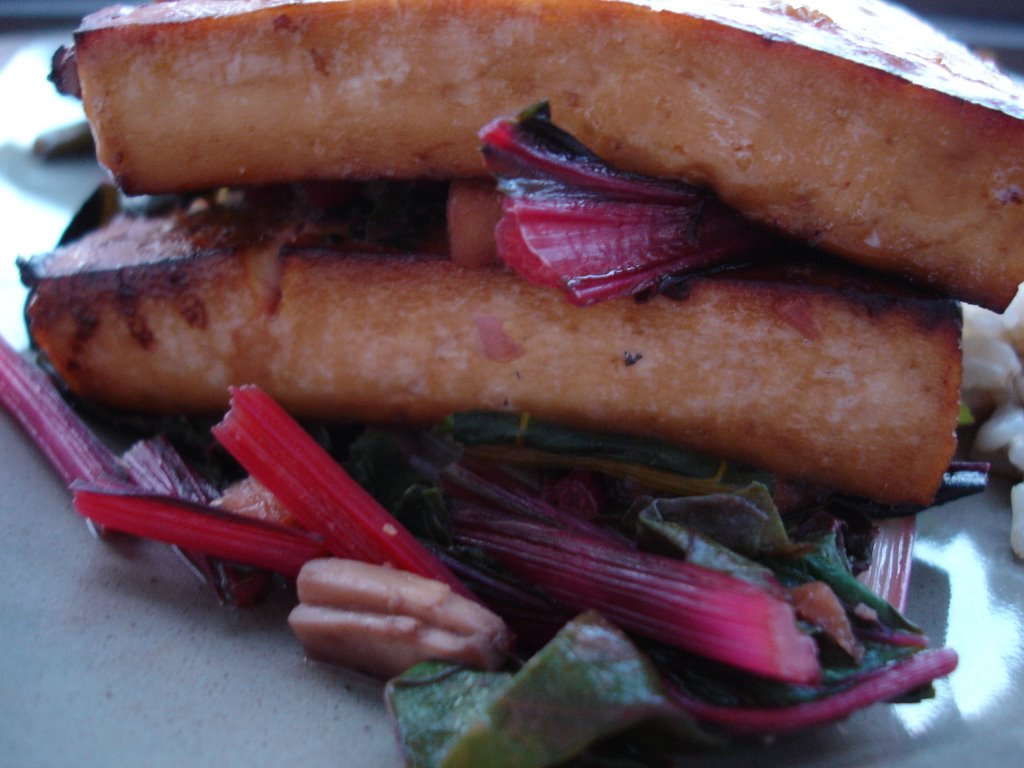
So, the rainbow chard was the featured ingredient of this evening's meal. I surfed Cooking Light's website, and found a recipe for Tofu and Swiss Chard Stacks. It seemed pretty straightforward, so I decided to give it a try. I served the Tofu and Swiss Chard Stacks with a little leftover chard, a scoop of brown rice from a pouch of Trader Joe's frozen brown rice, a variation on my Mirin-Soy Glazed Green Beans and some frozen dumplings. I did make a couple of changes to the Tofu and Swiss Chard Stacks, namely increasing the yield from two servings to three by slicing the tofu into 6 slices, not 4. I also subbed cremini mushrooms for the shitaake mushrooms because I really don't care for the taste of shitaakes (no matter how many times I try them). And while entering the recipe, I realized I totally forgot the sesame seeds! Oh well.

Overall, I enjoyed this dish. I wanted a different swiss chard presentation, since I always do the same thing with it. Typically I just sautee the chard until wilted with garlic, salt/pepper and lemon juice. While that's very tasty, I wanted something slightly different. This recipe added an Asian element to the dish with the marinated tofu and the addition of soy sauce to the greens just before serving. Would I make it again - maybe. There were many other swiss chard recipes that appealed to me when I used the Cooking Light website search engine, I'd probably dive into some of those before repeating this one. But it was pretty quick and easy, and come September it would definitely be something I'd make after a long day at school.


Tofu and Swiss Chard Stacks

Cooking Light's notes- Marinated, broiled tofu and a spicy chard mixture are layered for free-form individual lasagnas. Use water-packed tofu; its firm texture holds up well. Serve with fried rice that's been tossed with steamed edamame.

My notes - This recipe was said to serve 2. I cut the tofu into six pieces (instead of four) and we'll get three meals out of it easily. I subbed baby portabello mushrooms for shitaake, because I don't care for the taste of shitaake mushrooms. And I totally forgot the sesame seeds!

Tofu:
2 tablespoons low-sodium soy sauce
1 tablespoon mirin (sweet rice wine)
2 teaspoons rice vinegar
1 teaspoon honey
1 (12.3-ounce) package water-packed reduced-fat firm tofu, drained
Cooking spray

Greens:
1 teaspoon dark sesame oil
1 cup thinly sliced shiitake mushroom caps
1 1/2 teaspoons minced peeled fresh ginger
1/4 teaspoon crushed red pepper
2 garlic cloves, minced
4 cups thinly sliced Swiss chard
1/2 teaspoon sesame seeds, toasted
2 teaspoons low-sodium soy sauce

To prepare tofu, combine the first 4 ingredients, stirring with a whisk. Cut tofu lengthwise into 4 equal slices. Carefully place tofu in an 11 x 7-inch baking dish. Pour the soy sauce mixture over tofu. Cover and refrigerate 30 minutes, carefully turning once.

Preheat broiler.

Remove tofu from dish; discard marinade. Place tofu on a baking sheet coated with cooking spray. Broil 10 minutes on each side or until tofu is lightly browned.

To prepare greens, heat oil in a large nonstick skillet over medium heat. Add mushrooms, ginger, pepper, and garlic; cook 1 minute, stirring frequently. Add chard and sesame seeds; cook 3 minutes or until chard wilts, stirring frequently. Stir in 2 teaspoons soy sauce.

Place 1/4 cup chard mixture on each of 2 plates; top each serving with 1 tofu slice. Repeat layers with remaining chard and tofu.


Yield: 2 servings

CALORIES 155(29% from fat); FAT 5g (sat 0.4g,mono 1.2g,poly 2.8g); PROTEIN 13.8g; CHOLESTEROL 0.0mg; CALCIUM 130mg; SODIUM 754mg; FIBER 2.1g; IRON 3.9mg; CARBOHYDRATE 12.4g


Technorati Tags: , , , ,

Tuesday, August 01, 2006

Corn and Barley Salad

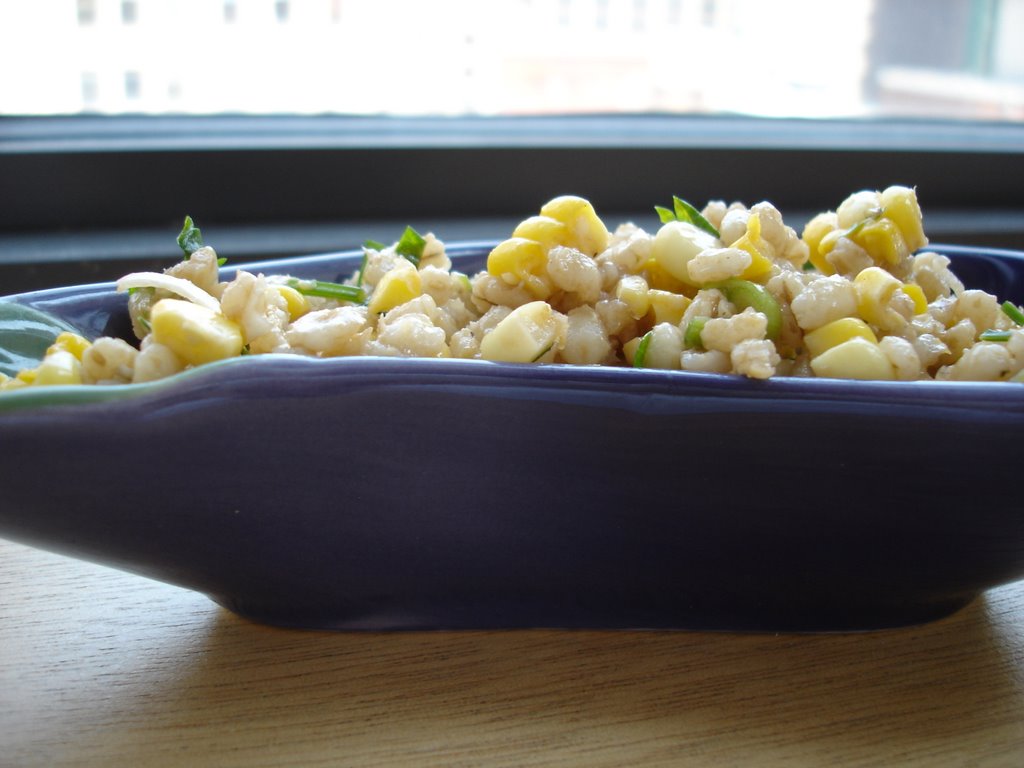
When I found this recipe in a new-to-me cookbook I got for the grand price of $0.58, I knew it was just the kind of dish that would make M.'s eyes light up. Sure enough, he walked in the door last night just as I was finishing it up and instantly grabbed a spoon to sample on the spot. So I knew I had a winner, and that was definitely confirmed when I sampled a real portion for lunch today.

This salad was easy, quick to throw together and just so wholesome. Barley, corn, parsley, a hint of flavor from the chopped chile, chunks of tomato - what's not to like? The dressing mixed up easily, and seemed to be quite forgiving. I used some basalmic vinegar in addition to red wine vinegar as I didn't have white wine vinegar to no ill effect. And, as I added the dressing to the salad, I thought there was no way this little bit of dressing would dress the whole salad. But it did. It is a lightly dressed salad, definitely not drenched but the touches of vinegar add a refreshing quality to the overall taste of the dish.


Corn and Barley Salad
Jane Brody's Good Food Gourmet
4-6 side salad servings (I think we'll get 4 - 6 main course salad servings out of this generous recipe!)

Jane's notes - All tasters agreed that this easily prepared salad was a winner. It's a nice salad to make when you have some leftover ears of cooked corn.

Jane's preparation tips - Cooking the garlic takes the bitter edge off of it, but you can skip this step if you wish. You can make the salad 1 day ahead, adding the cilantro or parsley just before serving time.

My notes - I cooked the garlic in a glass bowl covered with water for 2 minutes in the microwave and that worked pretty well. I used parsley, not cilantro. I didn't measure the corn, but used three and a half ears. I used one chili, didn't seed and might use two when repeating the salad as the heat was lost in the bulk of the salad (and we like things flavorful, but not too spicy). I also used red wine vinegar and basalmic vinegar, and was pleased with the results. And I just tossed the parsley into the salad - no waiting one hour before serving here! I will definitely will be repeating this salad!

Salad
3 cups of water
1/2 tsp salt (optional)
1 cup barley
2 cups cooked corn kernels, fresh if available or frozen and thawed
1/2 cup thinly sliced scallions
1 large tomato, seeded and finely chopped
1 - 2 fresh hot green chilies or jalepenos, seeded and minced

1/4 cup minced cilantro or fresh parsley, or to taste

Dressing
2 cloves garlic, cooked ten minutes in boiling water and peeled
3 tablespoons white wine vinegar
2 tablespoons olive oil or canola oil
1/2 tsp cumin
1/2 tsp salt
1/4 tsp freshly ground pepper

1. To prepare the salad, in a large saucepan bring the water and salt (if desired) to a boil. Add barley and cook stirring often for 30 minutes (pearled barley)/40 minutes (unpearled barley). Do not overcook the barley. Drain barley in a colander, rinse under cold water and let drain until cool.
2. Transfer the cooled barley to a large bowl. Add the corn, scallions, tomato, chilies or jalepenos, and toss ingredients well.
3. To make dressing, put dressing ingredients into a food processor or blender and process. Pour dressing over salad, and toss well to combine ingredients thoroughly. Cover bowl, and chill the salad.
4. One hour before serving, stir in cilantro or parsley, and allow salad to come to room temperature.


Technorati Tags: , , , , ,

Sunday, July 30, 2006

A walk on the veggie heavy side...

So, I've decided that my veggie kitchen will be producing lighter fare in the weeks to come. There may still be baking for M.'s office folks, but the french tarts and tartes tatins will have to wait a bit. All this travelling and vacationing has left me feeling somewhat heavy from eating in restaurants that use much more butter/oil then I do. As a result, I'm craving nonstop fresh fruits and veggies, and this is certainly the time of year to indulge.

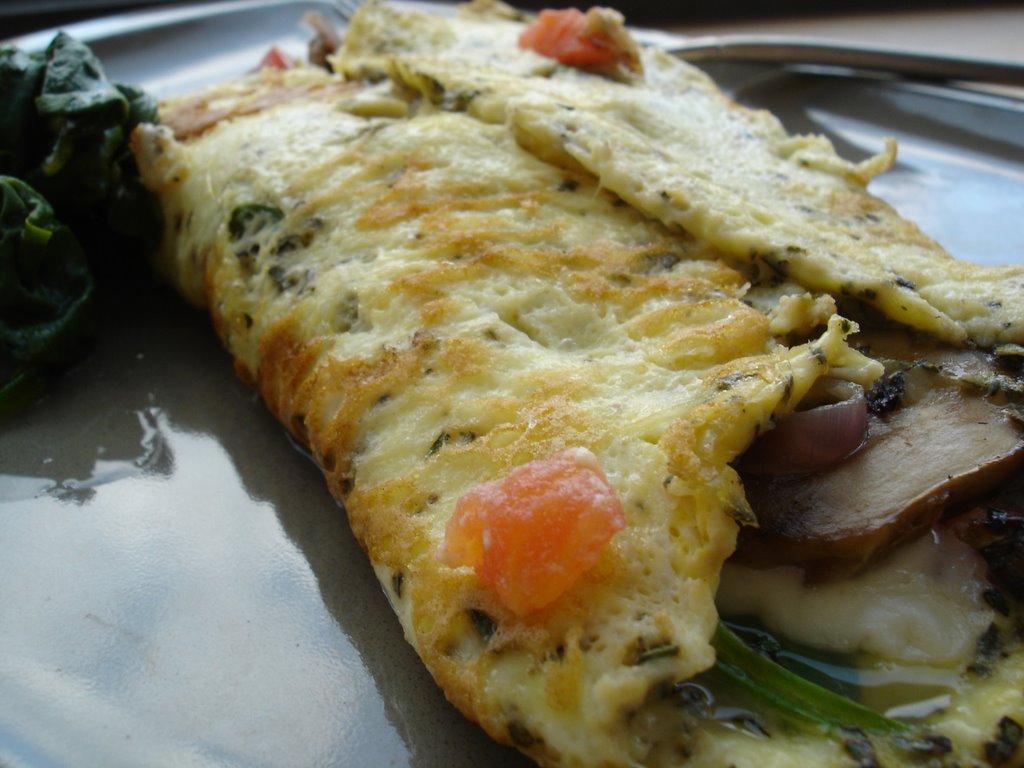
First of all, I must show off the omelet M. made me for lunch today. M. tends to be a very inventive cook. Give me a recipe, and I'm a happy girl but M. likes to push the envelope a bit more. Sometimes this results in amazingly tasty concoctions, sometimes not so much. Today fell into the amazingly tasty category. He chopped fresh herbs (oregano, rosemary and thyme) and added them to the egg mixture component of the omelette. I would never have thought to do so (I would have added the herbs to the sauteed vegetables instead) but the result was so flavorful and above and beyond the standard omelet.

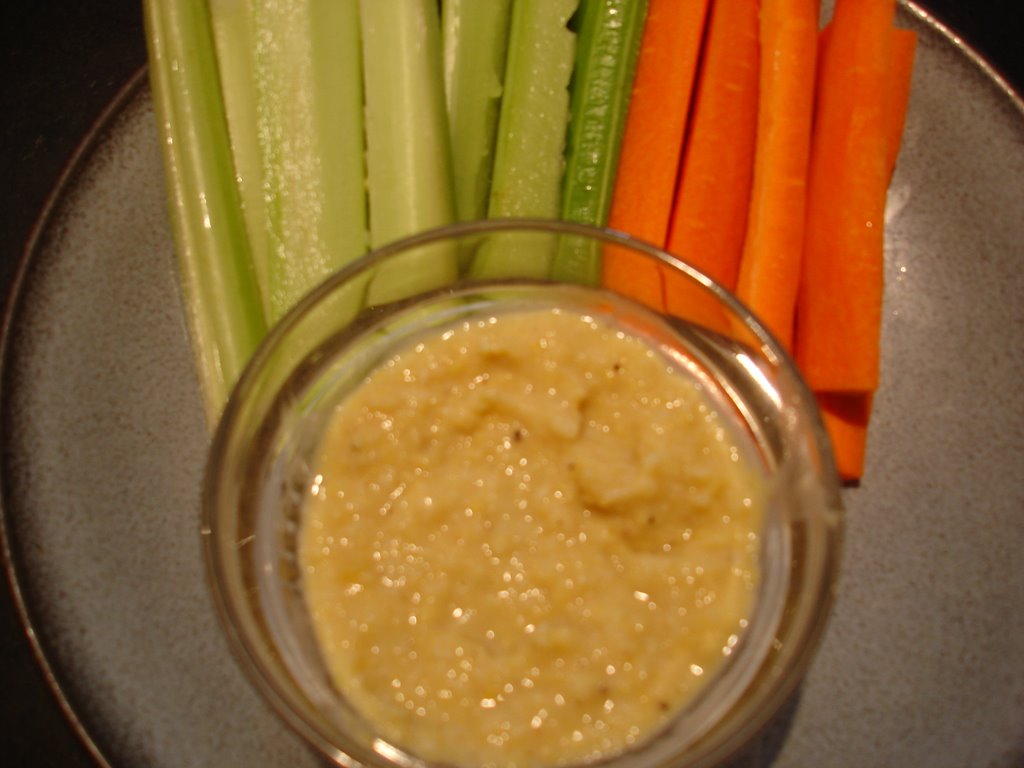
After the dust settled (and the dishes were washed), I set about trying a new hummus recipe. We're big fans of hummus, but have stopped making it since we have an amazing Middle Eastern grocery on the next block which makes it in bulk amounts for a minimal price. Why reinvent the wheel? But, in an attempt to make as much at home as possible (so as to minimize unwanted ingredients like too much oil etc), I decided to whip up a batch to have with carrots and cucumbers for a snack. When I drastically lighten our diets, I like to send M. to work with snacks so that he's not chained to a desk wasting away with hunger. This hummus will do nicely. All in all, the recipe was good but not great. It's a Weight Watchers recipe, and in my experience WW recipes are either awesome or just alright. The texture was a little runny, but then I just dumped 6 oz. of plain fat free yogurt into the mix without measuring out a half a cup so that might be cook's error. The flavor was good, it was just the runniness that was a touch off-putting.

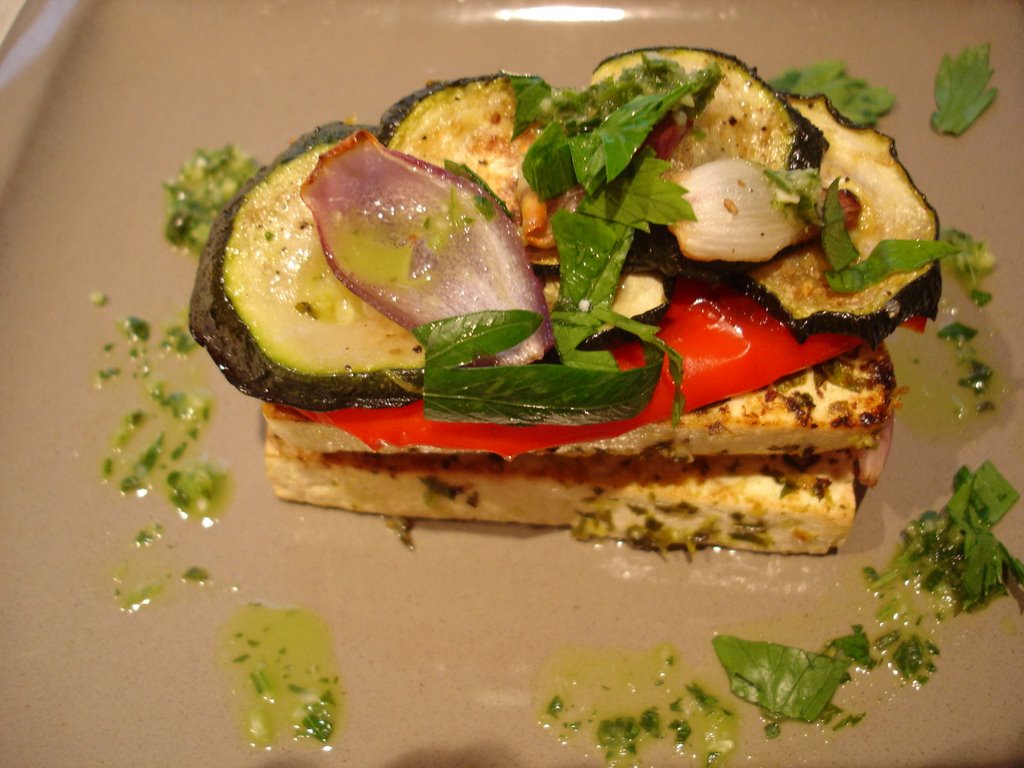
But, falling squarely into the awesome WW recipe category were the two dishes I made for dinner. We started with a Roasted Vegetable and Tofu Napoleon which consisted of seared tofu slices with roasted peppers, onions and zucchini in between. The recipe should have included eggplant, but my brain did not register this fact when copying down ingredients so our napoleons remained eggplant-less. Both M. and I were impressed by how flavorful the resulting dish was, and agreed that the tofu benefited from the simple but tangy preparation. I would make this dish again.


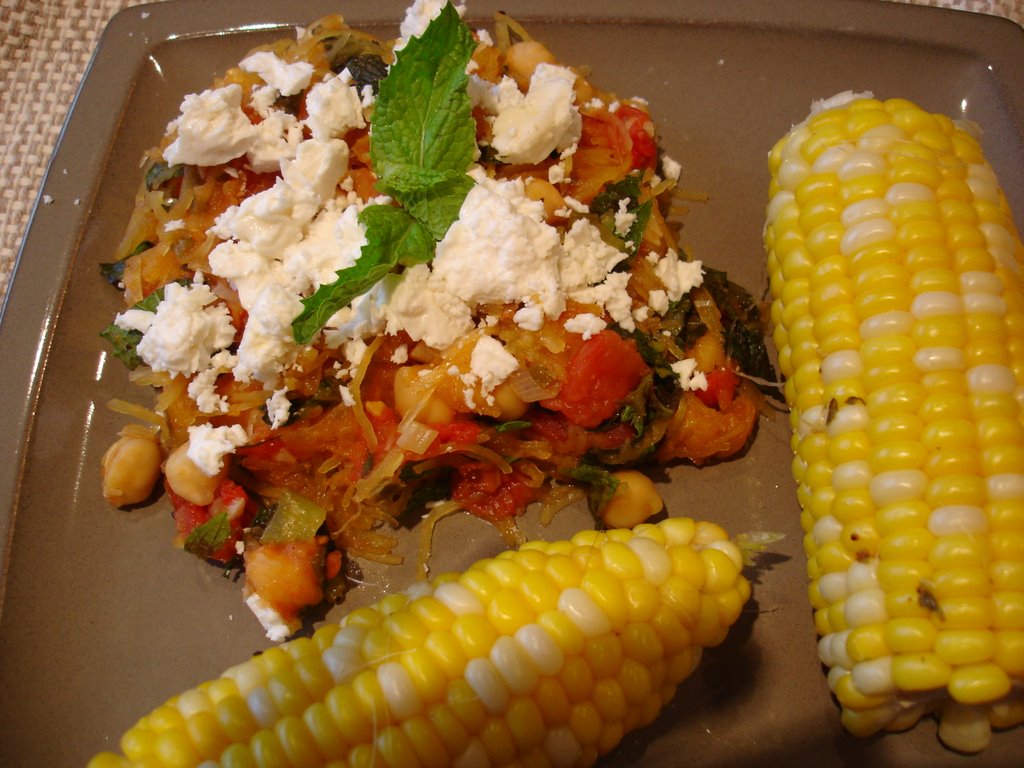
As a main dish, I made Grecian Spaghetti Squash Saute. Chickpeas, diced tomatoes, mint and feta- this dish combined several of our favorite flavors. Halfway through making it, I realized I'd made it before but not in a very long time. I had a sort of recipe deja vu. Since I already had the oven on for the roasting vegetables, I roasted the spaghetti squash as well. This dish came together quickly, and if using the microwave cooking method would definitely be doable on a busy weeknight. I served this dish with fresh corn since the combination of the two dishes had meant lots of chopping etc, and I wasn't going to make anything else! This kitchen was closed, and the chef on strike. :) But it felt great to be cooking again.


Grecian Spaghetti Squash Saute
Weight Watchers Recipe
Serves 4

WW notes - This unusual and delicious take on spaghetti squash is great as a main dish, or as a side dish paired with grilled or broiled fish or chicken, or roast leg of lamb. Red pepper flakes will add extra kick

My notes - Red pepper flakes would have been good, I'd add them next time.

2 pound raw spaghetti squash
2 tsp olive oil
1/2 cup scallion(s), sliced
2 tsp minced garlic
14 1/2 oz canned diced tomatoes, undrained
1 cup canned chickpeas, drained and rinsed
1 tsp dried oregano
1 tsp lemon zest, freshly grated
1/4 tsp table salt
1/4 tsp black pepper
1/4 cup dill, or mint, fresh, chopped
1/4 cup pot cheese, or fat-free crumbled feta

  1. Pierce squash with a fork in several places; place on a microwave-safe plate. Microwave on high, turning squash over every 3 minutes, until tender, about 12 to 15 minutes; let stand 5 minutes. (Or to bake squash, preheat oven to 350ºF. Halve squash lengthwise and scoop out seeds. Place squash, cut side down, in a large baking dish and prick skin all over with a fork. Bake until tender, about 30 to 40 minutes.)

  2. Meanwhile, heat oil in a large nonstick skillet. Add scallions and garlic; cook, stirring, until fragrant, about 1 minute. Add diced tomatoes, chickpeas, oregano, lemon zest, salt and pepper; bring to a boil.

  3. Cut cooked squash in half lengthwise; scrape out seeds and then scrape strands of squash into skillet with a fork. Cook, stirring, until squash strands are well coated; remove from heat and stir in dill or mint. Top each serving with cheese. Yields about 1 cup of squash and 1 tablespoon of cheese per serving.

Roasted Vegetable and Tofu Napoleon
Serves 4

4 sprays cooking spray
1 large red onion(s)
1 medium raw eggplant, peeled
1 medium zucchini
1 medium yellow pepper(s)
1 medium sweet red pepper(s)
1 pound extra firm tofu
1 Tbsp rosemary, fresh, chopped
3 Tbsp parsley, fresh, chopped
3 large garlic clove(s)
1 Tbsp olive oil, extra virgin
2 Tbsp fresh lemon juice, about the juice from one lemon

  1. Preheat oven to 425°F. Coat 2 baking sheets with cooking spray.

  2. Slice onion in half and then cut each half into quarters. Slice eggplant, zucchini (slice diagonally) and peppers into 1/4-inch slices. Slice tofu across into 8 slices, about 1/4-inch thick.

  3. Place onions on one half of a baking sheet and peppers on other half. Place eggplant and zucchini separately on second baking sheet. Coat tops of vegetables with cooking spray. Roast 15 minutes and then rotate baking sheets; roast 15 minutes more. Turn off oven and leave vegetables in oven to keep warm.

  4. Place rosemary, parsley and garlic in bowl of food processor. Add oil and lemon juice and blend until smooth, about 3 to 4 minutes; set aside.

  5. Spread herb mixture onto both sides of each tofu slice. Coat a large nonstick skillet with cooking spray and heat over medium heat. Place tofu in heated pan and brown both sides of tofu, about 2 to 4 minutes per side.

  6. To serve, place one slice of tofu on a plate. On top of tofu, stack one slice of eggplant, one slice of red pepper and one wedge of red onion; top with another slice of tofu and then top that with one slice each of yellow pepper and zucchini, and another piece of red onion. Drizzle with remaining herb mixture. Repeat with remaining ingredients. Yields one napoleon per serving.


Hummus
[Will be posted tomorrow, as it requires typing unlike the two previous recipes which I found online!]


Technorati Tags: , , , , ,

Friday, July 14, 2006

A meal fresh from someone's garden....

... even if not my own!

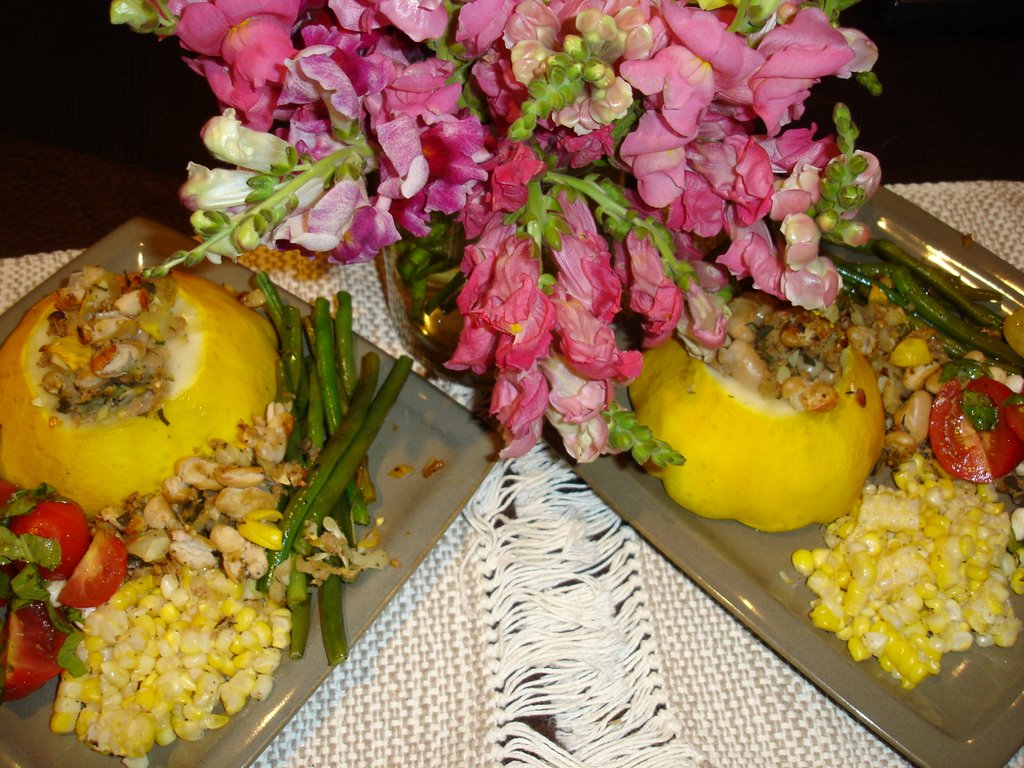
Tonight's meal inspiration began with Susan's (chef in the Fatfree Vegan Kitchen) recipe for Patty Pan Squash Stuffed with Cajun White Beans. She posted her creation several days ago, and when I saw pattypan squash at the Union Square Farmer's Market today, I knew our dinner was determined.

While still at the Farmer's Market I saw fresh green beans, small heirloom tomatoes and corn. And dinner was done. I was instantly convinced that a simple meal prepared with these fresh ingredients would fit the bill for our Friday dinner. M. tends to work pretty late during the week, but Friday is a night he can often make it home for a late (8:00 or in tonight's case 9:00pm) dinner. Accordingly, I try to make something a bit more special to usher the weekend in.


Having finished at the Farmer's Market, I then proceeded to one of my new favorite grocery stores. It was a definite trip carrying the produce and the three Barnes and Noble books that somehow found their way to me during my perusal of the Barnes and Noble at Union Square. But, Trader Joe's is worth it. It just opened in March, and already I'm in love! Poor Whole Foods (just down the street even) got kicked to the curb! Anyways, at Trader Joe's I found what turned out to be a key ingredient to tonight's supper. Orange Muscat Champagne Vinegar, pictured on the left and featured heavily in tonight's green bean preparation and fresh corn preparation. Its tangy sweetness complemented the veggies nicely, and I look forward to finding new ways to use my new pantry staple.


Our lovely dinner in its entirety.
As always, clicking on the picture will blow it up, and reveal our amateur photographic skills!


Here is Susan's original recipe. Because I'm lazy as its somewhat late, I just entered it as (meaning I copied it from her blog) is but I want all credit to go to her as it was a tasty recipe, and one I will repeat. But, I actually made some changes which I will describe here. First of all, I omitted the celery and green pepper because I didn't have any and I wasn't going out again after lugging home two TJ bags, all my produce and three Barnes and Nobles books. So, no celery and pepper for us. I adapted the herbs somewhat (mostly because our fridge is bursting with a multitude of herbs right now). I used fresh sage (about 7 leaves cut in a chiffonade), fresh thyme (about 4 stems with approximately 5 fronds per stem), herbs de Provence (about 1/2 a teaspoon), crushed red pepper (a dash) and I added 1/4 cup whole wheat panko (Japanese bread crumbs) and a few microplane grates of parmesan cheese. But other than that, I made her recipe in its entirety! :) Oh, and I used cannellini beans. As I said above, I will repeat this but I do think it is a forgiving recipe that will accommodate "what's on hand" and remain delicious.


Patty Pan Squash Stuffed with Cajun White Beans


4 medium-sized patty pan squash
1 small onion, chopped fine
1 stalk celery, chopped fine
1/2 bell pepper, chopped fine
2 cloves minced garlic
1 tsp. thyme
1/8 tsp. cayenne
1/8 tsp. black pepper
1/2 tsp. oregano
1/2 tsp. basil
1/2 tsp. fennel seed
1/4 tsp. rubbed sage
1/2 tsp. salt (optional)
1 can (15 ounces) great northern beans (or other white beans), rinsed and drained

Place the squash flat side down in a large pot. Add about 1 inch of water, cover, and bring to a boil. Cook for about 8 minutes, until a fork easily pierces the top of the squash. Remove from the pot and set aside to cool.

When cool enough to handle, slice off the top of the squash and use a melon baller to scoop out the flesh from the inside. Be sure to leave a wall of at least 1/4-inch of flesh on all sides of the squash. Turn them upside down to drain, and dice the scooped out flesh coarsely.

Preheat the oven to 375 F.

Sauté the onions, celery and bell pepper in a large, non-stick skillet for about 5 minutes until soft; add garlic, diced squash, and remaining seasonings and cook for another 2 minutes. Add the white beans and cook on low heat for about 5 minutes.

Place the squash in an 8x8-inch baking pan. Spoon the stuffing into each shell; be sure to really pack it into the shell, and don't be afraid to over-stuff them. Pile any stuffing that remains into the center of the baking pan, right between the squash.

Bake for about 20 minutes or until the tops begin to brown. Serve with additional stuffing. Serves 2 as a main dish or 4 as a side dish


The other components of our dinner remained pretty simple. For the green beans, I cut off the ends and sauteed them in a splash of my new champagne vinegar, a splash of vegetable broth, two garlic cloves minced, salt and pepper and a dash of lemon flavored olive oil (to taste - I didn't use very much but others might prefer more). This created a nice little sauce which I then reduced until the green beans were nicely glazed.

The heirloom tomato salad with perlini was an adaptation of everyone's favorite - the caprese salad. I quartered the mini-heirlooms, tossed with basil chiffonade, salt and pepper. I then strained a spoonful of perlini (mini-bocconcini or fresh mozzarella balls - also obtained at Trader Joe's) and added a splash of olive oil and a splash of basalmic vinegar. I stirred, and left the salad to sit for a few minutes so that the flavors would meld.

And the corn, I cooked the corn for about three minutes in boiling water. I used my corn zipper and unzipped the kernels, added salt and pepper and my new vinegar to taste (about a tablespoon) and left to marinade until I served it.

And that was our dinner, and M. was very pleased. Wouldn't you have liked to join us?


Technorati Tags: , , ,

Monday, July 10, 2006

The Accidental Italian (Meal).

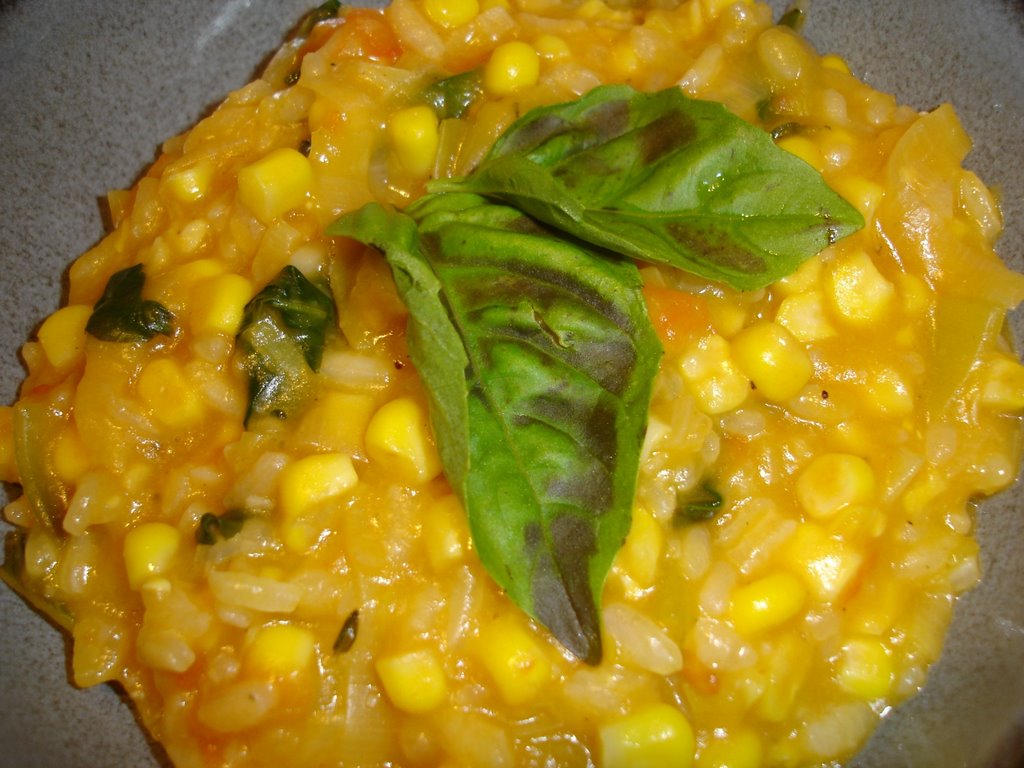
As I flipped through cookbooks yesterday afternoon, I noticed the recipe fo Summer Risotto with Tomatoes, Leeks and Fresh Corn. M. and I love risottos, but haven't made them at home for the longest time (for whatever reason). This particular recipe was in The Modern Vegetarian Kitchen by Peter Berley which is a cookbook I've not used nearly enough (although I seem to be remedying this fact of late). And just like that, dinner was decided. I decided to pair the risotto with a side dish of Pan-Seared Summer Squash with Garlic and Mint mostly because the recipe sounded very intriguing, and I had some lovely fresh spearmint needing to be used. Coincidentally, the summer squash recipe comes from Fresh Food Fast, also by Peter Berley. And, our meal would begin with caprese salad because we had some fresh mozzarella to use up from Friday. And, you can never have enough caprese salad.

Once I chose this recipe that involved corn kernels, M. and I both realized we'd need the Kuhn Rikon Corn Zipper. Luckily (or unluckily depending on your perspective) we have a kitchen store right around the corner who happened to have the Corn Zipper in stock. Using it was very easy, and despite the fact that it has somewhat of an eerie face I think it'll be a tool earning its drawer space frequently this summer.

It was only after I began cooking that I realized we were having an Italian meal of the evening of Italy's World Cup win. Sometimes I even amaze myself. :)


Summer Risotto with Tomatoes, Leeks, and Fresh Corn
The Modern Vegetarian Kitchen - Peter Berley (and Melissa Clark)

Author's notes - A quick and flavorful broth can be made from the corn cobs and leek tops.. Simply wash the leek tops well, place them in a pot with the corn cobs, cover with six cups of water and simmer, uncovered for 30 minutes. Strain off and discard the trimmings, and proceed with the risotto using the corn cob broth instead of vegetable broth.

My notes - I missed this notation about corn cob broth and used store-bought broth instead.

5 cups All-Season Vegetable stock (or store-bought), or water
2 tablespoons extra virgin olive oil
2 cups thinly sliced leeks (white and tender green parts only)
1 cup arborio rice
1/4 cup dry white wine such as a Sauvignon Blanc
2 cups kernels scraped from 2 ears fresh corn
1 lb ripe tomatoes, peeled, seeded and diced
2 teaspoons minced garlic
1/2 teaspoon fresh thyme leaves
1 cup torn basil leaves
1 teaspoon unsalted butter (optional - I added)
1/4 cup Parmesan cheese (optional - I added)
Coarse Sea Salt
Freshly Milled Black Pepper

1. In a 2 quart sauce pan over high heat, bring stock to a boil. Reduce heat so that stock maintains a steady simmer.

2. In a heavy 3 quart pan over medium heat, warm the oil. Add leeks and saute for 2 minutes until softened. Stir in rice and saute for 2 minutes, until grains are translucent. Pour in the wine and let simmer until absorbed.

3. Add the corn, tomatoes, garlicc and thyme. Add the stock, 1/2 cup at a time, stirring constantly until te liquid has been absorbed before adding each subsequent 1/2 cup stock. Continue stirring and adding stock, until grains are tender and creamy about 20-25 minutes. Add the basil during the last five minutes.

4. Stir in butter and cheese if using, and add salt and pepper to taste. Serve immediately.

Pan-Seared Summer Squash with Garlic and Mint
Fresh Food Fast by Peter Berley (and Melissa Clark)

Author's notes- Pan searing the squash carmelizes it and produces a nice crust. The sugars become concentrated, and their juices locked in. You can use the same technique with eggplant slices, and onion rings.

My notes - This was a really tasty recipe, but kind of a pain to make. The pan-searing took forever, and I think were I to make it again (and I would) I might grill the veggies instead. I tinkered with the amounts since I only had 1 1/2 pounds of squash. I used all the lemon juice, garlic and mint but only about a tablespoon of oil. And it still tasted great. Very garlicky, but very good.

2 pounds summer squash, sliced 1/2 inch thick
2 tablespoons freshly squeezed lemon juice
2 tablespoons fresh mint
2 garlic cloves, finely chopped
1 teaspoon coarse salt, plus additional to taste
1/2 teaspoon crushed red pepper flakes
3 tablespoons extra-virgin olive oil
Freshly milled black pepper

1. Warm a large, heavy skillet, griddle or grill pan over medium heat. Arrange the squash in a single layer and sear until speckled with brown and beginning to blacken (about five minutes). Flip the squash and cook for five minutes more. Repeat with remaining squash.

2. In a serving bowl, combine lemon juicce, mint, garlic, salt, and red pepper flakes and let marinade for 5 minutes. Whisk in oil.

3. Transfer seared squash to bowl, toss to coat with dressing and let rest for about five minutes. Season with additional salt and pepper, and serve.


Technorati Tags: , , ,

Wednesday, July 05, 2006

A use-up yet surprisingly coordinated meal.

I am a notorious hoarder of purchased food items. Some people hate grocery shopping. I love it, and have this strange compulsion to buy things without checking first to see if I already have the item in our already bursting pantry/fridge/freezer. I've learned to plan menus (and shop accordingly) so as to minimize the storage of items like three kinds of lentils, two kinds of bread crumbs, ten cans of beans etc.

But, I view this trait as a good thing, as it is a very rare night that I cannot go to our pantry and concoct a meal. Now, that's not to say that I won't pretend otherwise when I'm wanting to order takeout or go out to eat, but the fact remains that we could eat well for several weeks without stepping foot into a grocery store. That's evolutionary progress right in our own kitchen!

Tonight's meal was using up various odds and ends that needed to be cooked before they went bad. Like, the green beans I bought at the market last Tuesday. And the bok choy I bought to make M. something brothy (as he requested in the comment section of Tales from the Farmer's Market, Part 1). But, most importantly, my hoarding tendencies came into play because I was able to decide to make a favorite tofu preparation, have all the ingredients and be ready to make the recipe within minutes. I had the tofu, and the sauce fixings, and no trip to the grocery store was necessary.

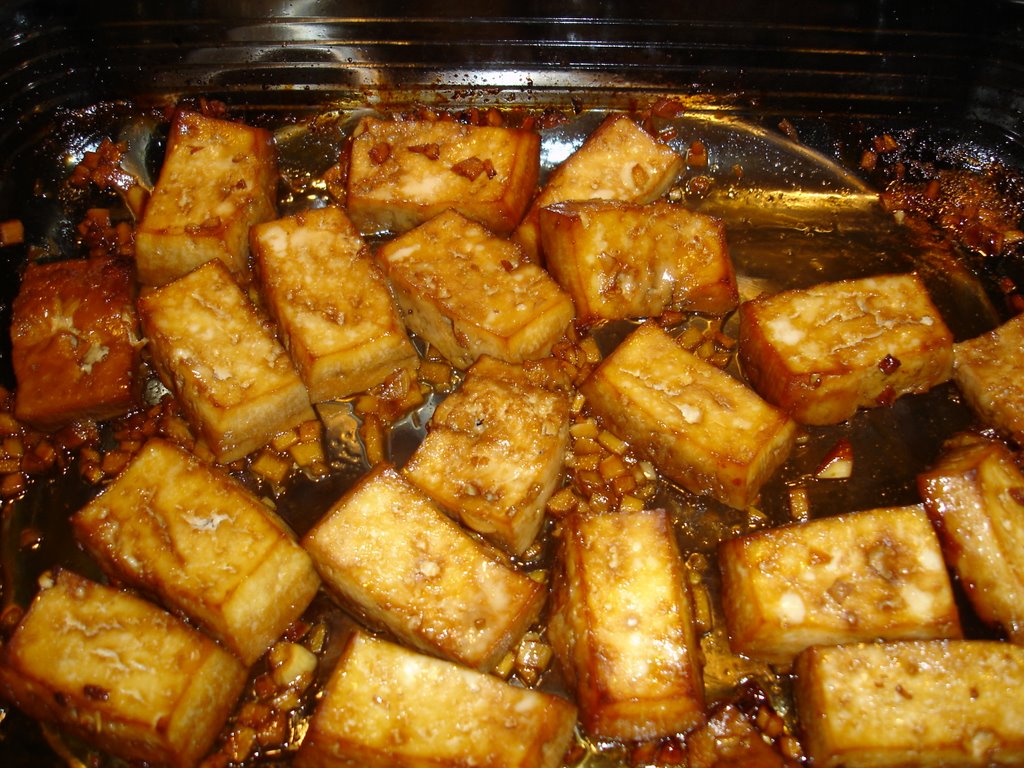
This is one of my all-time favorite tofu preparations. It is even better when allowed to marinate for a few hours before baking. I didn't have time for that today, but it does make an already great recipe even better. It is great alone, or topping noodles with a simple veggie stir-fry. It would be a great recipe to try on alleged tofu-haters...

Sweet Ginger Tofu

The Modern Vegetarian Kitchen - Peter Berley

Yield: 4 to 6 servings (I don't think we've ever gotten six servings out of this delicious tofu!)

1/4 cup soy sauce
1/4 cup mirin
1/4 cup rice vinegar
2 tablespoons honey
2 Tbs minced gingerroot
2 Tbs light sesame oil -- (note: I only use 1 Tbs)
1 tsp minced garlic
1 pound firm tofu -- rinsed, patted dry, and sliced 1/2 inch thick

Preheat the oven to 350F In a small bowl, combine the soy sauce, mirin, vinegar, honey, ginger, oil, and garlic. Lay the tofu slices in a baking dish that can hold them in a single snug layer. Pour the marinade over the tofu. Bake for 45 minutes, or until the tofu is nearly dry and well browned. Serve hot or cold.

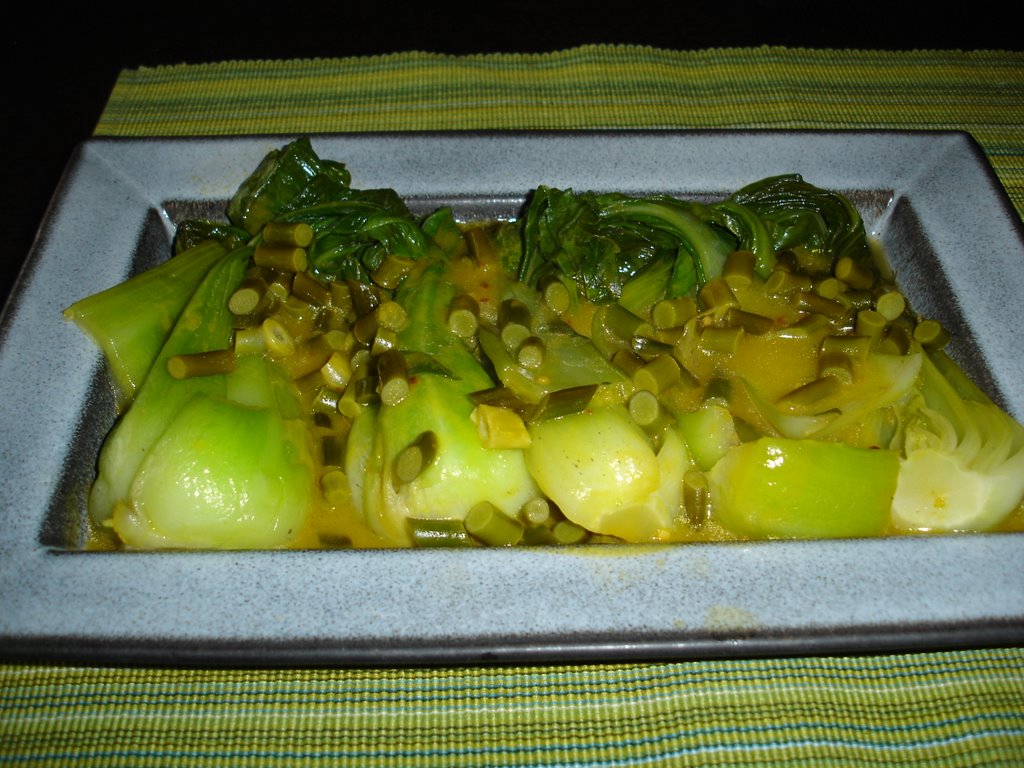
I also made the braised bok choy with garlic scapes recipe featured on Pie in the Sky
. Thanks again to Caroline who posted a reminder about this recipe on my Tales from the Farmer's Market post - it was delicious.

Braised Bok Choy with Garlic Scapes

Courtesy of Kate at A Pie in the Sky

INGREDIENTS

2 heads bok choy, sliced in half lengthwise and washed

1 cup vegetable stock

1 tablespoon butter

2 garlic scapes, diced

1/2 teaspoon sesame oil

Pinch of cracked red pepper

Salt to taste
Toasted sesame seeds (available in Chinese markets and many supermarkets) I omitted these
.

DIRECTIONS
Melt butter in large sauté pan over medium heat. Add scapes and stir-fry to soften, about 1 minute. Add stock and bring to a simmer. Arrange bok choy in pan and cover, simmering for about five minutes or until tender.

Transfer bok choy to serving dish and cover to keep warm. Bring remaining
broth and scapes to a boil and reduce to 1/2 cup or less. Stir in sesame oil and pepper; salt to taste. Pour over bok choy and sprinkle with sesame seeds; serve hot.
Serves 2.

And lastly, I created my own green bean recipe this evening that turned out to be surprisingly tasty. But unfortunately, I didn't really take many measurements. But to the best of my memory, here goes ...

Mirin-Soy Glazed Green Beans


2 cups of green beans
2-3 cloves of chopped garlic
1/4 cup vegetable broth
2 tablespoons of mirin
3 tablespoons soy sauce
Sprinkle of hot pepper flakes
1 tsp sesame oil
salt/pepper to taste

Wash and trim the green beans, discarding stems. Coat nonstick skillet with cooking spray, turn on heat to High and add green beans. Add garlic and cook for one minute. Add vegetable stock and turn down to medium. Cook green beans for approximately 2 minutes or until beginning to soften. Add mirin, soy, hot pepper, sesame oil, salt and black pepper and stir. Adjust heat to medium high, and reduce sauce with frequent stirring of the beans. When most of the sauce has reduced, and green beans are tender (even wilted) and coated with glaze (to taste) then remove from heat and serve.

This was the whole meal, but you can see the beans in the upper left hand corner. I didn't think they warranted their own picture, until I tasted them.


All this cooking wore poor Helios out! Hang in there little man, the kitchen is closed for today.


Technorati Tags: , , , ,

Sunday, June 25, 2006

Cooking Overdrive!

Well, I got a little ambitious in the kitchen yesterday. Apparently having a new blog is motivating me to new and greater cooking heights (which was the intention so I guess the plan is working).

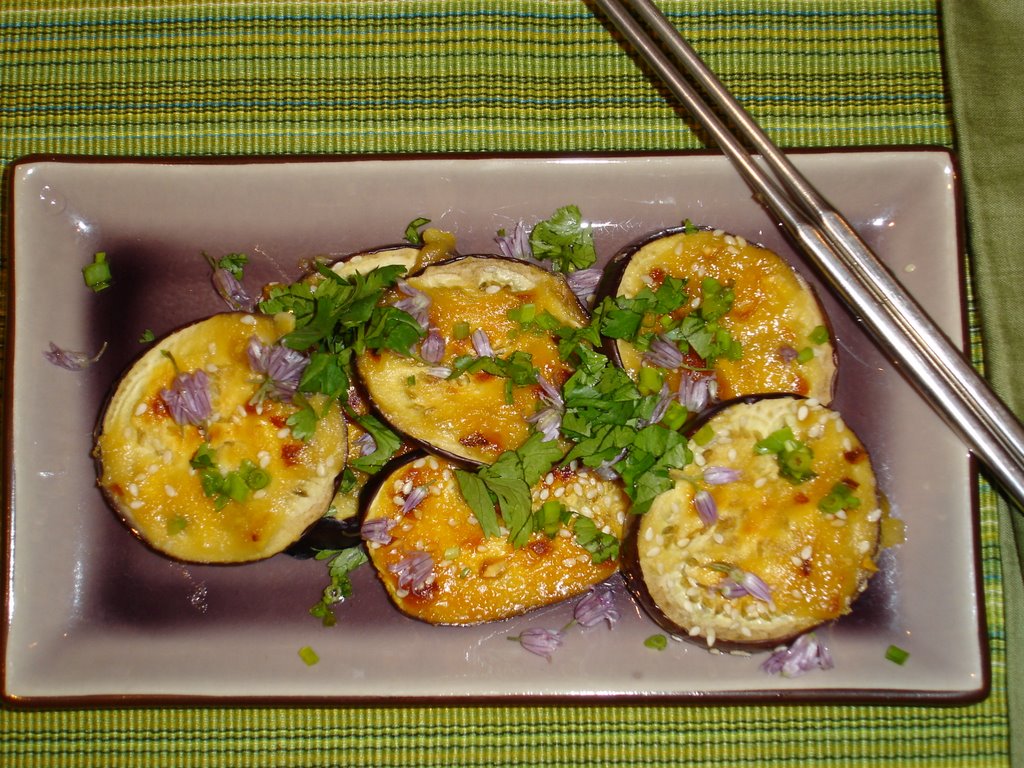
On Friday night M. and I had dinner at a Japanese fusion restaurant called Taku. We both ordered the 30 prix-fixe so as to sample a complete menu (after determining that the chef would be willing to create a vegetarian main dish option for me). My starter was a fried eggplant in miso sauce which reminded me of a dish I used to make at home that was somewhat similar. And so I kept thinking about that dish, dredged up the recipe and decided to make it for dinner on Saturday. Its an old Cooking Light recipe that I found in the Best of Cooking Light 4 (a collection I bought at the supermarket at some point).


Miso-Garlic Broiled Eggplant

Miso, garlic and crushed red pepper add intense flavor to this dish, which you can also serve as a side.

1/4 cup mirin
3 tablespoons yellow miso (soybean paste)
2 teaspoons grated peeled ginger
1 teaspoon dark sesame oil
1/2 teaspoon crushed red pepper
2 garlic cloves minced
4 Japanese eggplants, cut diagonally into 1/2-inch-thick slices (about 1 lb)
Cooking spray
1 tablespoon sesame seeds
1/4 cup thinly sliced green onions

1. Preheat broiler.
2. Combine first 6 ingredients, stirring with a whisk. Arrange eggplant slices on a baking sheet coated with cooking spray. Spread mirin misture evenly over eggplant slices; sprinkle with sesame seeds. Broil 8 minutes or until topping is golden. Place eggplant slices on a platter; sprinkle with onions.

Yield - 4 servings.

Calories - 115, Fat 3.3 g, Protein - 3.3 g, Carb - 16.1, Fiber - 4 g,Chol - 0, Iron - 1.1 mg, Sodium 475 mg, Calc - 46 mg


The rest of the meal at Taku was pretty tasty, but not hands-down-we-must-go-again-tomorrow-amazing. I'd like to go back again for a "tapas-style" meal because they had some amazing looking vegan spring rolls and some fried tofu sticks served with a chipotle mayo sauce that sounded intriguing. But would I do the price fixe again? Probably not. M. was similarly indifferent, although we were both taken by his dessert which was vanilla ice cream with "green tea fluff" which was like a green tea whipped cream. Mmmmm....

Taku
(718) 488-6269
116 Smith St
Brooklyn, NY 11201


Technorati Tags: , ,