Tuesday, July 11, 2006

Chocolatey-chip goodness!

My favorite cookie in the world is a chocolate chip cookie. I'm actually somewhat picky about desserts. If its not just right, I'll say no. Storebought supermarket cake - maybe not. Brownie with nuts - not for me. Double chocolate chip brownie without nuts - yes please!

My willpower is always tested with chocolate chip cookies though. I really find it almost impossible to turn down a good chocolate chip cookie. Unless it has nuts. But then I'll usually pick them out!

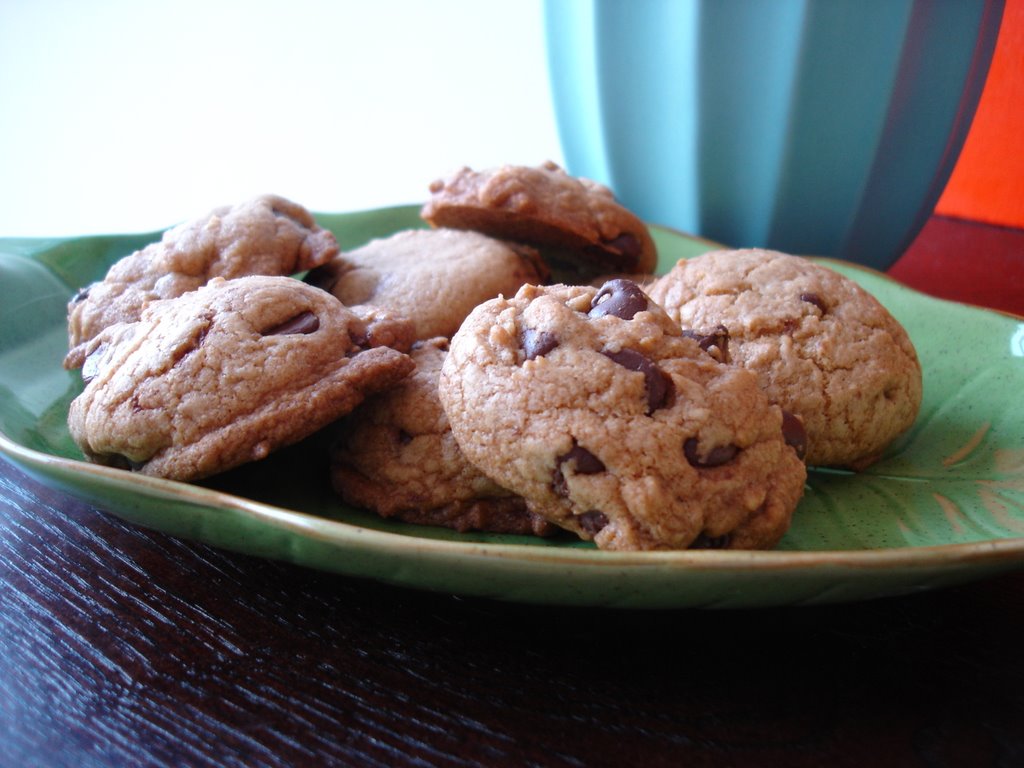
Yesterday I made the Alton Brown "Chewy" cookie recipe. I've made it before, but a long time ago and while I remembered the cookies as being good, I couldn't remember why. So I made them, and M.'s coworkers are benefiting from the vast majority today out of deference to my waistline. For those not aware, Alton Brown has a food show on the Food Network called "Good Eats", and has created three kinds of chocolate chip cookie recipes. The three recipes or the three types of cookies are called the "Puffy", the "Thin" and the "Chewy". Since I'm a big fan of chewy chocolate chip cookies, that's what I made.

I did have a little trouble with the recipe. First of all, its very precise. Tinkering with the steps will lead to disaster. When it calls for bread flour - the recipe means bread flour. That wasn't my problem. My problem was the size of my cookies relative to the baking time. The recipe calls for baking the cookies for 14 minutes, which I did. It also calls for using a scoop to scoop the dough, which I did. It just took me some time (and some cookies) to realize that my scoop must be much smaller than the recipe called for as my yield was much greater. I generally make cookies pretty small, so that when I eat several the damage isn't as great. :) But in this case, that meant I was over-cooking the cookies. Once I scaled back the cooking time, the cookies were complete in their chewy goodness.


The Chewy Recipe

Alton Brown - Good Eats

2 sticks unsalted butter
2 1/4 cups bread flour
1 teaspoon kosher salt
1 teaspoon baking soda
1/4 cup sugar
1 1/4 cups
brown sugar
1 egg
1 egg yolk
2 tablespoons milk
1 1/2 teaspoons vanilla extract
2 cups semisweet chocolate chips


Heat oven to 375 degrees F.

Melt the butter in a heavy-bottom medium saucepan over low heat. Sift together the flour, salt, and baking soda and set aside.

Pour the melted butter in the mixer’s work bowl. Add the brown sugar. Cream the butter and sugars on medium speed. Add the egg, yolk, 2 tablespoons milk and vanilla extract and mix until well combined. Slowly incorporate the flour mixture until thoroughly combined. Stir in the chocolate chips.


Chill the dough, then scoop onto parchment-lined baking sheets, 6 cookies per sheet. Bake for 14 minutes or until golden brown, checking the cookies after 5 minutes. Rotate the baking sheet for even browning. Cool completely and store in an air tight container.

Technorati Tags: , ,

Monday, July 10, 2006

The Accidental Italian (Meal).

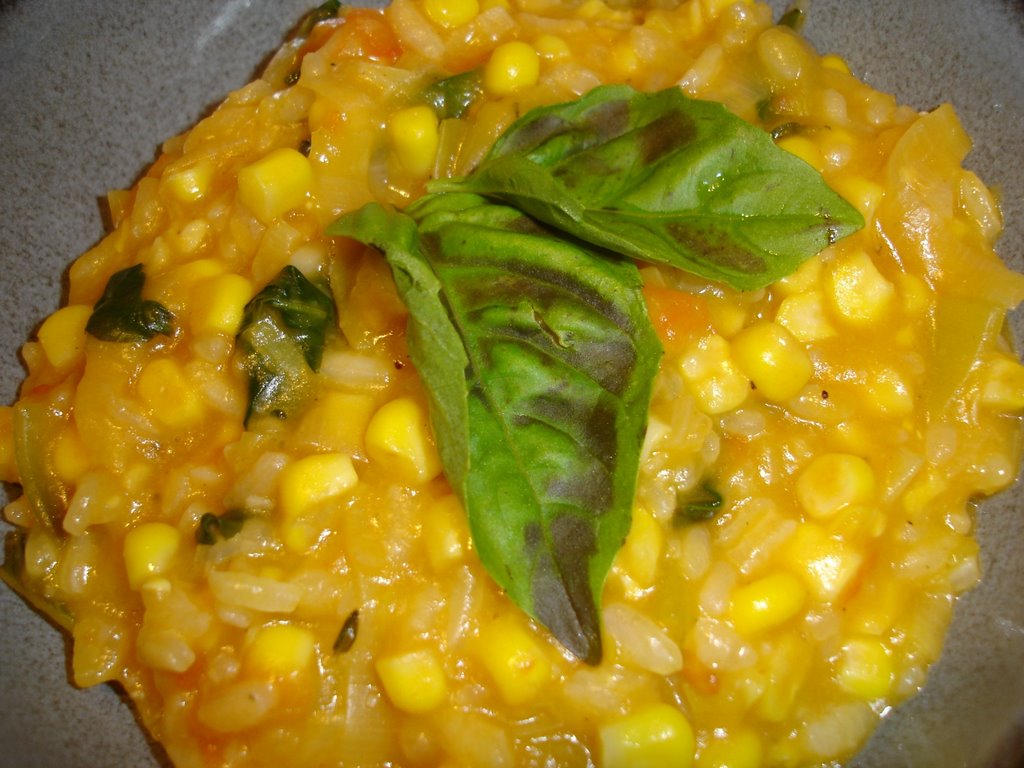
As I flipped through cookbooks yesterday afternoon, I noticed the recipe fo Summer Risotto with Tomatoes, Leeks and Fresh Corn. M. and I love risottos, but haven't made them at home for the longest time (for whatever reason). This particular recipe was in The Modern Vegetarian Kitchen by Peter Berley which is a cookbook I've not used nearly enough (although I seem to be remedying this fact of late). And just like that, dinner was decided. I decided to pair the risotto with a side dish of Pan-Seared Summer Squash with Garlic and Mint mostly because the recipe sounded very intriguing, and I had some lovely fresh spearmint needing to be used. Coincidentally, the summer squash recipe comes from Fresh Food Fast, also by Peter Berley. And, our meal would begin with caprese salad because we had some fresh mozzarella to use up from Friday. And, you can never have enough caprese salad.

Once I chose this recipe that involved corn kernels, M. and I both realized we'd need the Kuhn Rikon Corn Zipper. Luckily (or unluckily depending on your perspective) we have a kitchen store right around the corner who happened to have the Corn Zipper in stock. Using it was very easy, and despite the fact that it has somewhat of an eerie face I think it'll be a tool earning its drawer space frequently this summer.

It was only after I began cooking that I realized we were having an Italian meal of the evening of Italy's World Cup win. Sometimes I even amaze myself. :)


Summer Risotto with Tomatoes, Leeks, and Fresh Corn
The Modern Vegetarian Kitchen - Peter Berley (and Melissa Clark)

Author's notes - A quick and flavorful broth can be made from the corn cobs and leek tops.. Simply wash the leek tops well, place them in a pot with the corn cobs, cover with six cups of water and simmer, uncovered for 30 minutes. Strain off and discard the trimmings, and proceed with the risotto using the corn cob broth instead of vegetable broth.

My notes - I missed this notation about corn cob broth and used store-bought broth instead.

5 cups All-Season Vegetable stock (or store-bought), or water
2 tablespoons extra virgin olive oil
2 cups thinly sliced leeks (white and tender green parts only)
1 cup arborio rice
1/4 cup dry white wine such as a Sauvignon Blanc
2 cups kernels scraped from 2 ears fresh corn
1 lb ripe tomatoes, peeled, seeded and diced
2 teaspoons minced garlic
1/2 teaspoon fresh thyme leaves
1 cup torn basil leaves
1 teaspoon unsalted butter (optional - I added)
1/4 cup Parmesan cheese (optional - I added)
Coarse Sea Salt
Freshly Milled Black Pepper

1. In a 2 quart sauce pan over high heat, bring stock to a boil. Reduce heat so that stock maintains a steady simmer.

2. In a heavy 3 quart pan over medium heat, warm the oil. Add leeks and saute for 2 minutes until softened. Stir in rice and saute for 2 minutes, until grains are translucent. Pour in the wine and let simmer until absorbed.

3. Add the corn, tomatoes, garlicc and thyme. Add the stock, 1/2 cup at a time, stirring constantly until te liquid has been absorbed before adding each subsequent 1/2 cup stock. Continue stirring and adding stock, until grains are tender and creamy about 20-25 minutes. Add the basil during the last five minutes.

4. Stir in butter and cheese if using, and add salt and pepper to taste. Serve immediately.

Pan-Seared Summer Squash with Garlic and Mint
Fresh Food Fast by Peter Berley (and Melissa Clark)

Author's notes- Pan searing the squash carmelizes it and produces a nice crust. The sugars become concentrated, and their juices locked in. You can use the same technique with eggplant slices, and onion rings.

My notes - This was a really tasty recipe, but kind of a pain to make. The pan-searing took forever, and I think were I to make it again (and I would) I might grill the veggies instead. I tinkered with the amounts since I only had 1 1/2 pounds of squash. I used all the lemon juice, garlic and mint but only about a tablespoon of oil. And it still tasted great. Very garlicky, but very good.

2 pounds summer squash, sliced 1/2 inch thick
2 tablespoons freshly squeezed lemon juice
2 tablespoons fresh mint
2 garlic cloves, finely chopped
1 teaspoon coarse salt, plus additional to taste
1/2 teaspoon crushed red pepper flakes
3 tablespoons extra-virgin olive oil
Freshly milled black pepper

1. Warm a large, heavy skillet, griddle or grill pan over medium heat. Arrange the squash in a single layer and sear until speckled with brown and beginning to blacken (about five minutes). Flip the squash and cook for five minutes more. Repeat with remaining squash.

2. In a serving bowl, combine lemon juicce, mint, garlic, salt, and red pepper flakes and let marinade for 5 minutes. Whisk in oil.

3. Transfer seared squash to bowl, toss to coat with dressing and let rest for about five minutes. Season with additional salt and pepper, and serve.


Technorati Tags: , , ,

Sunday, July 09, 2006

Easy Cinnamon Bread

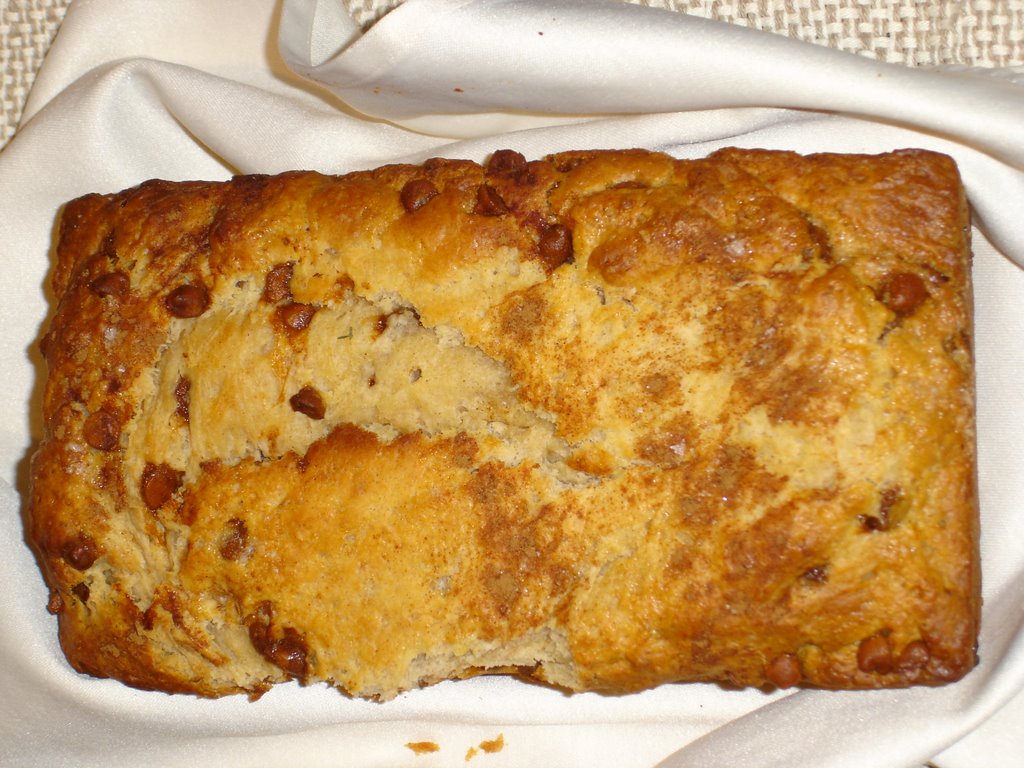
M. has been a big fan of watching the (now concluded) World Cup soccer games. This is okay with me (who pretty much detests most sports), as long as I have something to do. Today, he watched Italy beat France in a penalty kick shootout, and I browsed through the King Arthur's Baking Companion cookbook. I stumbled across the recipe for Easy Cinnamon Bread, and was instantly motivated to abandon the couch to start baking. I've made this bread once before, and it is positively the height of cinnamon deliciousness. And, it would fulfill this week's breakfast quest. See, since I'm having a lazy summer I've been sleeping in a bit later. And, the typical breakfast that I start my working days with at 7:00 am just isn't appealing at the much later hours of 9:30 am or 10:00 am. As a result, I've been experimenting with lighter fare that I can eat later in the morning and still be hungry for lunch. I think this bread will fit the bill perfectly for this upcoming week.


Easy Cinnamon Bread
King Arthur's Baking Companion

1 loaf, 16 slices

This bread is a cross between a typical baking powder-leavened quick bread and a yeast bread. The result: a loaf that tastes like cinnamon coffeecake, wondeful served plain and incredible toasted.

3 cups all purpose flour
1/2 cup sugar
2 tsps instant yeast
1 tsp cinnamon
1 tsp salt
1 cup warm milk
1/4 cup butter, melted
1 egg
1 tsp baking powder
1 cup (6 oz) cinnamon chips
Cinnamon-sugar, for topping

In a large bowl, mix together the flour, sugar, yeast, cinnamon and salt. In a separate bowl, whisk together the milk, butter and egg. Combine the wet and dry ingredients, beating until smooth. Cover and let the batter rest at room temperature for 1 hour, then stir in the baking powder and cinnamon chips.

Preheat oven to 350 deg. Spoon the batter into greased 8 1/2 x 4 1/2-inch loaf pan. Sprinkle the top with cinnamon sugar.

Bake the bread for 35 to 40 minutes, until a cake tester inserted into the center comes out clean. Remove the bread from the oven, let it rest in the pan for 5 minutes, then tranfer it from the pan to a rack to cool completely. Don't slice the bread while it's hot; it will slice much better when it's completely cool.


Technorati Tags: , ,

Saturday, July 08, 2006

Italian Inspiration.

I just love Italian food. It's vegetarian friendly, chock full of fresh herbs and cheeses and always very comforting to eat. Nothing soothes me more during the bitterly cold winter then a nice plate of baked ziti, lasagna or the like. But, those heavier dishes wouldn't seem as appropriate now during the toasty summer months, so when planning last night's meal I looked for lighter inspiration.

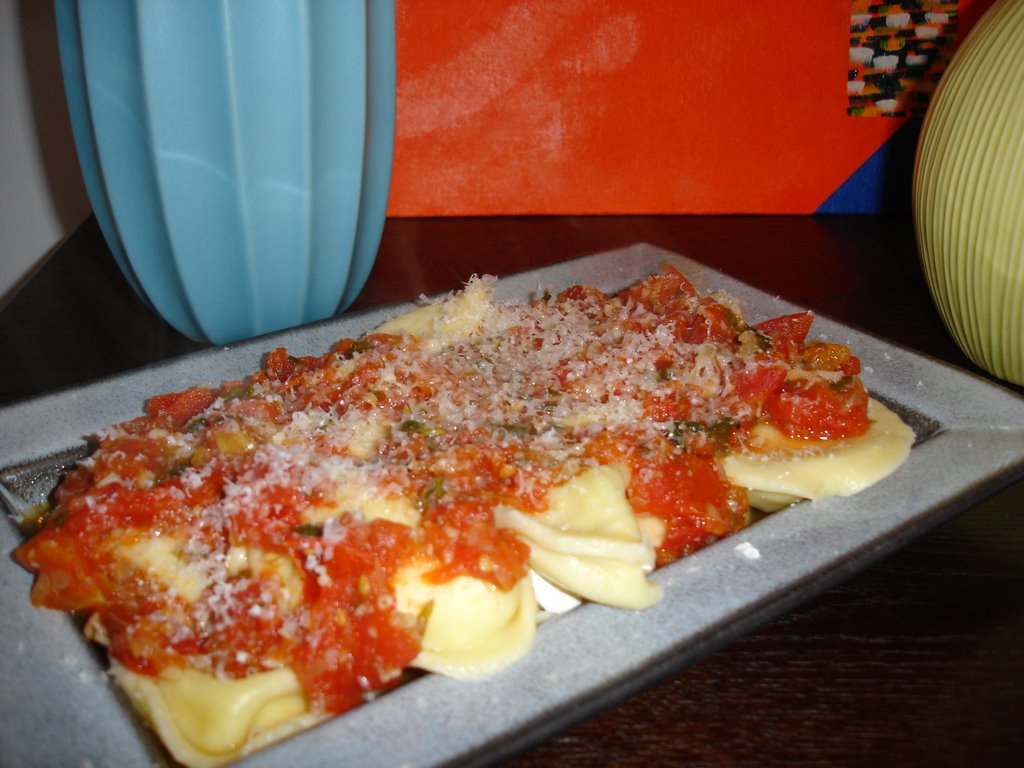
I decided to cheat, and buy frozen ravioli. We're lucky - here in Brooklyn there are several companies that make excellent frozen ravioli. Nothing pleases me more then browsing the multitude of choices in the Fratelli Ravioli (www.fratelliravioli.com) freezer (yes, they have their own freezer just for their ravioli) at our local grocery store. Whole wheat tofu spinach, pesto, spinach, lobster (doesn't appeal to me but its a choice), sundried tomato, stuffed shells . . . the list just goes on. So, sometimes I take the easy way out and splurge on their tasty products. They're not exactly cheap running at approximately ten dollars for sixteen ravioli, but the quality is good and way easier then making my own ravioli.

I wanted a fresh sauce to pair with my cheese ravioli, so I decided to try the Chunky Garden-Tomato sauce posted on the Cooking Light website. Of course, lacking a garden I had to actually buy tomatoes but the concept of the sauce seemed appealing. But then I didn't buy quite enough tomatoes, and had to throw in a can of diced which kind of marred the freshness of the sauce. Overall it was a tasty sauce that paired well with the ravioli and a side of homemade garlic bread.

And to start the meal, I decided a little caprese salad was in order. I love caprese salad. I could eat it every day and be happy. There is something about the sweetness of the ripe tomatoes, the creaminess of the fresh mozzeralla, the tang of fresh basil coupled with the mellowness of olive oil and basalmic vinegar - what's not to love? That qualifies as my idea of heaven. M. teased me when we spent a few days in Italy on our honeymoon two years ago because I think I had caprese salad every day while we were there. I just love it, and last night became the official launch of caprese salad season in our house.

My notes - I typically make caprese salad free-form, just adding the ingredients and winging amounts. But for the unfamiliar, this Cooking Light recipe would be a good place to start.

Tomato, Fresh Mozzarella, and Basil Salad
Cooking Light Magazine
Cooking Light's notes - In Italy, this is known as insalata caprese (Capri-style salad). It's best in summer, when tomatoes are at their peak. If you can get imported Buffalo mozzarella from Italy, use it, but domestic fresh mozzarella is fine, as well. Fresh mozzarella cheese is packed in water. It has a softer texture and sweeter, more delicate flavor than the regular part-skim mozzarella that is more commonly used in cooking for its superior melting qualities. 4 tomatoes, each cut into 6 slices (about 1 1/2 pounds)
1/2 pound fresh mozzarella cheese, cut into 12 slices
1/4 teaspoon kosher salt
1/4 teaspoon freshly ground black pepper
1 tablespoon extravirgin olive oil
1/2 cup fresh basil leaves
Arrange 4 tomato slices and 2 mozzarella slices on each of 6 salad plates. Sprinkle evenly with salt and pepper; drizzle with oil. Top evenly with basil. Yield: 6 servings NUTRITION PER SERVING
CALORIES 150(64% from fat); FAT 10.7g (sat 5.8g,mono 1.9g,poly 0.4g); PROTEIN 7.8g; CHOLESTEROL 30mg; CALCIUM 231mg; SODIUM 138mg; FIBER 1.5g; IRON 0.6mg; CARBOHYDRATE 5.4g
Chunky Garden Tomato Sauce
Cooking Light Magazine

1 tablespoon of olive oil
1 cup chopped onion
4 garlic cloves, minced
5 1/2 cups chopped seeded tomato
1/4 cup chopped fresh basil
2 tablespoons chopped fresh oregano
1 teaspoon sugar
1/2 teaspoon salt
1/4 teaspoon pepper
Heat oil in a large nonstick skillet over medium heat. Add onion and garlic; sauté 3 minutes. Add remaining ingredients, and bring to a boil, stirring occasionally. Reduce heat, and simmer 10 minutes, stirring occasionally. Serve over pasta or polenta, or on crostini. Yield: 3 1/2 cups (serving size: 1/2 cup) NUTRITION PER SERVING
CALORIES 63(36% from fat); FAT 2.5g (sat 0.3g,mono 1.5g,poly 0.4g); PROTEIN 1.7g; CHOLESTEROL 0.0mg; CALCIUM 25mg; SODIUM 181mg; FIBER 2.4g; IRON 0.9mg; CARBOHYDRATE 10.2g


Technorati Tags: , ,

Friday, July 07, 2006

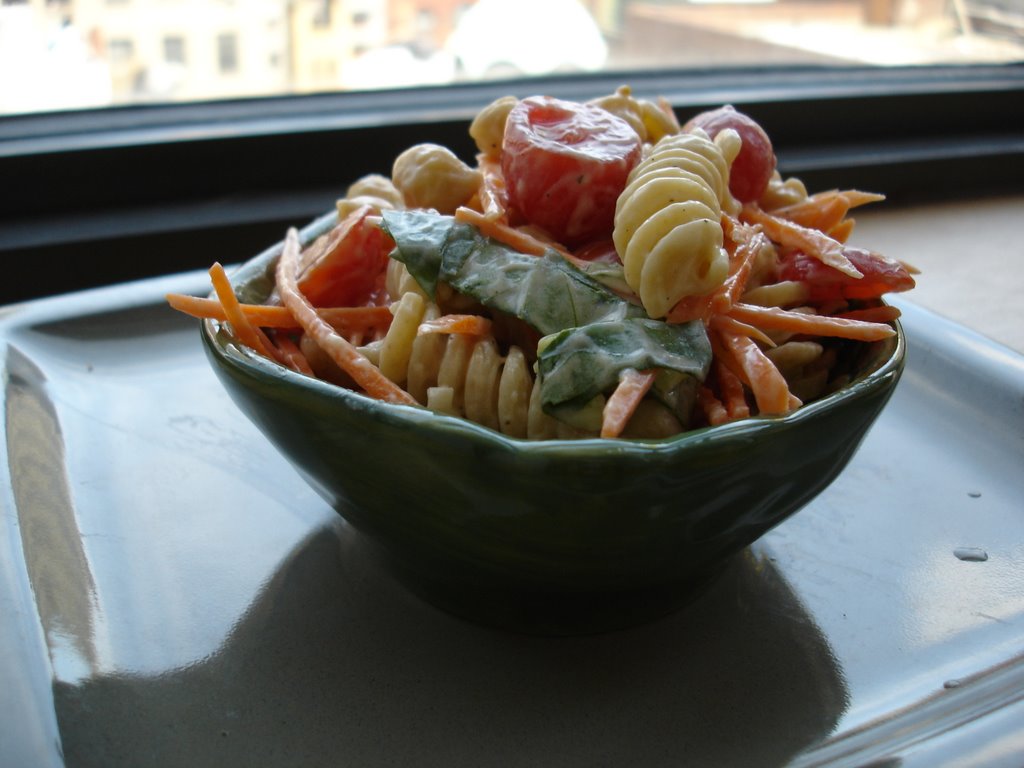
Creamy and delicious pasta salad.

Like many Americans, I have a fondness for creamy, mayonnaisey and delicious pasta salads. No matter how I try to lighten my diet, there's just something about that creamy richness (especially in the summer time) that I find appealing.

Since I'm not blessed with a metabolism that will let me indulge in such a dish too often, I've found ways to replicate the creamy rich texture with less fat. One easy way is the recipe I made for lunch today. It is from the magazine Eating Well, to which I've subscribed for several years. Much like my other favorite magazine Cooking Light, Eating Well strives to print healthy recipes that taste great while keeping things like oil and fat in moderation.

One of my favorite things about this recipe is that it is very forgiving. It can be easily doubled, easily halved, and the ingredients are easily substituted when one or two might be missing. Like today, I carefully wrote down all I needed to buy to make the salad but somehow the words "yellow or red bell pepper" didn't register, and my salad was bell pepper-less. I typically add baked tofu to the salad, but today I didn't have any so I added a can of chickpeas instead. And, I don't tend to measure the vegetable ingredients. I halved an entire container of grape tomatoes, threw in a bunch of pre-shredded carrots, slivered what looked to be enough basil and thus kept the preparation somewhat free-form. The dressing makes enough to coat the salad easily (along with whatever additions I've added) so I've never worried about having a too dry salad. Oh, and I leave out the olives because I don't like them. And its MY pasta salad - :) !


Garden Pasta Salad
Eating Well
Serves 6 1 cup portions

Eating Well's note: To make this salad more substantial, you can toss in canned chunk light tuna, cooked chicken or flavored baked tofu.

2 cups whole-wheat rotini (6 ounces)
1/3 cup reduced-fat mayonnaise
1/3 cup low-fat plain yogurt
2 tablespoons extra-virgin olive oil
1 tablespoon red-wine vinegar or lemon juice
1 clove garlic, minced
1/8 teaspoon salt, or to taste
Freshly ground pepper to taste
1 cup cherry or grape tomatoes, halved
1 cup diced yellow or red bell pepper (1 small)
1 cup grated carrots (2-4 carrots)
1/2 cup chopped scallions (4 scallions)
1/2 cup chopped pitted Kalamata olives
1/3 cup slivered fresh basil

1. Bring a large pot of lightly salted water to a boil. Cook pasta, stirring occasionally, until just tender, 8 to 10 minutes, or according to package directions. Drain and refresh under cold running water.
2. Whisk mayonnaise, yogurt, oil, vinegar (or lemon juice), garlic, salt and pepper in a large bowl until smooth. Add the pasta and toss to coat. Add tomatoes, bell pepper, carrots, scallions, olives and basil; toss to coat well.

Per serving: 205 calories; 9 g fat (2 g sat, 5 g mono); 1 mg cholesterol; 29 g carbohydrate; 6 g protein; 4 g fiber; 291 mg sodium.


Technorati Tags: ,

Wednesday, July 05, 2006

A use-up yet surprisingly coordinated meal.

I am a notorious hoarder of purchased food items. Some people hate grocery shopping. I love it, and have this strange compulsion to buy things without checking first to see if I already have the item in our already bursting pantry/fridge/freezer. I've learned to plan menus (and shop accordingly) so as to minimize the storage of items like three kinds of lentils, two kinds of bread crumbs, ten cans of beans etc.

But, I view this trait as a good thing, as it is a very rare night that I cannot go to our pantry and concoct a meal. Now, that's not to say that I won't pretend otherwise when I'm wanting to order takeout or go out to eat, but the fact remains that we could eat well for several weeks without stepping foot into a grocery store. That's evolutionary progress right in our own kitchen!

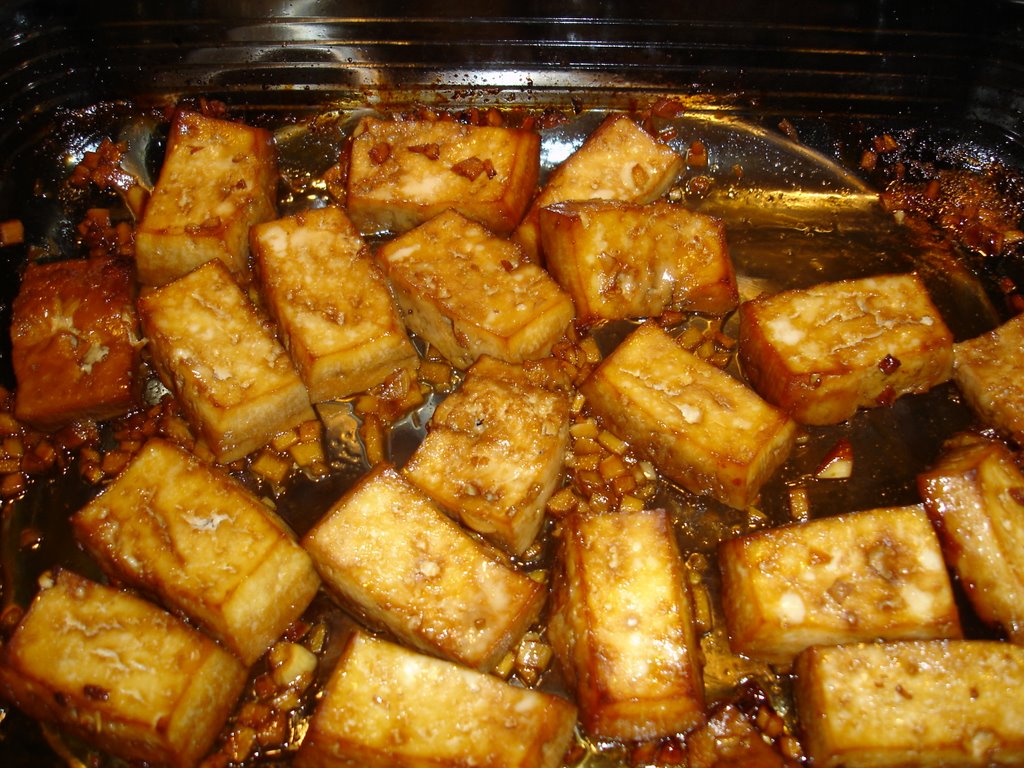
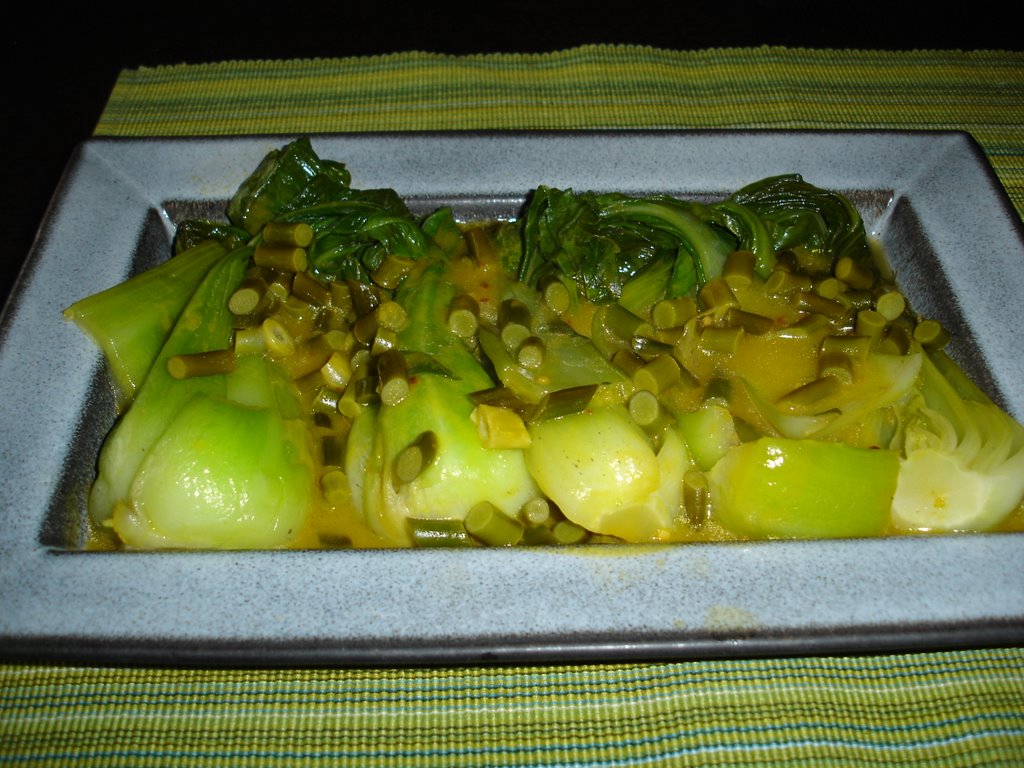
Tonight's meal was using up various odds and ends that needed to be cooked before they went bad. Like, the green beans I bought at the market last Tuesday. And the bok choy I bought to make M. something brothy (as he requested in the comment section of Tales from the Farmer's Market, Part 1). But, most importantly, my hoarding tendencies came into play because I was able to decide to make a favorite tofu preparation, have all the ingredients and be ready to make the recipe within minutes. I had the tofu, and the sauce fixings, and no trip to the grocery store was necessary.

This is one of my all-time favorite tofu preparations. It is even better when allowed to marinate for a few hours before baking. I didn't have time for that today, but it does make an already great recipe even better. It is great alone, or topping noodles with a simple veggie stir-fry. It would be a great recipe to try on alleged tofu-haters...

Sweet Ginger Tofu

The Modern Vegetarian Kitchen - Peter Berley

Yield: 4 to 6 servings (I don't think we've ever gotten six servings out of this delicious tofu!)

1/4 cup soy sauce
1/4 cup mirin
1/4 cup rice vinegar
2 tablespoons honey
2 Tbs minced gingerroot
2 Tbs light sesame oil -- (note: I only use 1 Tbs)
1 tsp minced garlic
1 pound firm tofu -- rinsed, patted dry, and sliced 1/2 inch thick

Preheat the oven to 350F In a small bowl, combine the soy sauce, mirin, vinegar, honey, ginger, oil, and garlic. Lay the tofu slices in a baking dish that can hold them in a single snug layer. Pour the marinade over the tofu. Bake for 45 minutes, or until the tofu is nearly dry and well browned. Serve hot or cold.

I also made the braised bok choy with garlic scapes recipe featured on Pie in the Sky
. Thanks again to Caroline who posted a reminder about this recipe on my Tales from the Farmer's Market post - it was delicious.

Braised Bok Choy with Garlic Scapes

Courtesy of Kate at A Pie in the Sky

INGREDIENTS

2 heads bok choy, sliced in half lengthwise and washed

1 cup vegetable stock

1 tablespoon butter

2 garlic scapes, diced

1/2 teaspoon sesame oil

Pinch of cracked red pepper

Salt to taste
Toasted sesame seeds (available in Chinese markets and many supermarkets) I omitted these
.

DIRECTIONS
Melt butter in large sauté pan over medium heat. Add scapes and stir-fry to soften, about 1 minute. Add stock and bring to a simmer. Arrange bok choy in pan and cover, simmering for about five minutes or until tender.

Transfer bok choy to serving dish and cover to keep warm. Bring remaining
broth and scapes to a boil and reduce to 1/2 cup or less. Stir in sesame oil and pepper; salt to taste. Pour over bok choy and sprinkle with sesame seeds; serve hot.
Serves 2.

And lastly, I created my own green bean recipe this evening that turned out to be surprisingly tasty. But unfortunately, I didn't really take many measurements. But to the best of my memory, here goes ...

Mirin-Soy Glazed Green Beans


2 cups of green beans
2-3 cloves of chopped garlic
1/4 cup vegetable broth
2 tablespoons of mirin
3 tablespoons soy sauce
Sprinkle of hot pepper flakes
1 tsp sesame oil
salt/pepper to taste

Wash and trim the green beans, discarding stems. Coat nonstick skillet with cooking spray, turn on heat to High and add green beans. Add garlic and cook for one minute. Add vegetable stock and turn down to medium. Cook green beans for approximately 2 minutes or until beginning to soften. Add mirin, soy, hot pepper, sesame oil, salt and black pepper and stir. Adjust heat to medium high, and reduce sauce with frequent stirring of the beans. When most of the sauce has reduced, and green beans are tender (even wilted) and coated with glaze (to taste) then remove from heat and serve.

This was the whole meal, but you can see the beans in the upper left hand corner. I didn't think they warranted their own picture, until I tasted them.


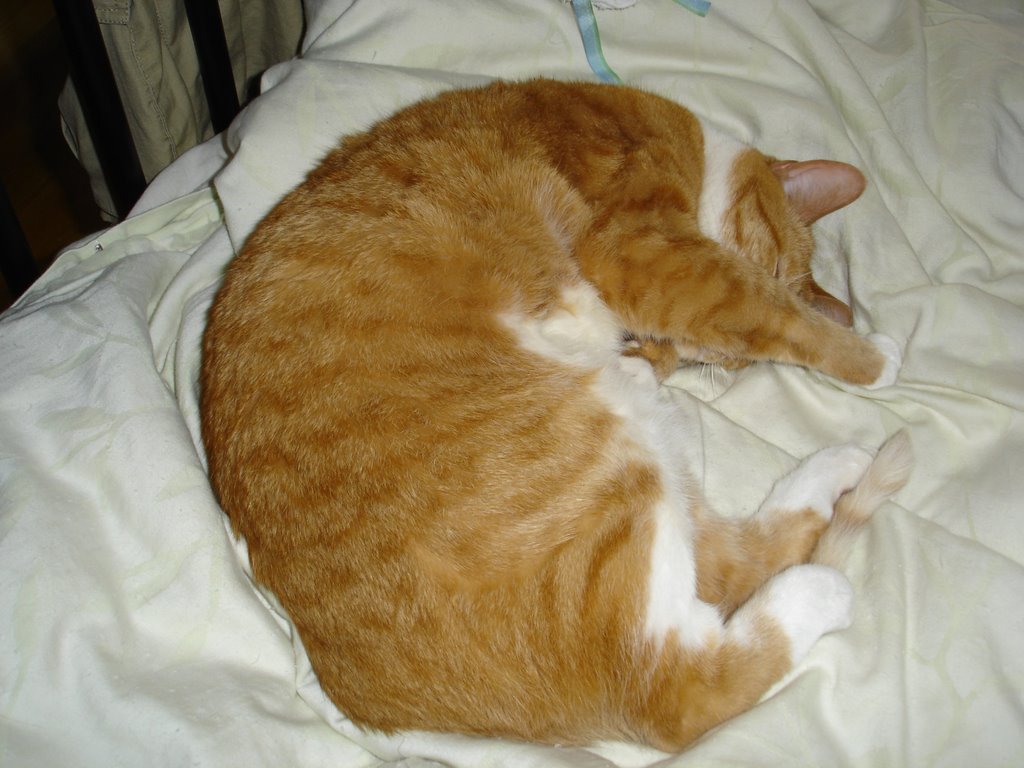
All this cooking wore poor Helios out! Hang in there little man, the kitchen is closed for today.


Technorati Tags: , , , ,

An anniversary brunch.


As part of a celebratory brunch, we tried a new waffle recipe. M. and I both love waffles, but we tend to reserve them for a special treat as they aren't always the most filling of meals. But we thought our anniversary merited the trying of Mark Bittman's buttermilk waffle recipe. And then we decided to take the event up yet another notch by enjoying a bottle of champagne along with our waffley goodness. This bottle of Nicolas Feuillatte was given to us by a dear friend on the occasion of my (second) graduation from graduate school. While M. and I are big fans of sparkling wine (me perhaps more than M.), we tend to save real champagnes for an actual occasion. But a prosecco or cava, or a sparkling wine lacking the distinctive champagne classification but still yielding bubbles might make a more regular appearance on our table. We're big fans of the Nicolas Feuillatte champagnes - we find them reasonably priced and yet as crisp and flavorful as other champagnes with much heftier pricetags. [This now concludes my amateur wine review - I anticipate that M. will be emailing me shortly with his more oeneophilic perspective once he sees what I've written and if that is the case, I will add his thoughts to the wine review.]


Here are our lovely waffles. M. was kind enough to make them for me, which was a lovely treat. As much as I love to cook, I also love to be cooked for and was quite happy to sit back and relax while the kitchen hummed with activity. M. separated the finished batter into two bowls and added blueberries to one, and chocolate chips to the other. He had blueberry waffles and I had my favorite - chocolate chip waffles! Does life get any better? The waffles were sprinkled with fresh berries, and served with delicious maple syrup. And the champagne of course complimented the meal delightfully. Mmmmm.........


Rich Buttermilk Waffles
Mark Bittman - How to Cook Everything
Makes 4-6 servings (M. halved recipe)

The best waffles you can make at the last minute, with a sour tang that sets of maple syrup beautifully.

2 cups all-purpose flour
1/2 tsp salt
2 tablespoons sugar
1 1/2 tsp baking soda
1 3/4 cup buttermilk or 1 1/2 cups sour cream or plain yogurt thinned with 1/4 cup milk
2 eggs, separated
4 tablespoons (1/2 stick) butter melted and cooled
1/2 tsp vanillar extract
canola or neutral oil for brushing on waffle iron (M. used cooking spray)

1. Combine dry ingredients. Mix together the buttermilk and egg yolks. Stir in the butter and vanilla (if using).
2. Brush waffle iron lightly with oil and preheat. Stir the wet into the dry ingredients. Beat egg whites with the whisk or electric mixer until they hold soft peaks. Stir them gently into the batter.
3. Spread a ladleful or so of batter onto the waffle iron and bake until waffle was done (usually 3-5 minutes). Serve immediately, or keep warm in low oven.

For buttermilk - you can sub 1 3/4 cups of milk at room temperature mixed with 2 tablespoons of white vinegar and left to clabber for ten minutes.


Time - 10 minutes plus time to bake


Technorati Tags: , ,

Tuesday, July 04, 2006

Monday, July 03, 2006

When you mess up pizza ....

... you get a calzone!

M. and I are big pizza fans. We have a favorite whole-wheat crust recipe which is easy to mix up in the food processor and rises quickly. So, preparing pizza has become a favorite and relatively reliably tasty but easy meal in our house. Usually. Today was an exception. After rolling out the dough, I realized I was out of parchment paper. Typically, I assemble the pizza on the parchment paper, slide it into the oven onto the pizza stone where it cooks. And when finished, I slide it right back onto the bottom of a baking pan and remove. It is a flawless system that hasn't failed me yet.

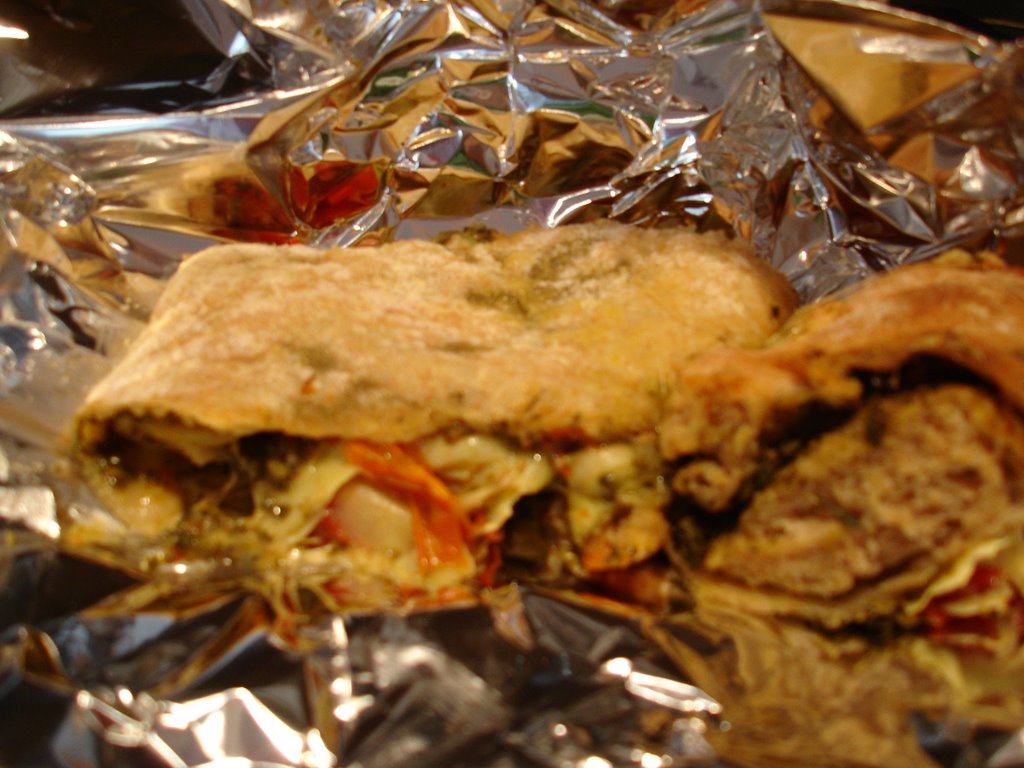
But today, I was out of parchment paper. I assembled the pizza onto the back of a pan covered in cornmeal and hoped it would slide off anyway. No dice. We tried several other devices and likewise, no dice. This pizza was planted. Dressed in the last of the homemade pesto, drained chopped tomatoes, artichoke hearts, mozzarella cheese and sprinkling of parmesan - it wasn't budging.

Frustrated, I flipped it over on itself and asked M. how he felt about a calzone for lunch. He thought it was a fine idea. And it was, although were I to set out making a calzone I think less toppings would be more effective as this particular specimen was quite topping dense. But it was tasty, and kept lunch from being a total waste!

So voila! My Pesto, Artichoke Heart and Mozzarella Calzone makes its international debut.
I used the 12 oz dough recipe to create my pizza/calzone. And I topped it with:

approximately 1/2 cup leftover fresh pesto
1 can quartered artichoke hearts chopped
approximately 3/4 cup part-skim mozzarella cheese
1/4 cup finely grated parmesan
1 can diced tomatoes - drained

Again, the pizza would have been spectacular. Were I to plan making the calzone again, I would probably use less toppings (perhaps half a can of diced tomatoes drained and half as many artichoke hearts) just because the calzone was literally almost bursting with toppings in a few places. But the results were yummy - if a little homely!


So this is our house "pizza dough". I love that it uses the food processor which I think is just the smartest (and quickest) way to make dough. We happen to love its nutty flavor, and I actually use regular yeast but give the dough a little more time to rise. And that's worked for me - mostly because I haven't found quick-rise yeast in my usual shopping haunts yet.

Whole-Wheat Pizza Dough


Yield: Makes 1-12 ounce or 1 pound dough
Active Time: 5 minutes
Total Time: 15 minutes
Ease of preparation: Moderate

To improve the nutritional profile of pizza, include whole-wheat flour in the crust. Using half whole-wheat and half all-purpose yields a light crust with a distinctive nutty taste. Quick-rising yeast shortens rising time to just 10 minutes, making wholesome homemade pizza a possibility for busy weeknights.

To make 12 ounces dough:
3/4 cup whole-wheat flour
3/4 cup all-purpose flour
1 package quick-rising yeast (2 1/4 teaspoons), such as Fleischmann's RapidRise
3/4 teaspoon salt
1/4 teaspoon sugar
1/2-2/3 cup hot water (120-130°F)
2 teaspoons extra-virgin olive oil

To make 1 pound dough:
1 cup whole-wheat flour
1 cup all-purpose flour
1 package quick-rising yeast (2 1/4 teaspoons), such as Fleischmann's RapidRise
1 teaspoon salt
1/2 teaspoon sugar
3/4 cup hot water (120-130°F)
1 tablespoon extra-virgin olive oil

1. Combine whole-wheat flour, all-purpose flour, yeast, salt and sugar in a food processor; pulse to mix. Combine hot water and oil in a measuring cup. With the motor running, gradually pour in enough of the hot liquid until the mixture forms a sticky ball. The dough should be quite soft. If it seems dry, add 1 to 2 tablespoons warm water; if too sticky, add 1 to 2 tablespoons flour. Process until the dough forms a ball, then process for 1 minute to knead.
2. Transfer the dough to a lightly floured surface. Coat a sheet of plastic wrap with cooking spray and place it, sprayed-side down, over the dough. Let the dough rest for 10 to 20 minutes before rolling.

Nutrition information:

Per 12 ounces: 766 calories; 12 g fat (2 g sat, 8 g mono); 0 mg cholesterol; 142 g carbohydrate; 26 g protein; 16 g fiber; 1,882 mg sodium.
Per 1 pound: 1,032 calories; 18 g fat (3 g sat, 12 g mono); 0 mg cholesterol; 189 g carbohydrate; 33 g protein; 21 g fiber; 2,509 mg sodium

To make ahead: The dough will keep, in a plastic bag coated with cooking spray, in the refrigerator for up to 2 days. Bring to room temperature before using.


Technorati Tags: , ,

All's quiet on the kitchen front?

Not exactly, although you wouldn't know that from the number of posts. But I haven't spent as much time at the computer with M. home for a four day weekend. But, I have done some cooking and here's a quick preview of what's been cooking in my veggie kitchen of late. And I promise to post recipes later this week. :)
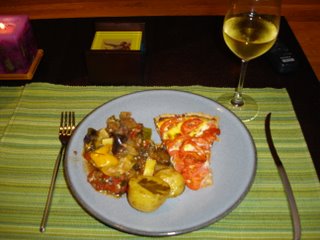


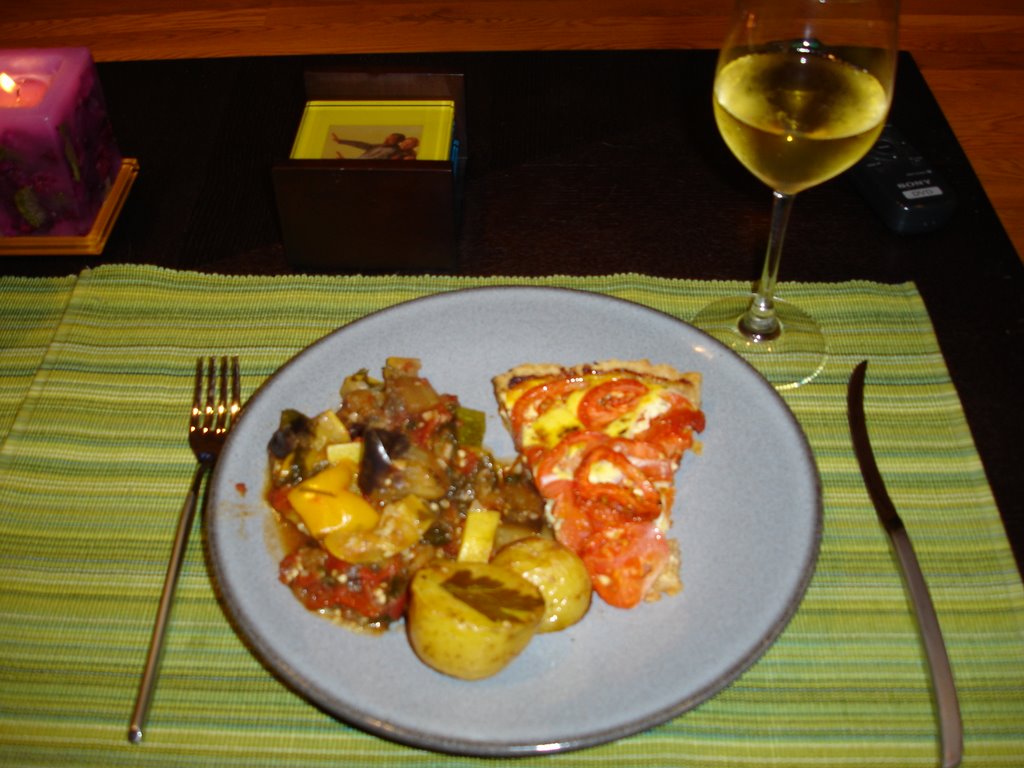
This was an elegant French inspired Saturday night dinner. Which ended up being quite involved. We ate around 9:30 pm ! But it was worth the wait. On the left you have homemade ratatouille (my own creation), on the right you have a tomato and gruyere tart and at the bottom you have herb roasted potatoes. The meal began with a goat cheese salad course, which we forgot to photograph! Oops.
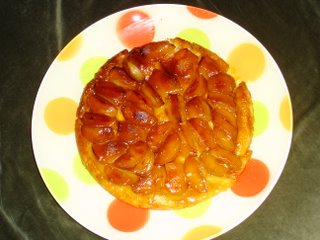


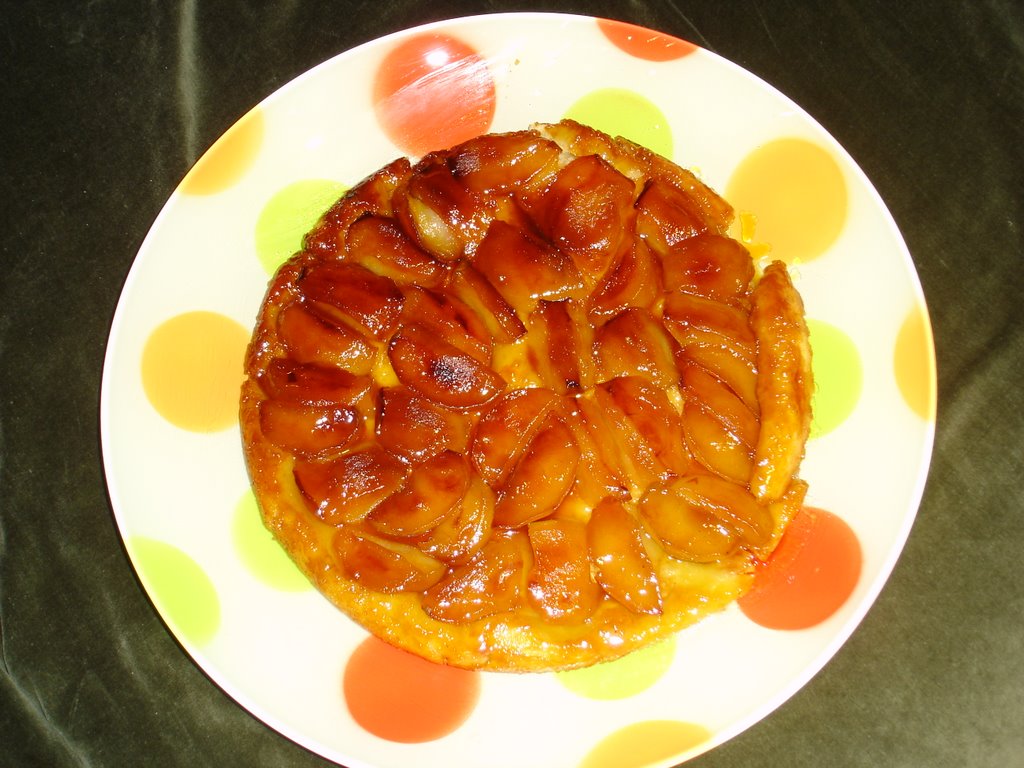
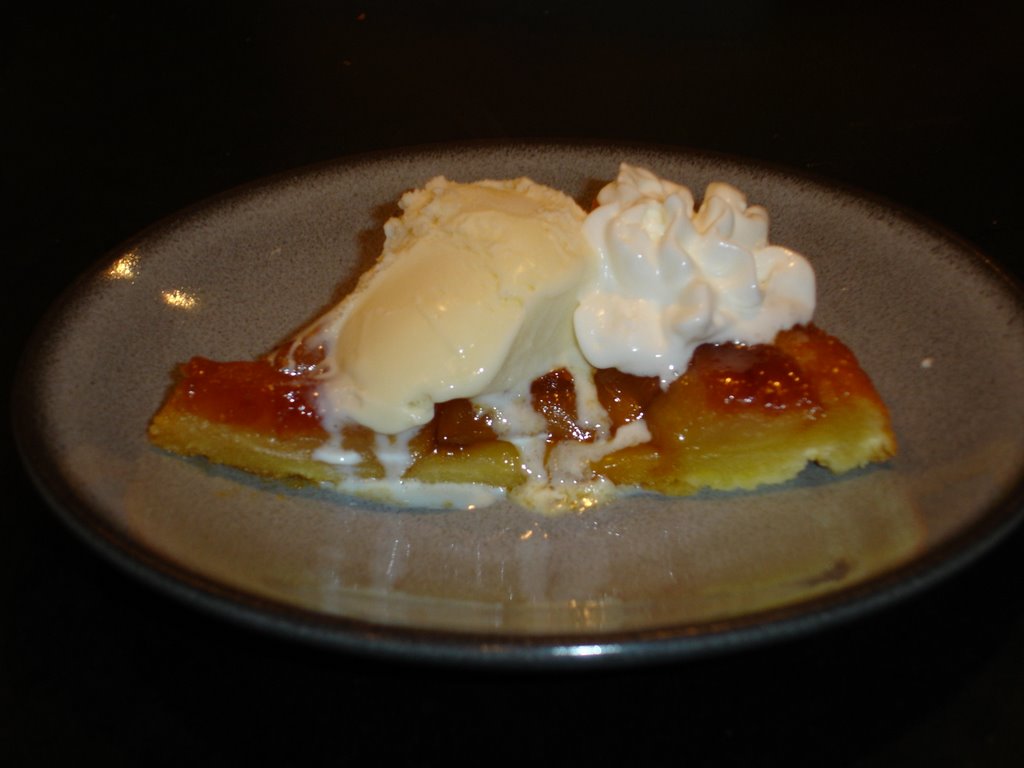
I still had those six apples kicking around from our last CSA pickup, so I decided to try making Tarte Tatin, or a Carmelized Apple Tart for the conclusion of our French inspired meal. I've never made this dessert before, and found it both easy and involved. It was involved because of making the tart crust and peeling and quartering those apples, but once those tasks were accomplished the actual assembly and baking of the dish was relatively easy. And the results were very tasty - M. was quite impressed.


The tart recipe I used is from a wonderful book called Once Upon a Tart by Frank Mentesana and Jerome Audureau. The cookbook features recipes from a restaurant in the Soho part of New York City which actually wasn't too far from where M. and I used to live. I'd like to say that everything I've tried from the cookbook has been excellent. It actually has BUT, I've tried the same recipe three times now! We just can't get enough of the creamy cheesey tomatoey texture of this tart. One day we'll branch out... maybe.

Provencal Tart with Gruyere Herbs de Provence

Notes from authors - In preparation for a picnic, make this tart the day before. After the completed tart cools on the counter, cover it with plastic wrap and keep it in the refrigerator until you are ready to pack your basket. The tart crust recipe yields two 9-inch crusts. I par-bake (see below) the extra shell, let it cool, pop it in a heavy-duty plastic bag and freeze it. The next time you go to make a tart, your pulse will jump with excitement when you realize you have a homemade shell ready to be filled - on the next sunny day your second tart will come together in a flash.

My notes - I actually froze the second tart dough wrapped in plastic wrap and sealed in a freezer bag. When I wanted to make the second tart, I simply defrosted the dough, rolled it out and parbaked it.

For the Tart:

12-15 plum tomatoes (2 1/2 pounds), cored and cut into 1/4- inch-thick rounds (We actually found 6-7 plum tomatoes to be a more appropriate amount for a single tart recipe)

2 tablespoons Dijon mustard

1 par-baked 9-inch Crunchy Savory Tart Crust

1 cup coarsely grated Gruyere cheese

1 teaspoon herbes de Provence

2 large eggs

1/4 cup light cream

1 teaspoon salt

A few turns of freshly ground black pepper

For the (basic) Crust/Rosemary-Whole Wheat Tart Crust (the one I made this time):

2 1/2 cups unbleached all-purpose flour/2 cups unbleached all-purpose flour

3 tablespoons semolina flour/1/2 cup whole wheat flour

1 teaspoon salt/same

12 tablespoons (1 1/2 sticks) cold unsalted butter, cut into 1/4-inch cubes/same

3 tablespoons cold solid vegetable shortening/same

A glass of ice water/same

/1 tablespoon chopped fresh rosemary

9" tart pan with removable bottom.

To Prepare the Crust:

1. Position oven racks so that one is in the center and preheat oven to 400 degrees.

2. Put the flours and salt in the bowl of a food processor fitted with a metal blade, and pulse a couple of times just to integrate the flours and salt.

3. Add the butter and shortening all at once and pulse quite a few times, until the mixture forms little balls, like moist crumbs, and no chunks of butter or shortening remain. You have to pulse, not run, the food processor. The worst thing that can happen at this stage of the crust-making game is for the flours and fats to come together into a paste.

4. Remove the blade from the food processor and dump the dough crumbs into a big bowl. Add chopped rosemary if making rosemary-whole wheat variation. Fill a tablespoon with ice water and sprinkle over the surface of the dough. Repeat with 3 more tablespoons.

5. Use your hands or a wooden spoon to bring the dough together into a ball, adding more water if needed, 1 tablespoon at a time. The dough should be just past crumbly, but holding together. You don't want it to be so wet that it sticks together or turns white in color.

6. Cut the dough in half, and wrap each half in plastic wrap. Press each half with the palm of your hand to form a disk. Refrigerate at least 30 minutes before rolling out.

7. Roll out 1 disk of dough to 1/4 inch thick. Fit it into your tart pan and chill for 30 minutes. Then use the tines of a fork to prick holes over the bottom of the tart. Line the dough with parchment paper or aluminum foil, and weigh down with pie weights or dried beans.

8. Place the tart shell on the center rack in the oven, and bake for 10 minutes. Remove the paper and weights from the pan. Return it to the oven, and bake until the crust is golden brown and toasted all over, 5-10 more minutes for a par-baked tart shell. For a fully baked tart shell, bake for another 15 minutes at 400 degrees or until it's golden brown all over.

9. Remove the tart shell from the oven and set it on a wire rack to cool. Can be prepared a day in advance. Cover and keep at room temperature.

To prepare the tart:

1. Position your oven racks so that one is in the center, and preheat the oven to 375 degrees.

2. Put the tomato slices in a colander, and place it in the sink. Let the tomatoes sit for 15 minutes to drain off any excess liquid.

3. Spread the mustard evenly over the tart shell with a rubber spatula or the back of a spoon. Sprinkle the cheese over the mustard, and sprinkle the herbes de Provence over the cheese.

4. Working from the outside in, lay the drained tomato slices in overlapping concentric circles, making sure the crust is covered entirely.

5. Whisk the eggs in a small bowl, or a large measuring cup with a spout, to break up the egg yolks. Whisk in the cream, salt, and pepper. This is your custard. Pour the custard evenly over the tomatoes until it comes to about 1/4 inch from the top edge of the crust. (If you have extra, don't worry about it; if you don't have enough, pour a little cream on top.)

6. Place the tart on the center rack in the oven, and bake for 1 hour to 1 hour and 20 minutes, or until the custard is set. Set custard won't jiggle when you shake the pan and will be firm when you touch it. (The custard will also be hot, so touch it lightly.) The tomatoes in this tart may give off a lot of liquid; don't confuse this with uncooked eggs and accidentally overcook your tart. The liquid will evaporate as the tart cools.

7. Remove the tart from the oven and set it on a wire rack. Allow the tart to cool slightly.

8. To remove the tart from the pan, rest it on a big can. Make sure the tart is steady and balanced. Slide the outside ring of the pan down off the tart. Then place the tart on your work surface, and slide it off the bottom of the pan and onto a rim- less serving dish or a cutting board. Serve warm or at room temperature.

Makes one 9-inch tart.
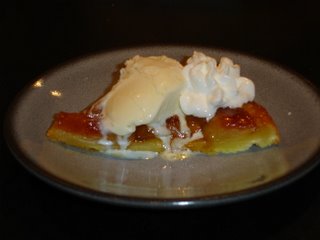


Caramelized Apple Tart
Mark Bittman - How to Cook Everything

Rich Tart Crust
(makes enough for a generous 10-inch tart crust)
Time - 10 minutes

Egg yolks and a little extra butter enrich this crust giving it more flavor and body than a typical pie crust. In fact, it's like a great big cookie.

1 1/2 cups all-purpose flour (plus more as needed)
1/2 teaspoon salt
2 tablespoons sugar
10 tablespoons (1 1/4 sticks) cold, unsalted butter cut into 10 pieces
2 egg yolks (more as needed)
3 tablespoons ice water (plus additional fourth if needed)

1. Combine flour, salt, and sugar in the container of the food processor. Pulse once or twice. Add the butter, and turn on the machine. Process until the butter and flour are blended, and the mixture looks like cornmeal (about 10 seconds). Add egg yolks and process another few seconds.
2. Place the mixture ina bowl and sprinkle 3 tablespoons of water over it. Use a wooden spoon or rubber spatula to gradually gather mixture into a ball. If mixture is dry, add another tablespoon of ice water. When you can make the mixture into a ball with your hands, do so. Wrap in plastic, flatten into a small disc and freeze dough for 10 minutes (or refrigerate for 30).
3. You can roll the dough between two sheets of plastic wrap, usually quite successfully. Sprinkle both sides with a little more flour and then proceed. Or, sprinkle a countertop or large board with flour. Unwrap dough, place on work surface and sprinkle with flour. If the dough is hard, let it rest for a few moments until it gives way when pressed with fingertips.
4. Roll with light pressure, from the center out. If dough seems sticky, add more flour. if dough gets sticky while rolling return to refrigerator for ten minutes before proceeding. Continue to roll, adding flour as necessary and rotating/turning dough over once or twice. When diameter of dough is about 2 inches greater then that of the tart pan, move dough to pan by draping it over rolling pin or folding into quarters. Unfold and press into sides and bottom of pan.
5. Before filling, freeze dough for 20 minutes.

Caramelized Apple Tart
Tarte Tatin
Mark Bittman - How to Cook Everything
Makes about 8 servings
Time - 1 hour

Author's notes - There is nothing better than tarte tatin but, to be its best, it should be made almost at the last minute. The ideal is to prepare it just before serving the meal, and bake it while eating.
My notes - Agreed. The tarte tatin was absolutely divine right after being prepared, although leftovers kept very well, and tasted great up to three days later. We did reheat in the toaster oven - microwaving would not have been as tasty I think.

6 Granny Smith or any other tart, hard apple
Juice of 1/2 a lemon
8 tablespoons of butter cut into pieces
3/4 cup of sugar
1 recipe Rich Tart Crust, chilled but not yet rolled out

1. Preheat oven to 400 degrees F.
2. Peel, core and quarter apples. Toss with lemon Juice. Press the butter into the bottom and sides of medium, heavy, ovenproof skillet (cast iron works well). Sprinkle butter with sugar. Press apple slices into sugar, arranging in concentric circles and making sure to pack them in tightly. They will shrink during baking.
3. Place pan over medium-high heath. Cook for 15-20 minutes, or until butter-sugar mixture has turned a deep dark brown. While cooking, roll out pastry. When apples are ready, remove from heat. Lay pastry on top of apples, bringing the dough to the edges of the pan to seal. Prick dough with a fork, and bake about 20 minutes or until pastry is golden brown.
4. Remove tart from oven, and let sit for 5 minutes. Shake hot pan to loosen apples stuck to bottom of the skillet. Invert whole tart onto serving dish (being careful not to burn yourself as juices are hot). Serve immediately or at room temperature.


And finally, the potatoes. I took the basic recipe for these potatoes from Pie in the Sky

I would definitely make these again. They were low-maintenance (minus the shaking every ten minutes or so) and looked really cool. Although I only make a fresh parsley variation (it's what we had) but I think I need to press harder next time as many leaves fell off.

Cameo Herbed Potatoes

INGREDIENTS

1/2 cup plus two tabelspoons extra-virgin olive oil
1 teaspoon coarse sea salt
1/2 teaspoon fresh-cracked black pepper
2 large russet potatoes
About 5 sprigs of fresh rosemary
About 5 whole leaves of flat-leaf parsely

DIRECTIONS

Preheat oven to 400 degrees F.

Pour 1/2 cup olive oil into a 9x13 glass baking dish. Add salt and papper and swirl to combine.

Rinse potatoes and pat dry. slice each potato into 1-inch thick rounds. Press a rosemary sprig or a parsley leaf on one side of each slice (the cut side of the ends) and place herb-side-down into the oil. Drizzle remaining 2 tablespoons oil over potatoes and sprinkle with salt.

Bake until potatoes are soft and nicely browned, about 40-45 minutes. Shift potoes in pan every ten minutes to prevent sticking. When done, remove from the pan and turn herb-side up. Enjoy!I


Technorati Tags: , , , ,