Monday, August 28, 2006

Back to work ...

... the fun's over folks!

Well, not entirely. But my mind is definitely aflutter with "must do's" of a school based nature. So there will not be as many recipes posted this week, but perhaps more random musings. Or maybe I'll get myself together and cook by the end of the week. We'll have to see.

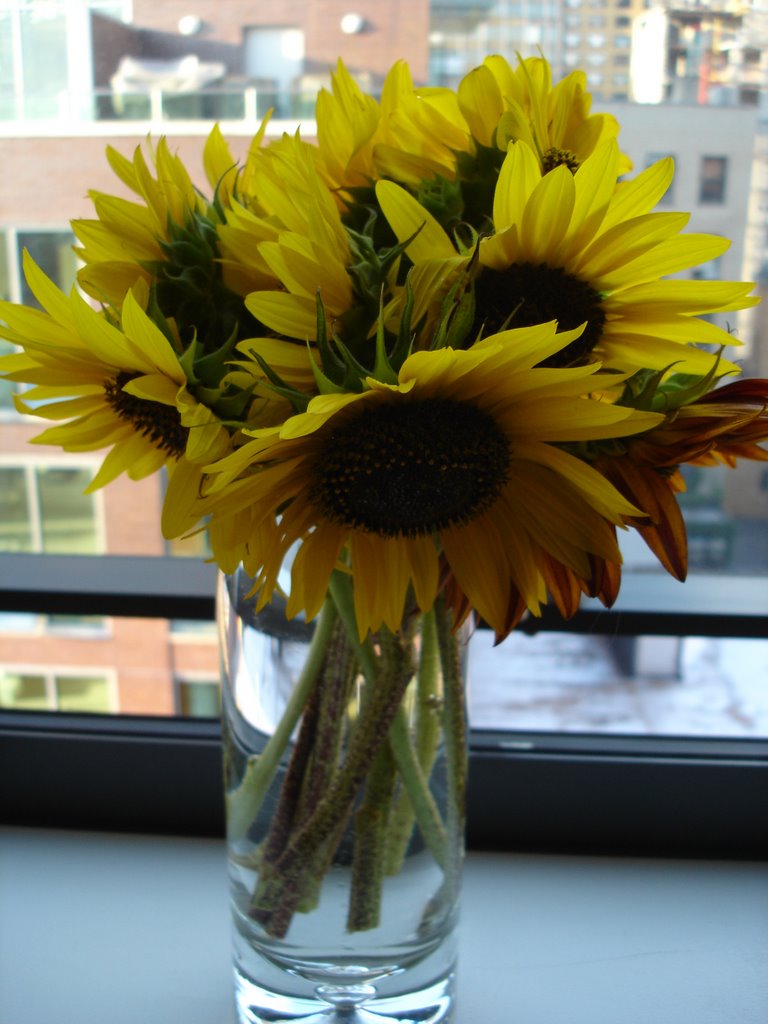
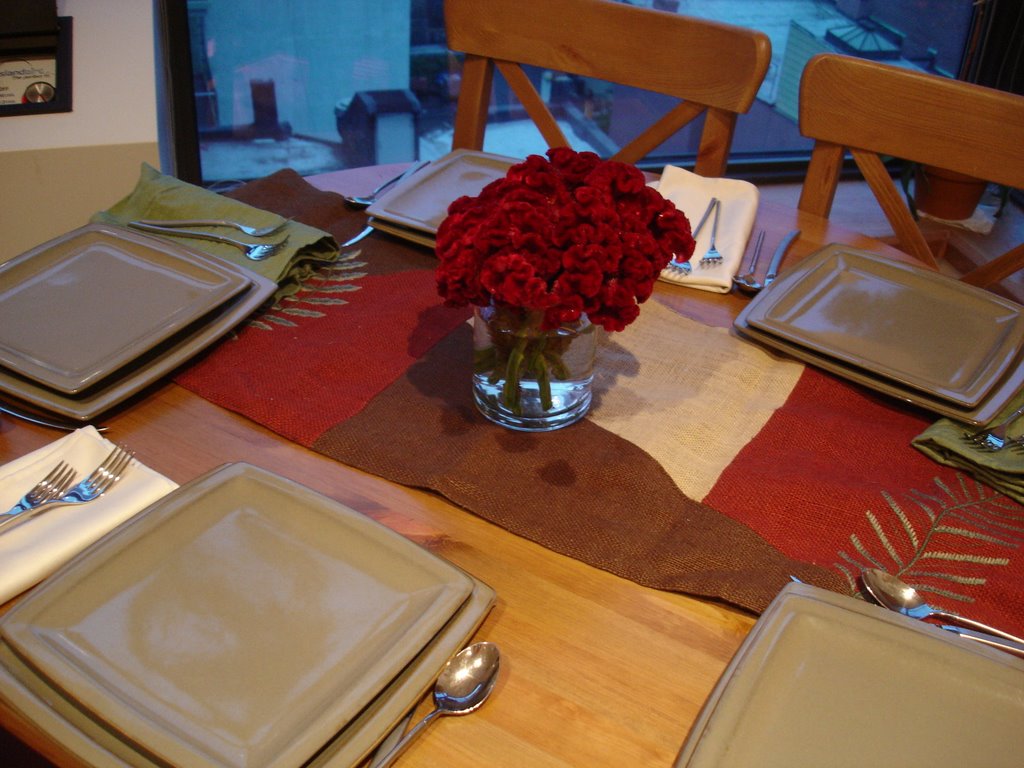
But, I can tell you about the fantastic dinner party M. and I threw on Saturday night. It was fun, fun, and more fun. And a ton of work - we were both exhausted yesterday. Behold, my beautiful table setting. Doesn't it look pretty?

And yes, the flowers look like a brain. You can click on the pictures if you don't believe me. We had purple brain flowers courtesy of our CSA flower share - who knew such a thing even existed?

So, M. planned the menu. He worked very hard. He cooked DUCK (for the non-vegetarians obviously - I had portabello mushrooms), he made pasta by hand, he baked a tart and I did dessert. Which I usually do quite well. But not this time. No, this time I had to go and totally mess it up. I didn't pay enough attention and put too much chocolate into the cake. It was like fudge, people, fudge. Not cake, not even a morsel of cakey goodness to be had. Just dense fudge.


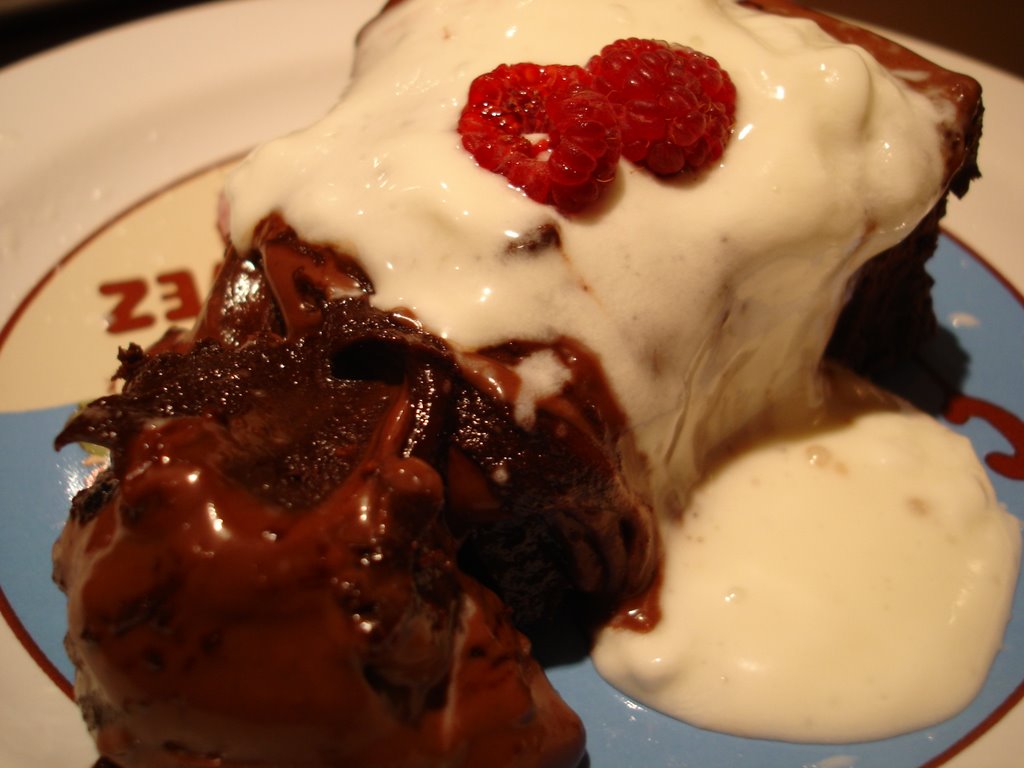
People were very polite and ate it anyways. But I knew better. So disappointing. So here is the recipe I wish I could rave and glow about. I will try it again, it does sound delicious and came together quite quickly. But, what I created was definitely not a flourless chocolate cake. If you'd like to see what it should look like, you can find the cake on the cover of the September issue of Bon Appetit.

Such a waste. And totally my fault, not the recipes. 18 ounces of chocolate and 28 ounces of chocolate are so not the same thing. One cannot put 28 ounces of chocolate into a recipe that calls for 18 and expect it to work. Apparently.

La Bete Noire

Bon Appetit's notes - This phenomenal take on a classic flourless chocolate cake lives up to its translation, "The Black Beast".

16 servings (supposedly)

Cake

1 cup water
3/4 cup sugar

9 tablespoons (1 stick plus one tablespoon) diced
18 ounces bittersweet (not unsweetened) or semisweet chocolate, chopped
6 large eggs

Ganache
1 cup heavy whipping cream
8 oz bittersweet (not unsweetened) or semisweet chocolate, chopped

Lightly sweetened whipped cream

For cake-
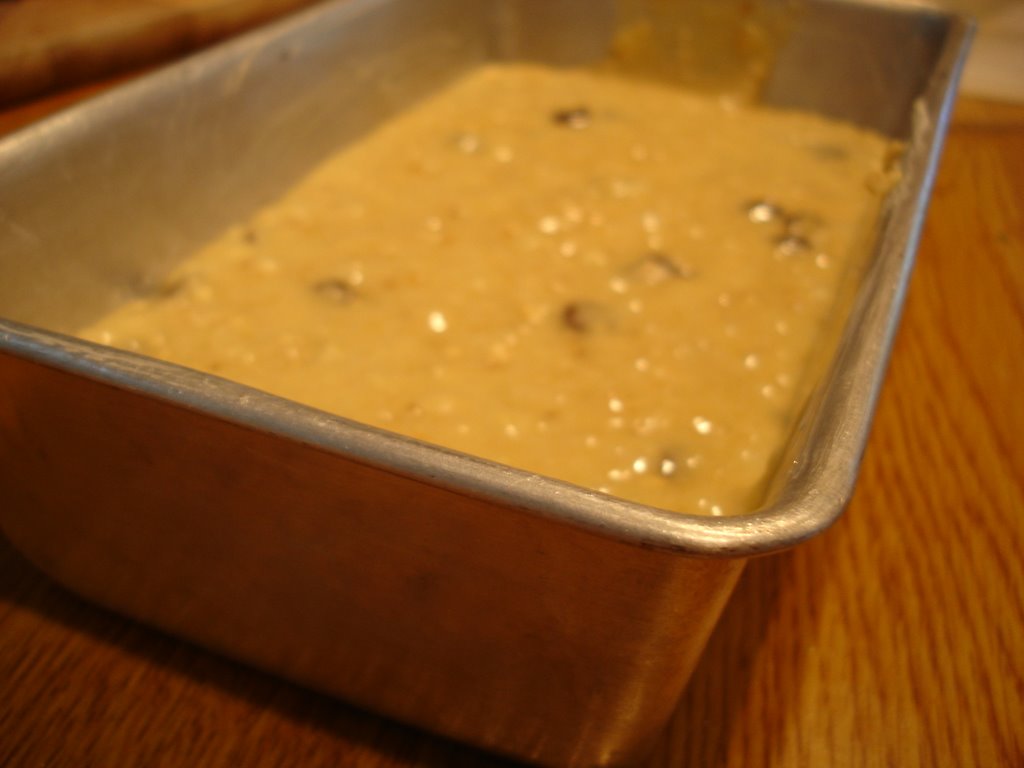
Preheat oven to 350 degrees F. Butter 10 inch diameter springform pan. Line bottom of pan with parchment round, butter parchment. Wrap three layers of heavy duty foil around the outside of the pan, bringing the foil to top of rim. Combine 1 cup water and sugar in small saucepan. Bring to boil over medium heat, stirring until sugar dissolves. Simmer five minutes. Remove from heat.

Melt chocolate in large saucepan over low heat. Add chocolate and whisk until smooth. Whisk sugar syrup into chocolate, cool slightly. Add eggs to chocolate mixturem and whisk until well blended. Pour batter into prepared pan, and place cake in large roasting pan. Add enough hot water to roasting pan to come halfway up sides of cake in pan.

Bake cake until center no longer moves when pan is gently shaken, about 50 minutes. Remove from water bath, and transfer to rack. Cool completely n pan.

For Ganache -
Bring whipping cream to simmer in small saucepan over medium heat. Remove from heat. Add chocolate, and whisk until smooth. POur over top of cake still in pan. Gently shake pan to distribute ganache evenly over top of cake. Refrigerate cake in pan until ganache is set, about two hours.

DO AHEAD - can be made 2 days ahead. Cover and keep refrigerated.

Run knife around pan to loosen cake. Release sides, cut into wedges and serve with whipped cream.

Friday, August 25, 2006

A Bowl Full of Comfort.

Last night, I was in a terrible mood. You know how sometimes that happens? There's no one particular reason, but I was just feeling down. The weather was grey and rainy. That might have been part of it. I had to go to the dentist earlier in the day. And I hate the dentist, even the new one I tried who was the nicest person ever. That could have been a factor as well. I finished my filing project, but it was excruciating. Who knows - for whatever the reason I was grumpy! So I made myself the one food item that spells comfort for me.


When I'm sick, this is what I eat. When I'm grouchy and grumpy, this is the food I turn to for comfort. It can be homemade, there is no requirement for the magic food to come out of Annie's purple box. But that will do since there is rarely a homemade macaroni and cheese supply when these times of grumpiness and illness come a-knockin. And after a bowl of cheesey goodness, I usually feel a bit better.

So, this process made me wonder. What are the comfort foods of others? Come on internet folks, I know you're out there reading. Pop on over to the comments section, and tell me what your favorite comfort food is. Do you go for the salty like french fries or potato chips? Or do you have more of a sweet tooth, and only dessert will do?

Curious minds want to know....

Thursday, August 24, 2006

Hello!

Hello internet folks. I didn't mean to disappear on you but it has been a surprisingly busy week. I'm in the middle of several projects (which turned out to be more time consuming then predicted) and just haven't been doing much cooking.

For example, there is this disaster also known as what was our living room also known as me trying to get myself organized. And yes folks, I left this project until the very end of the summer. Why? Beats me. I'm taking all the papers and teaching materials accumulated through 2 masters degrees and six years of teaching and trying to organize it into files. Which will then live in a little file cabinet where I'll be able to find things and stop reinventing the wheel. But I've a ways to go - that white cube and the open black container are both full. Sigh..........

As you can see, Helios is not impressed with this project at all. I think it is because while he does like to sit on papers and things, he finds this general snowstorm of papers to be a bit overwhelming. It's overkill, even for him.

And then there's this little children's book project I have been working on all summer. See, most teachers have a nice little children's book collection accumulated over time. Well, the schools I've taught in have provided books, so my collection didn't grow as well as it should. Meaning, buying a book here or there really won't cut it for a classroom reliant on my own personal library. So I've spent much of the summer combing ebay and buying lots of second-hand children's books. And then I had the bright idea of making a master list (divided by subject of course) so that I'll know what books I have and can hopefully keep track of them. Great idea, but I'm sure hating it now. Sitting and typing titles and authors of books getsvery boring after a (suprisingly short) while.

So both of those projects need to be tackled today and I'm powering through and not stopping to cook a fantastic meal. I didn't get much done yesterday because M. and I met friends to listen to an opera concert in the park. We picnicked, we drank wine and listened to beautiful music. It was tons of fun, but didn't help the state of our living room. And so, full speed ahead today! Accordingly, there will be no yummy recipe post. To compensate for this fact, I will leave you with yummy fruits and vegetables courtesy of this week's Community Supported Agriculture pickup.


The veggie roundup - (beginning at the bottom) okra, basil, summer squash and lettuce.


An apple a day keeps the doctor away... I'd say we've got a good week here.


A bowl full of mixed plums...


A bowl full of nectarines and peaches.


A lovely eggplant. I tried to pick the biggest one. I'm greedy like that! :)


And that's that! Stay tuned - there will be some wonderful cooking soon, just not today. But tomorrow... that's another story!

Monday, August 21, 2006

Tofu Salad - My Way

With those yummy pickles residing in the fridge, I wanted to find a way to begin using them (while I can still get kirby cucumbers to make another batch). I really felt like egg salad (a craving I get about once a year), but we only had one egg since I dropped the other last night. Egg on the floor - awesome! Oh the dilemma.

Since eggs were out of the question, I began to contemplate alternatives. Luckily, I had a pound of lite tofu lurking in the back of the fridge. I decided to come up with my own variation of Tofu Salad. Now, there are two types of texture to tofu salad. There's the kind of tofu salad which resembles egg salad, and the tofu is mashed with the other ingredients. My recipe is not that kind of salad. I prefer dicing the tofu into small cubes, sauteeing them with a quick dash of cooking spray to cook off the water, and then mixing the browned cubes with the other ingredients. That's just my personal preference, but feel free to take the recipe in any direction you like.


Tofu Salad
Serves 3-4 (depending on how much you like to pack into your sandwich)

Ingredients
1 pound lite (or regular) tofu, drained and cubed into 1/4 inch squares)
1/2 cup light mayonnaise
1/4-1/2 cup diced pickles (or relish)
2 tablespoons dijon mustard
Salt
Pepper to taste

Spray a nonstick frying pan with cooking spray, and turn on burner to medium-high heat. Add tofu, and stir. Cook tofu (stirring frequently) for about ten minutes, or until cubes begin to brown and turn golden. Turn off heat.

While tofu cooks, prepare other ingredients. Dice pickles (or add relish), and place in mixing bowl. Add mustard, salt and pepper, and mayonnaise. Add tofu cubes when finished cooking. Stir thoroughly to make sure ingredients are fully combined.

Add tofu salad to a sandwich, or a salad. Use as you would use egg salad. Enjoy.

Japanese Grilled Eggplant

This recipe made a nice, low calorie side dish to our Asian inspired meal of General Tso's "fake" Chicken, sauteed green beans and vegetable dumplings. I broiled the eggplant which was a little problematic since they remained somewhat dry. I think the recipe would be better grilled, however we don't have access to an outdoor grill in our current living situtaion. The sauce was easy to put together, and gave the dish its flavor. Over all, I think I prefer the Miso Grilled Eggplant preparation to this recipe in terms of flavor and final presentation. Perhaps it was broiling versus grilling, but this dish came out a bit homely in the end.

Japanese Grilled Eggplants
Weight Watchers Recipe

1 pound raw eggplant, Japanese (about 4 medium), sliced crosswise on the diagonal into 1/2-inch-thick pieces
1 sprays cooking spray
2 Tbsp low-sodium soy sauce
1 Tbsp fresh lemon juice
1 1/2 tsp rice wine vinegar
1 tsp ginger root, freshly grated
1/4 tsp minced garlic
1/4 cup scallion(s), thinly sliced on the diagonal

Preheat outdoor grill, stove-top grill pan or broiler. Coat eggplant with cooking spray.

Grill or broil eggplant, turning as needed, until lightly charred and tender, about 7 to 9 minutes.

Whisk together soy sauce, lemon juice, vinegar, ginger and garlic in a small bowl until blended; drizzle over grilled eggplant and then sprinkle eggplant with scallions. Yields about 3/4 cup per serving.

General Tso's (Fake) Chicken

I admit it. Sometimes I use "fake meat" substitutes. They're quick, and easy and sometimes that's what I need. And I figure, as long as I don't use them every day, then its okay.

Meat substitutes, like the kind I used last night, can be a very divisive topic with vegetarians. Some vegetarians believe very strongly that cooking and eating meat substitutes goes against the principle of vegetarianism, or abstaining from eating meat. They think that if you are vegetarian, then you wouldn't want the taste of soy crumbles (another popular meat substitute) in your food. I understand that principle and idea, but the fact of the matter is vegetarian cooking can be quite time consuming. Vegetarian main dishes tend to involve many spices, ingredients and take a considerable time to cook (especially when using dried beans, grains etc). So, sometimes it is appealing to take a recipe written for meat (and therefore somewhat quicker in preparation) and substitute either tofu, tempeh or a store-bought meat subsitute. Its not something I do every day, but sometimes it adds something different to our menu.

The recipe I made tonight is an old favorite of ours. It is ... wait for it ... a Weight Watchers recipe (I seem to be on a Weight Watchers kick lately), but you wouldn't know it from the taste. The use of cornstarch again creates that thick, glossy mouthfeel found in most Chinese takeout. Like most stir-fry dishes, once the sauces are mixed the dish cooks and comes together quite quickly. I've made this dish successfully with tofu, as well as the fake chicken strips I used this evening.

Below you see the entire meal. On the upper right side of the plate, Japanese Grilled Eggplant. Lower right side has Stirfried Green Beans with Rice Wine Vinegar and Mirin. Lower left side has homemade vegetable dumplings, and in the top left corner is the General Tso's "Chicken".

General Tso's Chicken
Weight Watchers Take Out Tonight Cookbook
Serving Size: 4

Ingredients:

1 lb. skinless boneless chicken breast, cut into 1" pieces (I used fake chicken strips)
5 tablespoons dry sherry
1 tablespoon cornstarch, plus 2 teaspoons
1 tablespoon oyster sauce (I subbed hoisin sauce)
2 tablespoons water
2 tablespoons reduced-sodium soy sauce
1 tablespoon honey
1 tablespoon rice vinegar
1 teaspoon dark sesame oil
2 teaspoons canola oil
1 tablespoon minced ginger
2 cloves garlic, minced
3 whole scallions, chopped
1/2 teaspoon crushed red pepper
2 stalks celery, chopped
1 whole red bell pepper, seeded and chopped

Directions:

Combine the chicken, 2 tablespoons of the sherry, 1 tablespoon of the cornstarch, and the oyster sauce in a medium bowl, set aside to marinate for 5 minutes.

Combine the remaining 3 tablespoons sherry, the water, soy sauce, honey, rice vinegar, sesame oil, and the remaining 2 teaspoons cornstarch in a small bowl; set aside.

heat a nonstick wok or a large, deep skillet over medium-high heat until a drop of water sizzles. Swirl in the canola oil, then add the chicken mixture. Stir fry until lightly browned, 2-3 minutes. Add the ginger, garlic, scallions, and crushed red pepper; stir fry until fragrant, about 30 seconds. Add the celery and bell pepper; stir fry until crisp-tender, 2-3 minutes. Stir in the sherry mixture and cook, stirring constantly, until the mixture boils and thickens, and the chicken is just cooked through, 1-2 minutes.


Weight Watchers Notes:

This wonderful dish originated in china's Hunan province and demonstrates the Chinese tradition of naming dishes after significant figures.

Nutritional Information:

According to recipe, one serving (1 cup) provides: 207 calories, 6 g. fat, (1 g. saturated fat), 63 mg. cholesterol, 413 mg. sodium, 13 g. carbohydrate, 1 g. fiber, 24 g. protein, 34 mg. calcium, 4 Weight Watcher Points.

Sunday, August 20, 2006

Refrigerator Pickles

Deciding to try this recipe was a spur of the moment decision on my part. I was actually at the grocery store, and had a flash of inspiration. Of course, I hadn't looked at the recipe, and so I had to go BACK to the grocery store to get white vinegar. Oops.

This recipe was quick and easy on all fronts. There was very little prep work required. The mixing of the brine was simple, and practical since it was done in the jar where the pickles will reside. Slicing the kirbies didn't take too long, and while I certainly can't claim to have perfectly thin pickles (as the directions demand), I'm okay with that. I'm just not that skilled with a knife. But a little variance is good, and I prefer thicker pickles anyways!

I haven't tasted these yet, as they're still pickling in the fridge. But once I do, I will report back as to their taste. But, given how much I love pickles, I'll be shocked if its anything but a glowing review.

Reporting back to say that these pickles are excellent! This is really and truly an outstanding recipe. Even M. was impressed, and he proceeded to sample several in a row just to make sure they were all as good as the first. The addition of the hot pepper adds just the right amount of heat, but the pickles aren't that spicy. The overall taste is a balance between heat and the sweetness of the brine, and very pleasing to the two palates over here in the Veggie Kitchen. So, I urge everyone and anyone to try this recipe. I've never made pickles before, and it really couldn't have been easier. And if you do try them, report back as to how you find the recipe. After all, inquiring minds always want to know!


Mom's Fridge Pickles

from Fresh Every Day by Sara Foster

makes about 1 quart

1 cup white vinegar
1/4 cup sugar
1 tablespoon sea salt
1/2 teaspoon freshly ground black pepper
6 whole cloves
2 bay leaves
1 teaspoon crushed red pepper flakes
1 teaspoon dill seed
4 to 5 small kirby (pickling) cucumbers, peeled in stripes and sliced into 1/8 inch thick rounds
1 small white onion, thinly sliced into rounds

1. Combine the vinegar, sugar, salt, black pepper, cloves, bay leaves, red pepper flakes, and dill seed in a quart jar. Place the lid on the jar and shake until the sugar has dissolved.

2. Layer the cucumbers and onion in the jar using a wooden spoon to press them tightly into the jar. Place the lid on the jar, shake it well, and refrigerate at least 4 hours, shaking the jar occasionally to keep the ingredients mixed. These pickles will keep in the refrigerator for at least 1 month.

Fudge Brownies Supreme

Last night, M. and I hung out with friends and neighbors here in Brooklyn. It was a wonderfully low-key evening, a chance to re-connect with friends after busy summers and a chance to go out for a drink at several local establishments. We enjoyed the evening thoroughly. But, in my sudden burst of kitchen energy yesterday morning, I decided to make brownies to take along. I love to bake, but when its just M. and myself to eat the baked goods, the portions can escalate quickly. So an event, like the one last night, to which I can bring something baked, taste a piece but leave the leftovers for my hosts to enjoy is really an ideal opportunity for me to try a new recipe.

I flipped through a couple books, and found the recipe for Fudge Brownies Supreme in The All-American Cookie book, a book which I've used but not recently. I had all the ingredients on hand, and the description of these densely fudgy brownies sounded irresistable. These brownies were really good, and one of the guests declared them the "best brownies ever". I do think, as I mention in my notes, that I undercooked them slightly. They were especially fudgy, and needed chilling to hold their shape. But, undercooked or not, they were definitely rich, chocolatey and delicious. And the author's description of "A friend commented that if great fudge were baked, it might taste like these brownies," was certainly apt. While I will keep trying brownie recipes to see which ones I like, this was a quick and easy recipe that I will make again. Since the recipe is plain and simple with few ingredients to dislike, I think this recipe will be great for taking to potlucks or as a host/hostess gift when the recipients' tastes might be unknown.

Fudge Brownies Supreme
The All-American Cookie Book

Nancy Baggett's Notes- These are the ones! The moistest, fudgiest, most succulent brownies ever. No frosting, no fruit, no crunchy munchies of any sort to distract from the mousse-like texture and the deep, full-blown chocolate flavor. A friend commented that if great fudge were baked, it might taste like these brownies. If you feel strongly that brownies should have nuts, you could add some walnuts to these. However, the effect will be similar to eating nuts in a chocolate mousse.

My notes - I used dark brown sugar since it was what I had on hand. I also used half a block of semi-sweet chocolate, again because it was what was on hand. I also slightly underbaked these, despite giving them 38 minutes in the oven. They still received glowing reviews, but remained a bit too moist.

1/2 cup plus 2 tablespoons (1 stick plus 2 tablespoons) unsalted butter
5 oz bittersweet (not unsweetened) or semi-sweet chocolate, broken up or coarsely chopped
2/3 cup all-purpose white flour
1 1/2 tablespoons unsweetened American-style cocoa powder, sifted after measuring
1/4 tsp salt
1 cup sugar
1/3 cup packed light brown sugar
3 large eggs
2 1/2 teaspoons vanilla extract

Preheat oven to 350 degrees F. Lightly grease an 8 inch square baking pan, or coat with nonstick spray. Line the pan with aluminum foil, letting the foil overhang two opposing sides of the pan by about 2 inches. Grease or spray foil with cooking spray.

In a large, microwave-safe bowl, microwave the butter and chocolate on 100-percent power for one minute. Stir well. Continue microwaving on 50-percent power, stirring at 30 second intervals. Stop microwaving before the chocolate completely melts, and let the residual heat finish the job. (Alternatively, in a large, heavy saucepan, melt the chocolate and butter over lowest heat, stirring frequently being very careful not to burn. Immediately remove from heat.) Let cool to warm.

In a small bowl, thoroughly stir together the flour, cocoa powder, and salt and set aside. Stir the sugar and brown sugar into the chocolate-butter mixture until well combined. Add the eggs and vanilla, and stir until sugar dissolves and the mixture is well blended and smooth. Stir in the flour mixture just until evenly incorporated. Turn out the batter into the baking pan, spreading to the edges.

Bake in the middle of the oven for 28-33 minutes, or until the center is almost firm when tapped and a toothpick inserted in the center comes out clean except for the bottom 1/4 inch which should still look moist. Transfer the pan to a wire rack and let stand until brownie is completely cooled. Refrigerate until well chilled.

Using the overhanging foil as handles, transfer the brownie to a cutting board. Carefully peel off and discard foil. If desired, cut away and discard any overbaked edges. Using a large, sharp knife, cut the brownie into 12 bars, wiping knife clean between cuts.

Store in an airtight container for up to three days, or freeze for up to a month. If freezing, leave brownie slab whole and cut into bars when partially thawed.

Eggplant Parmesan Sandwiches

So, after finishing the muffins (and baking a batch of brownies but more on those tomorrow) I was somewhat at a loose end. M. was still asleep, and I was definitely feeling pangs of hunger. But what to make for lunch? I remembered a favorite recipe for eggplant parmesan that we both really enjoy, and a certain white eggplant lurking in the depths of our vegetable drawer. Lunch was determined, and after sampling the dish it is safe to say that we still really like the recipe. While it is a Weight Watchers recipe, the addition of parmesan to the breadcrumbs adds a nice flavor to the sandwich. I used some of my homemade marinara, and a sprinkling of fat-free mozzarella cheese and we were enjoying our sandwiches within 35 minutes of my decision to make Eggplant Parmesan Sandwiches for lunch. I threw together a quick side salad using up the last of the quinoa salad along with some romaine lettuce, carrots and red pepper chunks in order to round out the meal. And I think its safe to say that this will be a recipe often repeated - it's even fast enough to be a weeknight dinner if I think far enough ahead and cook the eggplant while preparing the salad.

Eggplant Parmesan Hero ~ 7 Pts.
Weight Watchers recipe - Take Out Tonight Cookbook

Weight Watchers' Notes - "A favorite Italian treat, our hero is kept low in points by spraying the eggplant with nonstick spray and baking it. For best flavor, use olive oil spray."

My notes - I had a mini-baguette so I used one small eggplant to make only 2 sandwiches. The leftover eggplant pieces were topped with a little sauce and cheese, and eaten plain.

1 pound eggplant -- unpeeled, cut into 1/4"-thick slices
1 large egg
1 tablespoon nonfat milk
1/2 cup bread crumbs, seasoned -- dried
2 tablespoons Parmesan cheese -- grated
1/4 cup mozzarella cheese, part skim milk -- shredded
1 cup marinara sauce
4 Italian hard rolls -- split

Preheat the oven to 375 degrees. Spray a nonstick baking sheet with nonstick spray; set aside.

Lightly beat the egg and milk in a shallow bowl. Mix the bread crumbs and Parmesan on a sheet of wax paper. Dip the eggplant in the egg mixture, then in the bread crumbs, and arrange in one layer on the baking sheet. Lightly spary the eggplant with nonstick spray. Bake until the eggplant is softened and lightly browned, about 25 minutes.

Divide the eggplant slices into 4 equal portions on the baking sheet. Overlap each group of slices so they are no larger than the dimensions of each roll. Top each portions with 1 tablespoon of the mozzarella. Bake until the cheese is melted, about 2 minutes.

Transfer each eggplant portion to the bottom of each roll, top each with 1/4 cup of the sauce. Replace top of roll and serve at once.

Saturday, August 19, 2006

Do you know the muffin man?

I have deep love for baking and eating muffins, however, I often find them somewhat difficult to work into a healthful diet. A homemade muffin is not big enough on its own to be breakfast, but when paired with cereal becomes almost too much. I do find when I'm organized enough to have a low-fat muffin with me at school, they make a nice snack while my students imbibe goldfish and pretzels and other similar nutritional powerhouses (kidding about the nutritional part). But, I'm rarely that together and organized.

At any rate, I felt like making muffins today. I had a couple apples kicking around from a couple weeks ago when I lugged home 2 one pound apple bags. So, I made this tried and true muffin recipe to have around this week. I'm not sure what I'll do with them exactly, but I think they'll disappear with no problem! After all, they're low in fat and taste great! That cinnamon swirl adds a nice sweetness to the muffin, and the chunks of sweet apple are just divine. Not that I tasted one or anything! :)


Apple-Oat Muffins With Brown Sugar-Cinnamon Swirl
Shape Magazine
12 muffins

Ingredients
1 cup all-purpose flour
1/2 cup whole-wheat flour
1/2 cup oats
1/2 cup sugar
3 tsp. baking powder
1 1/2 tsp. cinnamon
1/2 tsp. baking soda
1/2 tsp. salt
1/4 tsp. ground cloves
1 Tbsp. brown sugar
1 Tbsp. warm water
1 cup milk
1/2 cup unsweetened applesauce
1 egg
1 Tbsp. canola oil
1 tsp. vanilla extract
1 apple -- peeled, cored and diced

Preheat oven to 400 F. Coat a 24-cup mini-muffin pan with cooking spray and set aside. In large bowl, combine both flours, oats, granulated sugar, baking powder, ½ tsp. Of the cinnamon, baking soda, salt and cloves. Mix thoroughly with a fork, make a well in the center and set aside. In a small bowl, combine remaining teaspoon of cinnamon along with brown sugar and water. Whisk until brown sugar is dissolved. Set aside. In a medium bowl, whisk together milk, applesauce, egg, oil and vanilla. Pour liquid mixture into center of dry ingredients and stir until just blended. Fold in diced apple. Spoon batter into prepared muffin cups and then top each muffin with ¼ tsp of the brown sugar-cinnamon mixture. Using a toothpick, swirl the mixture gently into each muffin. Bake 12 minutes. Cool in pan on wire rack, 5 minutes before removing muffins from pan.

Nutrition score per serving (2 mini-muffins or 1 regular-sized muffin)
Calories - 140, 13 % fat (2 grams, 0 % saturated), 76 % carbs (26 g), 11% protein (4g), 2 g fiber, 78 mg calcium, 267 mg sodium

Friday, August 18, 2006

Lazy lazy day.


This picture of Helios kind of summarizes the day we've had. He's been doing that all day long - lazy kitty!

I've at least been somewhat productive, although don't fool yourself. There have also been opportunities for increased productivity that were not taken advantage of. Was watching both episodes of old ER's on TNT this morning really necessary? Probably not. :)


Oh well, at least I get credit for those being "teacher books" and not reading for fun books. I actually accomplished a fair bit - the wheels are turning towards those first few days of school.

And I just have to show off my marinara containers, tagged and neatly arranged in our freezer.


But that's about all that's happening in my kitchen tonight, except for maybe the emptying of the dishwasher if I get really motivated. M. is working late, and I'm going to order veggie sushi. Yum!

Now, the only question is - do I drag myself to the gym, or do I call it quits on that too and have a glass of wine?

Hmmm......so many difficult decisions in life. :) Happy weekend!

Thursday, August 17, 2006

Making Marinara....

... and lots of it.

Today's cooking project was to make a ton of marinara. Despite my claims that homemade food disappears into the freezer never to come out, marinara sauce is the one exception. And with going back to work rearing its head in six working days, I figured this would be a good project to undertake. Starting the school year with multiple little glad containers with either 1 cup or 2 cups of measured marinara sauce will definitely come in handy on those uninspired evenings when cooking seems completely ludicrous.

I used a recipe I've made before, although not in a while. Featured in Cooking Light a few years ago, it makes upwards of 9 cups. While the recipe itself is somewhat time-consuming (caramelizing the onions for 30 plus minutes as well as 3 + hours of simmer time), the yield makes the effort quite worth it. I like to switch up the type of tomatoes I add - today I used two cans of "crushed" Muir Glen tomatoes (which were actually quite chunky) and one can of Muir Glen tomato puree. I also add the wine to the caramelizing onions, as the pan dries out I pour in a bit of the wine. It makes them very wine-y, but keeps me from burning them. And, learn from my mistake and make sure that when sprinkling dried hot pepper flakes that you have the container open to the sprinkle setting. Not the spoon dipping setting which proceeds to dump a ton of hot pepper into the sauce which then must be spooned out wasting precious tomato-ey goodness.

I took a picture while the sauce was cooking. It isn't the best, as I was desperately trying to keep the splatter from nailing the camera. This sauce does like to splatter, even on the lowest of low settings on my gas stove. Having invested all this effort into making sauce today, I think a sampling of this sauce will become my dinner. It will top some frozen tofu ravioli I re-discovered yesterday nicely, and with minimal effort on my part since I'm now feeling lazy.


Marinara Magnifica

Cooking Light's Notes - Dry red wine intensifies the well-blended flavors in this lusciously seasoned tomato sauce--magnifico!Serve over your favorite pasta.

My Notes - I like to switch up the type of tomatoes I add - today I used two cans of "crushed" Muir Glen tomatoes (which were actually quite chunky) and one can of Muir Glen tomato puree. I also add the wine to the caramelizing onions, as the pan dries out I pour in a bit of the wine. It makes them very wine-y, but keeps me from burning them. I also up the spices a bit depending on my mood.

1 tablespoon olive oil
6 cups chopped onion (about 3 medium)
1 tablespoon sugar
1/2 cup dry red wine
1 tablespoon extravirgin olive oil
2 teaspoons dried oregano
1 teaspoon salt
2 bay leaves
1/2 teaspoon dried thyme
1/2 teaspoon dried marjoram
1/2 teaspoon dried basil
1/2 teaspoon freshly ground black pepper
1/4 teaspoon crushed red pepper
6 garlic cloves, crushed
2 (28-ounce) cans crushed tomatoes, undrained
2 (14.5-ounce) cans diced tomatoes, undrained
2 (6-ounce) cans tomato paste

Heat oil in a Dutch oven over medium heat; add onion and sugar. Cook 30 minutes or until golden, stirring occasionally. Stir in wine; cook 1 minute. Add remaining ingredients; bring to a boil. Reduce heat, and simmer 3 hours, stirring occasionally.

Yield: 9 cups (serving size: 1 cup)

CALORIES 169(20% from fat); FAT 3.8g (sat 0.5g,mono 2.3g,poly 0.6g); PROTEIN 5.3g; CHOLESTEROL 0.0mg; CALCIUM 131mg; SODIUM 960mg; FIBER 6.5g; IRON 2.9mg; CARBOHYDRATE 30.9g
Cooking Light, AUGUST 2004

Wednesday, August 16, 2006

Playing with Ancient Grains

Today I had a sudden burst of domestic energy. Two loads of laundry were done, the sheets on the bed changed and I even had energy left to clean the fridge. I hate cleaning the fridge, but I'm always so happy when I'm done. It always looks so nice, and once the useless junk that isn't being used is gone I can see what I need to buy. Doesn't it look empty? Today's cleaning took me about an hour - mostly because a tupperware container of simple syrup had tipped and run everywhere. Nothing hits the spot like cold and congealed simple syrup - yummy!

I even had enough energy to empty out the freezer-burned items that were residing in our freezer. I'm still learning the art of freezing things. I can appreciate that freezing leftovers for a future time is a good idea, but somehow once they go in, they never come out. Unless they were purchased frozen, those items have a steady rotation. Oh well, I'll keep trying to master the art of freezing homemade food. And trust me, if you'd seen the freezer before I cleaned it out, you'd realize how empty the freezer is now compared with before.


I began tackling the fridge while cooking some quinoa to make for lunch. I told myself I'd only do a shelf or two while the quinoa cooked but of course I got sucked in. Once you start a yucky job like that, you really can't stop until you're done. Prolonging the agony is really unneccesary. So, the quinoa sat for a while, which gave me plenty of time to figure out what to add to it. This salad was the final result. It was tasty, but just something I threw together. It would benefit from any number of substitutions, but I enjoyed it just as it was with today's ingredients.


Quinoa and Chickpea Salad
Serves 6 (I'm guessing since quinoa is quite filling)

My notes - This salad was tangy and flavorful. I expect the flavor would improve as it sits, and that leftovers will be even better. The goat cheese could be omitted, and I think I would crumble it onto individual servings next time. It blended into the salad a bit much when added with chickpeas and other ingredients. Any number of substitutions could be made, this is truly a salad to make your own.


Salad
1 cup uncooked quinoa
2 cups Vegetable Broth
3/4 cup grape tomatoes, quartered
1/4 cup scallion(s)
3/4 cup canned garbanzo beans
3 oz semisoft goat cheese
3 tablespoons of fresh basil, cut into chiffonade

Dressing
2 Tbsp balsamic vinegar
2 Tbsp champagne vinegar
1 Tbsp Orange Muscat Champagne vinegar (optional)
1 Tbsp olive oil
salt to taste
Pepper to taste

Directions

1. Pour broth into medium saucepan. Rinse quinoa in a strainer fine enough to hold the kernels, and add to broth (scraping as necessary). Cover, and bring to a boil before reducing heat to a simmer for approximately 20 minutes (or until liquid is gone).

2. Prepare additional ingredients and add to bowl.

3. Mix dressing ingredients in a small bowl. Set aside.

4. Add cooked quinoa to prepared ingredients, mix dressing and pour over top. Stir carefully to blend dressing into salad, adding additional flavors (more vinegar, more salt etc) as necessary.


Technorati Tags: , , ,

Tuesday, August 15, 2006

CSA bounty

I'm back in New York, and its good to be home. It is always anti-climactic to come home during the day, as no one is around to greet you. After all, M. is not blessed with a teacher's schedule and actually has to work during the summer. But, Helios was pleased to see me and left furry orange evidence all over my black shirt. I think his orange fur is especially drawn to black clothing; it seems like the whole shedding process is some freakish scientific phenomenon of simply inescapable magnetic draw or something. Or something like that.

The flight was fine, and actually almost empty. I moved from my originally assigned seat to a window directly across the aisle. There was no one in the two seats next to me. In fact, I didn't see more than a person in a row when I glanced up and down the plane. Since I went through security at (yawn) 7:20 am, my line was held up for few moments by people who seemed to think the no liquids and gels rule really didn't apply to them, but only for a few moments. The whole process was surpisingly efficient, and everyone was on their best behavior (minus the aforementioned people).

So, after a quick sojourn to the gymnasium, I went to fetch our weekly veggies. I did get smart this week, and combined some of the pictures. The item by item process was just too laborious. So.... here we go:


Sunny sunflowers


Peaches and nectarines (3 pounds of each!)


A bowlful (or three pounds) of plums


The cute little apples are back. Having just sampled one, we have two pounds minus one apple left. :)


And, the veggies. Here we go clockwise - yellow grape tomatoes (which M. is going to be lucky to see any of - they're so good!), rainbow chard, a bag of green beans, romaine lettuce, three leeks and a white eggplant.


And with all that loot - we're going out for dinner. Off to try a restaurant M. has wanted to go to for sometime for a little "date night".

I leave you with Helios, checking out the new sunflower arrival.

Monday, August 14, 2006

Florida Adventures, part 3 ...

... the final adventure (until Thanksgiving). I've had a wonderful trip, but its definitely time to go home. All this travel in the past month has quite worn me out. I look forward to a couple weeks in New York before the craziness of back to school ensues. Of course, tomorrow morning I will get the distinct pleasure of having airport craziness ensue at 7:00 am (leaving the house at 6:20 am!). A 9:00 am flight seemed like a great idea three weeks ago but was it really? Stay tuned to find out.

Anyways, tonight I made banana bread using my mom's recipe. When I was growing up, this was THE banana bread. It could often be found as an after school snack, or even dessert if I was really lucky (we weren't a big dessert during the week family). It is a quick and easy recipe, mixes right into one bowl and can easily be adapted. My mom traditionally makes it with raisins, which is a delicious variation. Today I subbed chocolate chips for raisins, both because I do love a chocolate chip banana bread (or anything really) and because my mom is serving it as a dessert option at a dinner tomorrow. And we threw in some oats, but that too is optional. The bread is equally divine without. I would perhaps not suggest trying all three variations at once, that might be overkill, but feel free to substitute your own preferred banana bread flavorings (rum, coconut, nuts or whatever).

This is the banana bread batter heading into the oven.


And this is the final result -yum!


Banana Bread
Mom's recipe


3 ripe bananas (4 if small)
1 cup of sugar
1 egg
1 1/2 cups of flour
1/4 cup melted butter
1 tsp baking soda
1 tsp salt
1/2 cup oats (optional)
1/2 cup of chocolate chips (or to taste, also optional
1/2 cup of raisins

Mash bananas with fork. Stir in other ingredients. Pour into buttered loaf pan (ideally 8 1/2 x 4 1/2 x 2 1/2 inches). Bake for one hour in a preheated 325 degree oven.


Technorati Tags: , , , ,

Sunday, August 13, 2006

Florida Adventures, part 2

After an afternoon organizing old pictures and sorting through a couple boxes of childhood memories, my mom and I made an old favorite for dinner. This (thought to originally hail from Gourmet) Szechwan-Style Eggplant recipe was originally intended to be a dip, served with pita bread (?). Quite odd really, so we chop the pieces a little bit bigger and turn it into a main dish kind of recipe. It seems lengthy, however when the sauce is prepared first (and this is key - right Mom? :) ), it comes together quite quickly and is not as involved as it might seem. And the results are divine - if you're a fan of the glossy eggplant and garlic sauce found at most Chinese establishments, you'll be thrilled with the taste of this dish. The addition of cornstarch to the sauce gives it that glossy restaurant mouthfeel, and the components of the sauce provide enough heat to make the dish seem more impressive then the sum of its parts.

To accompany the eggplant, my mom used up some old veggies lying around to create veggie dumplings. I introduced her to my favorite Sesame Dipping Sauce and we had some steamed edamame, and a couple baked veggie spring rolls on the side. Altogether, the meal was delightful and just as tasty as having called in a delivery order. And, with the dumpling making, it was a lot more fun!


Szechwan-Style Eggplant
adapted from Gourmet (?)

My Notes -Mise en place is key. Putting all the sauces in little bowls is such a time saver as actual cooking time is very small.
This is supposed to be an appetizer served with pita wedges (?!?!). If doing main course style - small chopping isn't really necessary and larger pieces would be better. The recipe is somewhat flexible - we added chopped water chestnuts which added a nice contrasting crunch to the otherwise smooth textured dish.


1/4 cup vegetable oil (we used cooking spray with water, sometimes I use a tablespoon of oil and extra broth, whatever works for your dietary preferences)
1 1/4 lb eggplant (peeled if deisred, cut into 1/2 inch cubes - about 6 cups)
1 tsp cornstarch
1/2 cup vegetable broth (recipe calls for chicken but I use veggie)
1 tsp minced garlic
1 tablespoon minced peeled gingerroot
2-3 tsp Szechwan chili paste (or to taste - I recommend 2 as that's what I used and it was pretty spicy)
1 tsp hoisin sauce
1 tablespoon rice vinegar
1 tablespoon Sherry
3 scallions sliced thin
2 tablespoons soy sauce
1 tablespoon brown sugar packed (I used 2 packets of Splenda I think ... out of brown sugar)
1 red bell pepper minced (or chopped in small chunks)
1/2 tsp oriental sesame oil to taste

In wok or large skillet heat the veg. oil over high heat until it is hot but not smoking. Stir-fry eggplant over moderately high heat for 3-5 minutes or until tender and browned. Transfer to paper towel lined plate to drain.

In a small bowl, dissolve the cornstarch in the broth. To the wok add the garlic, the gingerroot, the chilil paste, the hoisin sauce, the vinegar, and the sherry and stirfry misture for 30 seconds. Add scallions and stirfry for 30 seconds. Add soy sauce, sugar, cornstarch mixture (stirred), the bell pepper and the eggplant and stirfry for 1 mintue until eggplant absorbs most liquid. Remove wok from heat, add sesame oil and salt and pepper to taste. Toss mixture well.


Technorati Tags: , , ,

Saturday, August 12, 2006

Florida Adventures part 1

Well, here I am in the wilds of Coral Springs, Florida. It's really not wild at all. Just lots of straight roads, flat roads and housing developments as far as the eye can see. Yes Toto, we're not in Brooklyn anymore.

Not too much has been happening. I managed to arrive the day before all air travel descended into chaos, so that was a definite plus. Granted I had a horrific experience with Delta just getting on to my plane - it was apparently time for a shift change when checking in so the women behind the desk ignored the growing line full of desperate people twenty minutes away from missing their flight. Good times, good times. But then as a reward for my anguish and having to pull my determined New Yorker personality out of the back-pocket where I tend to keep it behind good manners ("Ma'am, my plane leaves in twenty minutes. I need to be checked in now. And I'll stand right here until that happens. Thank you. And no sir, I'm very sorry that you arrived at the airport just as your minor daughter's flight arrived instead of arriving early. But you may not cut in front of me to get your permission slip because I've just waited on line for an hour, and I'm not missing my flight when the check-in lady just assured you your daughter would be taken care of.") But at least I was rewarded by discovering that the actual plane was a Song plane, so I got to watch TV on my way to Florida. And, they actually passed out free snacks! I didn't think anyone did that anymore. Watching TV, eating a snack-sized bag of Sunchips - life was good once I got on the plane.

And now I'm here. I've watched the birds visit my parents' bird-feeder, I've watched the ducklings clamber through the fence and come up and demand bird seed while Mama duck watches anxiously. My mom and I went shopping at our favorite outlet mall yesterday, where I managed to find some clothes that will help me start the school year in New York. It always amazes me that I do well shopping for reasonably priced fall clothes for NY in FLA, but hey - whatever works.


As part of my love of cooking, I always try to introduce my mom to recipes I've tried and liked. Tonight, I tried to introduce my mom to an "oldie", but one I remembered being a "goodie". I haven't made Corn and Poblano Empanadas in a while, and remembered the recipe as being impressive and fairly easy. Last night we had black beans and rice to eat up and I thought they'd add something special to an otherwise "leftover" to meal nicely. And they would have, except that the masa flour I used was unexpectedly greedy and moisture grabbing. So the dough was way too dry, and unable to be used for making empanadas. So, my mom saved the day by turning it into a Corn and Poblano Tamale Pie. She put the filling in a pie plate, managed (after adding a ton of water) to roll out the dough into a circle big enough to cover the pie plate. We brushed it with the egg and water that the recipe called for, and then baked for about 30-35 minutes. And it was quite tasty! The cheesy-corny filling is addictive, and despite the changed appearance of the dish, it was a success that we couldn't stop stealing pieces of filling from long after we weren't really hungry anymore.


Corn and Poblano Empanadas

Cooking Light's Notes -Masa harina--used to make corn tortillas and tamales--yields a more richly flavored and textured dough than that made with flour alone.

My notes - although the recipe calls for mozzarella cheese, I made it with half 2% cheddar and half mozzarella and found that combination especially flavorful and tasty.


3/4 cup all-purpose flour
3/4 cup masa harina
3/4 teaspoon salt, divided
1/2 teaspoon chili powder
1/2 cup water
2 tablespoons butter, cut into small pieces
2 poblano peppers
Cooking spray
2 garlic cloves, minced
1 1/2 cups fresh corn kernels (about 3 ears)
3/4 cup (3 ounces) shredded Oaxaca or mozzarella cheese
1 large egg white
1 tablespoon water

Preheat oven to 500°.
Lightly spoon flour into dry measuring cups; level with a knife. Combine flour, masa harina, 1/4 teaspoon salt, and chili powder in a food processor; pulse 3 times. Add water and butter; pulse until mixture forms a loose ball. Remove from processor; knead until ball completely forms. Divide dough into 8 equal portions. Shape each dough portion into a ball; flatten each ball into a 3-inch circle on a lightly floured surface. Cover and chill 30 minutes. (Stack dough portions between pieces of wax paper.)

Place poblanos on a foil-lined baking sheet. Bake at 500° for 20 minutes or until brown and blistered, turning once. Place in a zip-top plastic bag; seal. Let stand 15 minutes. Peel poblanos; cut in half lengthwise. Discard seeds and membranes, and finely chop. Place in a medium bowl.

Reduce oven temperature to 425°.

Heat a nonstick skillet coated with cooking spray over medium-high heat. Add garlic; sauté 30 seconds. Add 1/2 teaspoon salt and corn; sauté 3 minutes. Add to poblanos; let stand 5 minutes. Stir in cheese.

Roll each dough portion into a (5-inch) circle. Working with 1 circle at a time (cover remaining circles with a damp towel to prevent drying), spoon 3 level tablespoons corn filling into center of each circle. Moisten edges of dough with water; fold dough over filling. Press edges together with a fork or fingers to seal. Place empanadas on a large baking sheet coated with cooking spray. Combine egg white and 1 tablespoon water. Lightly coat tops of empanadas with egg mixture. Pierce top of dough with a fork. Bake at 425° for 20 minutes or until lightly browned.

Yield: 8 servings (serving size: 1 empanada)

CALORIES 156(27% from fat); FAT 4.7g (sat 2.5g,mono 1.3g,poly 0.7g); PROTEIN 5.2g; CHOLESTEROL 11mg; CALCIUM 58mg; SODIUM 277mg; FIBER 2.6g; IRON 1.3mg; CARBOHYDRATE 25.8g
Cooking Light, AUGUST 2003


Technorati Tags: , , , ,

Tuesday, August 08, 2006

Hominy-Pinto Burgers with Roasted Poblano Peppers


This was dinner tonight (along with corn, baked sweet potato fries and sauteed vegetables). Overall, we were pretty unimpressed. I was excited to use hominy - I've never used it before and bought a can specifically at Whole Foods just to try. But this recipe just seemed dry, and somewhat tasteless. Even with the creamy sauce and roasted chile, it just lacked zip for us. We ended up sprinkling salt on the burgers and that made them a little better but overall this recipe will not warrant repeating in this household.

The plus side -the burgers came together pretty quickly. They didn't fall apart while cooking, and resembled Cooking Light's photograph quite closely. When not cooking tons of vegetables on the side in preparation for upcoming trip, this recipe would have come together very quickly indeed.

The down side - we just didn't think this recipe was a winner. The taste was lacking for us, and as a result the meal just seemed a little blah. Overall, this was a disappointment.


It is late, and I'm feeling quite tired. So, I'm not going to post the recipe here. But if my less than raving review hasn't put you off trying these vegetarian burgers, you can find the recipe on the Cooking Light website here.

I'm off to Florida, but will do my best to remember my Blogger password and id so that I can post from there! Stay tuned... Florida adventures are coming soon.


Technorati Tags: , , , ,

CSA overdrive - part 2.

Each peach, pear, plum ... I spy Tom Thumb!

This quote is from a children's book that I used to love when my brother was little. I don't think he ever cared for it overly much, but I thought it was the cutest. This week CSA share is lacking in the pear, but otherwise we're doing pretty well!

So here's our weekly roundup from the CSA. I took single pictures where appropriate (like fruit) so as not to have to organize 2 pounds of plums for example. And, I can't promise food photography genius as all this produce is still waiting to be put away and/or used to make dinner. But, here ya go anways...


First up, a lovely bunch of fennel. Not my favorite flavor at all, but since I'm off to Florida tomorrow that will be M.'s problem to deal with. :)


Next, a bunch of scallions.


Followed by yellow beans.


And beautiful baby lettuces.


And, one green pepper and one purple pepper.


And, two roly poly summer squash.


And one lonely and blurry cucumber.


Next up was the fruit. Don't get me wrong, I love fruit. But lugging home 10 pounds (yes, we foolishly bought a double share - although we do seem to eat it all so I guess it wasn't that foolish after all) of fruit is no fun in any shape kind or form. Plus veggies, plus whatever I've picked up in order to make dinner. Today I had 6 shopping bags (consolidated and such but still - 6!).


This week we had three pounds of nectarines...


Three pounds of peaches...


4 pounds of plums (although I'm now thinking I only took 2 - oops!) Its actually quite annoying and painstaking measuring out the fruit. They have big boxes, and small scales. So you have to sit there and add a plum, remove a plum to get to the desired amount. Plus there are about five other people trying to do this simultaneously. And, since we bought a double share, I have to remember to double whatever the sign says (which I apparently didn't do in this case). And did I mention its hot and stuffy? :)


And 2 pounds of apples. Aren't they cute? I included a pepper for a reference as to how cute and tiny these guys are.


So, wish M. luck as he attempts to get through this feast of produce. I'll be back next Tuesday, just in time to get MORE produce! Yay! But check back because cooking is planned for this evening if I ever finish this long post.

Monday, August 07, 2006

Sweet Corn and Parmesan Flans

There is no really good reason as to why there was no post yesterday. I just totally lost all motivation. I wheedled M. into making me brunch (which turned into lunch by the 3 o'clock hour when we finally ate) and we ordered Chinese food for dinner. Today, however, I am back in action and have concocted a feast worthy of luring M. home from the office in time for a late dinner and the second-to-last Hell's Kitchen episode. What will Monday nights be like when the season ends next week? Tragic.

Anyways, I planned my meal around the recipe for Sweet Corn and Parmesan Flans which was a recipe featured in June's Cooking Light magazine. I thought a veggie-heavy meal would complement what I anticipated to be a creamy/eggy dish, and I was pleased to see I was correct. After putting the flans into the oven, I concocted a quick quinoa pilaf, glazed some sliced portabello mushrooms in a basalmic glaze and then braised some yellow beans in a vegetable broth/light butter sauce. Served with a chilled Pinot Grigio, the meal was pleasing and leftovers are eagerly anticipated by us both.

M.'s plate (which was considered most photogenic) shows quinoa pilaf, yellow beans, sliced tomato, sweet corn and parmesan flan, and basalmic glazed portabello mushrooms.

Sweet Corn and Parmesan Flans

Cooking Light’s Notes -For a pretty presentation, use a combination of red, orange, and yellow tear-drop tomatoes.

My notes – This dish was surprisingly easy to prepare, once the corn kernels were removed from the cob. Even with my corn zipper, it was surprisingly annoying as kernels popped out of the bowl almost as quickly as they were dropped in. Still, the dish is delicious and the corn battles are completely worth it!

Cooking spray

2 1/2 cups fresh corn kernels (about 5 ears)

1 cup 1% low-fat milk

1/3 cup grated Parmesan cheese

1 teaspoon flour

1/2 teaspoon salt

1/4 teaspoon freshly ground black pepper

4 large eggs

18 small tear-drop cherry tomatoes (pear-shaped), halved

2 tablespoons thinly sliced basil

Preheat oven to 350°.

Heat a large nonstick skillet over medium heat. Coat pan with cooking spray. Add corn, and cook 5 minutes or until tender, stirring occasionally. Remove from heat. Set aside 1 cup corn kernels.

Place remaining corn in a food processor; pulse 5 times or until coarsely chopped. Add milk and next 5 ingredients (through eggs) to food processor; pulse 4 times or until combined.

Pour about 1/2 cup corn mixture into each of 6 (6-ounce) ramekins coated with cooking spray. Place ramekins in a 13 x 9-inch baking pan; add hot water to pan to a depth of 1 inch. Bake at 350° for 35 minutes or until the center barely moves when ramekins are touched. Remove ramekins from pan; cool 5 minutes on a wire rack. Invert flans onto each of 6 plates. Garnish each serving with about 2 1/2 tablespoons corn kernels, 6 tomato halves, and 1 teaspoon basil.

Yield: 6 servings

CALORIES 152(35% from fat); FAT 5.9g (sat 2.2g,mono 2g,poly 1g); PROTEIN 9.8g; CHOLESTEROL 147mg; CALCIUM 125mg; SODIUM 344mg; FIBER 2.4g; IRON 1.2mg; CARBOHYDRATE 17g

Quinoa Pilaf

Serves 4

My notes - This recipe represents what I had ready access to, and what was lying around my kitchen. Substitutions welcome. And, as a presentation note, this particular combination was particularly "molding" friendly meaning that the pilaf retained the shape of the utensil by which it was served (spoon, glass or measuring cup etc).

2 cups vegetable broth

2 cloves of garlic, chopped

1 cup quinoa (rinsed in a sieve)

1 orange pepper (rough chopped)

2 tablespoons thyme leaves

1/2 teaspoon salt (or to taste)

1 teaspoon pepper (or to taste)

1/2 cup corn kernels

1/3 cup edamame beans (shelled soybeans)

Add all ingredients, and bring to a boil. Simmer for 10-15 minutes until quinoa is tender and most of the liquid has disappeared. Serve.

Basalmic Glazed Portabello Mushrooms

serves 2 with generous portions (4 with small portions)

1 package sliced portabello mushrooms

Cooking spray

1 garlic clove chopped

2 tablespoons basalmic vinegar

1/2 teaspoon salt

1 teaspoon ground pepper

1 teaspoon light butter (optional)

Coat cooking pan with cooking spray. Add mushrooms and garlic clove to pan heated to high heat. Add vinegar, salt, pepper and light butter. Stir vigorously for a moment to allow all ingredients to mix (mushroom slices should be well coated with basalmic vinegar). Turn heat down to medium high, and allow mushrooms to cook stirring every two to three minutes. In five to ten minutes, the basalmic glaze will thicken and mushrooms will cook down creating a sauce. Turn off heat, and serve.

Braised Yellow Beans

serves 4

Yellow beans (approximately 3/4 of a pound)

Cooking spray

1 garlic clove chopped

1/2 teaspoon salt

1 teaspoon ground pepper

1 tablespoon light butter

1/2 cup vegetable broth

Coat pan with cooking spray and heat on high heat. Add beans, and cook for two-three minutes. Add garlic, and other ingredients through butter. Cook for three minutes, and add broth. Reduce heat to medium-high, and cook stirring frequently until broth reduces and beans are tender. Serve immediately.


Technorati Tags: , , , , , , , ,