Friday, June 30, 2006

Lavender Shortbread


I saw this recipe on 28 Cooks and thought it would be an excellent way to use up some of the lavender I still have lying around. The recipe was easy to throw together, it went from measuring to baking within the span of minutes. I did make one slight error - I didn't realize how the dough would expand in the oven and thus made my circles of dough a little too big. It wasn't disastrous, it just meant my shortbread was thinner then I had anticipated. And as a result, the ends browned a bit more then I would have liked. To be remedied next time for sure, as this will definitely be a repeated recipe - perhaps with a different herb next time.

This batch of lavender shortbread was bound for M.'s office where the feedback has already been excellent. Apparently lavender-tinged goodies are the way to office people's hearts!

Once again, the source of this recipe was 28 Cooks

Rosemary Shortbread
1 c flour
1/4 c plus 1 1/2 tsp sugar
1/8 tsp salt
1 tablespoon fresh lavender, chopped
1 stick (1/2 c) unsalted butter, softened

Preheat oven to 350. Sift flour, 1/4 c sugar, and salt into a medium bowl. Stir in lavender. Add the butter and stir with a fork, or use your fingers to make a soft dough. Divide the dough in half and pat into 2 thin 6" discs on a parchment-lined baking sheet. Cut each disc into 8 wedges. Prick each wedge with a fork, and sprinkle the remaining sugar over the dough. Bake the shortbread until lightly golden, about 20 minutes. Re-cut the wedges after removing from the oven, and cool completely on a baking rack.


Technorati Tags: , ,

Thursday, June 29, 2006

Tales of the Farmer's Market - Part 1

Okay. So we're lucky enough to have a Farmer's Market about 4 blocks away from us on Tuesdays, Thursdays, Fridays and Saturdays. I know, I know. Do we need any more veggies in the house? Actually yes, I'm not making much headway with lettuce #1, and lettuce #2 is lurking in the wings - there's only so many cucumber/carrot/tomato salads a girl can eat without needing to spice life up a bit! But today I was going to the post office on the other side to mail something, and that caused me to walk THROUGH the farmer's market on the way. So on the way back I HAD to stop and see what was there. I mean, it was completely unavoidable.

And I'm calling this Tales of the Farmer's Market - Part 1 because let's face it, this will be a regular feature with the market so close and open so often.

Here's my haul:


Beets. I used to be convinced I didn't like beets because I only ever saw canned. I don't like canned. But fresh roasted - that's another story!


Fresh garlic. Why not?


Yellow and green beans. Always a summer favorite.


And, last but not least - garlic scapes. I don't know what they are (beyond the name), I don't know what to do with them but they looked cool so I decided to take the challenge!

Pesto


On Tuesday, I stopped by our local farmer's market and scored this lovely bunch of basil for a mere $2.

Instantly, I thought of making pesto. Traditionally, I'm a red sauce kind of girl. But my dear college friend M (recipient of the rhubarb shortbread) worked her magic on me in college and opened my eyes to the delight that is a tangy pesto sauce. M. and I spent a few days on the Ligurian coast during our honeymoon in the summer of 2004, and there I got to taste pesto sauces to my heart's content. Pesto originally hails from the Ligurian part of Italy, and each restaurant had their own recipe but they were all delicious! And, since our wedding anniversary is quickly approaching, I thought this bunch of basil would be perfect for trying a new pesto recipe.

Pesto
Adapted from Bow-Tie Pasta with Pesto recipe
The American Test Kitchen Cookbook

1/4 cup pine nuts
3 medium cloves of garlic, threaded on a skewer
2 cups packed basil leaves
2 tablespoons fresh flat-leaf parsley leaves (optional, I omitted)
7 tablespoons extra-virgin olive oil
salt
1/4 cup finely grated parmesan
1 pound pasta (bow-ties, linguine, fusilli etc)

1. Toast nuts in a small, heavy skillet over medium heat. Stir frequently, until nuts are just golden and fragrant (4-5 minutes).
2. Meanwhile bring 4 quarts of water to boil in large pot. Lower skewered garlic into water, and boil for 45 seconds. Run garlic under cold water. Remove from skewer, peel and mince. [I simply boiled water in a pyrex measuring cup in the microwave and boiled the garlic in that, since I wasn't cooking an entire pound of pasta.]
3. Place basil and parsley (if using) in a heavy-duty sealable plastic bag. Pound with meat pounder or roll with rolling pin until all leaves are bruised (I used the rolling pin method).
4. Place nuts, garlic, basil, oil and 1/2 tsp salt in workbowl of food processor fitted with steel blade. Process until smooth, stopping to scrape down sides of bowl as neccessary. Transfer mixture to small bowl. Add cheese and adjust salt. (Surface of pesto can be covered with sheet of plastic wrap and refrigerated for up to five days.


I just cooked a little pasta for me, since M. was working late. I served my fusilli with pesto along side the asparagus from our CSA share, and wilted swiss chard greens. I simply washed and chopped the chard, cooking with a touch of cooking spray, half a lemon and salt and pepper. The aspargus was glazed with lemon juice and a touch of basalmic vinegar, as well as a dash of salt and pepper. With a little homemade whole wheat garlic bread and a glass of wine, it made for a tasty and enjoyable meal.


After dinner I browsed through The America's Test Kitchen Cookbook as it is one I haven't looked at as often as I should. While not vegetarian, there are plenty of vegetarian options I should find occasions to try. Helios and I thought the thin crust pizza looked quite promising....


Technorati Tags: , ,

Hot Days in the City.

Yesterday was hot. It wasn't even all that hot, but it was humid. And for some reason, I was determined to leave the lovely cool bliss of our apartment to go read on the Brooklyn Heights Promenade at 3 in the afternoon.

This was the view from my bench in what little shade I could find. You can see, its not too shabby a place to sit back and relax in! Love that view of Lower Manhattan!

The Brooklyn Heights Promenade is this beautiful walk that runs perhaps a quarter of a mile or so along the waterfront. It has amazing views of the New York Harbor, the East River, the Brooklyn Bridge and the Statue of Liberty. And the most unique thing about it is that it runs over a highway. So you have this piece of urban beauty lined with flower gardens and river views, and the honking of tractor trailers and cars running underneath. Kind of funny, but still an enjoyable place to go.

I'm enjoying getting back into leisure reading. After a year reading textbooks and assigned articles (and sometimes not even those!), its nice to enjoy books that I want to read when I want to read them. Unfortunately, with a Barnes and Noble across the street this can be a pricey undertaking.

I'm currently re-reading "A Tree Grows in Brooklyn" by Betty Smith. I read it as a child, so its vaguely familiar. But the account of life in New York not even a hundred years ago is so far from the New York I know and live in that I'm finding it really fascinating despite its young adult reading list status. When my parents visited in May, we visited the Tenement Musuem, and walked around recreations of apartment life at the turn of the century. I must say, re-reading this book with these images in mind is definitely helping the story come alive.

So that was my afternoon. I could really get used to this not working thing!

Technorati Tags: , ,

Tuesday, June 27, 2006

Strawberry Bread

I really wasn't going to make anything today. I don't know if its the newness of the blog or if its receiving lots of CSA goodies but I've been active in the kitchen lately and wasn't feeling it today.

But then, I picked up the CSA loot.

1 lovely bunch of Swiss Chard
1 bunch of winter savory
2 heads of lettuce
7 asparagus stalks
.6 pound of sugar snap peas
a bunch of radishes

2 pints strawberries
2 quarts of cherries
8 apples

Well, it all looked pretty good. Minus the strawberries. They were on their last legs five minutes ago. So after coming home and putting away all the produce, chopping and washing one head of lettuce and making baggies of cherries to be consumed ASAP, I tackled these errant strawberries. I peeked into The King Arthur's Baking Companion to see what strawberry recipes might be inside. There was a recipe for a Walnut-Strawberry Quick Bread. Since we were nutless - I went ahead and made a Strawberry Quick Bread. Which, true to its name, came together quite quickly. Which was a good thing, as I was very tired.

I won't be tasting this bread, as it will go off to M.'s office with him tomorrow. So, we'll have to see how the hungry coworkers like it ...

(Walnut-) Strawberry Quick Bread
makes 1 loaf


Notes from cookbook authors:
We just love this bread no matter which way we make it: all starwberry, all rhubarb, or a combination of the two. We also used half a cup of applesauce in one recipe with great success when we ran short of strawberries.

Notes from me: It was fast, and quick to throw together. And smelled delicious while baking!

1/2 cup chopped walnuts
1 1/2 cups unbleached all purpose flour
1 cup sugar
1/2 teaspoon baking soda
1/4 teaspoon salt
1/4 teaspoon nutmeg
1 tablespoon lemon zest (or 1/4 tsp lemon oil)
2 large eggs
1 1/4 cups mashed strawberries
1/2 cup vegetable oil

Preheat oven to 350. Grease and flour (or spray with cooking spray) a 9x5 inch loaf pan.

In a medium-sized mixing bowl, whisk together the walnuts, flour, sugar, soda, salt and nutmeg. In a separate bowl, whisk together the lemon zest, eggs, strawberries and vegetable oil. Combine the wet ingredients with the dry ingredients, whisking until well blended.

Pour the batter into the prepared pan and bake for 55-60 minutes, until a ccake tester inserted into the center comes out clean. Cool the bread in the pan for 15 minutes, and then remove from pan and transfer to a rack to cool completely (1 hour or more). For best flavor and easiest slicing, wrap bread while slightly warm and let sit overnight.

Rhubarb variation - Use 1 1/4 cups cooked rhubarb in place of the strawberries, to make a slightly tart bread. Start with 2 1/2 cups sliced rhubarb. Cook over medium heat (or in microwave) to make about 1 1/4 cups rhubarb sauce. If you only use rhubarb (no strawberries) increase sugar to 1 1/4 cups. You may substitute rhubarb for some strawberries, and without increasing the sugar.

Technorati Tags: , ,

Ginger-Scented Vegetable Pot stickers/ Ginger-Sesame Dipping Sauce

When planning Saturday's meal, I thought that vegetable dumplings would make the perfect accompaniment to the Warm Vegetables with Cool Noodles. Well, they would have. But I made the classic mistake known to anyone with any specific dietary needs (be it vegetarian, no wheat, no dairy etc). I bought dumplings ... AND DIDN'T READ THE INGREDIENT LIST! I mean, there were a multitude of dumplings - some pork, some chicken, some shrimp and some vegetable. I grabbed a package of vegetable dumplings and kept going.

Boy was I bummed when I scanned the ingredients just before planning to prepare them. PORK FAT! Lurking in this particular brand of veggie dumplings - ack! And so, warm vegetables with cool noodles were served solo. And M. was told he had free reign on these particular dumplings (as he is not a vegetarian).

But when Monday rolled around, and the leftovers were looming - I still wanted dumplings. So, I purchased gyoza skins, grabbed my leftover grated carrots and my leftover shredded cabbage and found this recipe in Robin Robertson's Vegan Planet. But I modified it a touch, since the original recipe called for processing the ingredients uncooked. I simply sauteed them quickly before tossing them into the processer. Just my own personal preference.

Ginger-Scented Vegetable Pot Stickers
by Robin Robertson, Vegan Planet

1 cup minced napa cabbage (I used leftover shredded and left as such)
1 cup drained and crumbled extra-firm tofu (I cubed, since it was being processed anyways)
1/4 cup shredded carrots
1 clove garlic (I used 2)
9 tablespoons peeled and minced fresh ginger (I just used a lot)
1 tsp toasted sesame oil
1/2 tsp cornstarch
salt and pepper (which I now realize I forgot)
24 dumpling or wonton wrappers
2 tablespoons peanut oil
1 tablespoon tamari or other soy sauce (I threw in a splash too lazy to measure)
1 cup of water

My first step - saute ingredients briefly for a few minutes until fragrant.
1. In a food processor, combine the cabbage, tofu, carrots, garlic, ginger, sesame oil, cornstarch and salt/pepper to taste. Process until well combined.
1. Place 1 wonton wrapper on a work surface and spoon 1 tablespoon of the filling into the lower third of the wrapper. Maybe mine were small, but I found 1 T too much filling- and my yield was higher then 24. Fold wrapper over the filling to form a triangle (if using square) or a semi-circle (if using round). Moisten edges of the wrapper with water to seal. Repeat with the remaining wrappers and filling.
3.Heat 1 tablespoon of the peanut oil in a large non-stick skillet over medium high heat. Placce half the dumplings in the pan and cook until golden. Do not crowd.
I used my own cooking technique of spraying skillet with cooking spray, adding a few dumplings (I froze most) and then browning for a minute or two. Then, I add some water to make sure dumplings heat through without adding to much oil. Then, as water dries, they brown nicely.


Ginger-Sesame Dipping Sauce
Didi Emmons - Vegetarian Planet

This sauce is a favorite in our house. Fairly easy to mix up, it generally makes enough to get through a batch of homemade dumplings.

Makes about 1 cup

1 teaspoon wasabi powder
2 tablespoons water
2 tablespoons balsamic vinegar
3 tablespoons soy sauce
1 tablespoon honey or sugar
2 teaspoons Dijon mustard
1 garlic clove, minced
1 tablespoon minced fresh ginger
2 tablespoons dark sesame oil

In a small bowl, mix together the wasabi powder and water; let sit for a few minutes to allow the flavors to develop.
In a jar with a close-fitting lid, mix together the other ingredients. Add the wasabi mixture. Shake vigorously.


And the completed meal?


Not too shabby for leftovers at all!


Unfortunately, M. was unable to make it home for dinner as he had to work late. Very late as it turned out. Never fear! I didn't lack for a fine dinner companion....


Technorati Tags: , ,

Monday, June 26, 2006

Another CSA challenge

As I've mentioned, using up our CSA produce has resulted in several challenges. This week we were faced with rhubarb - again! The first time M. made a compote which we served over ice cream. Good, but it was definitely time to try something more adventurous.

We were invited to dinner at my friend M's (not to be confused with my husband M.) apartment. She and her husband live way out in Queens, so it is quite an adventure getting to their apartment. Well, actually getting there isn't so much of an issue as is getting home after a few glasses of wine! The journey involves the Long Island Railroad and NYC subway - we've learned to pack water and reading material for the trek. :)

When M (friend) and I confirmed the plans, I asked if I could bring anything. I was really hoping she'd say yes (which she did) since I had rhubarb to use up. I found a recipe on the Cooking Light Community board that looked promising, so when I got the green light, it was all systems go!


Strawberry Rhubarb Shortbread
posted by kbucky on CL Community Board

For the shortbread:
¼ pound (1 stick) unsalted butter, at room temperature
1 cup all-purpose flour, or ½ cup flour and 1 cup rolled oats
5 tablespoons confectioners’ sugar
½ teaspoon kosher salt

For the topping:
2 eggs, lightly beaten
¼ cup all-purpose flour
¾ teaspoon kosher salt
1 ½ cups sugar
2 cups diced rhubarb
(I made the strawberry rhubarb version and so used 1 1/2 cups of rhubarb and 1 cup of strawberries)

Preheat the oven to 350 degrees.
To make the shortbread: Place the butter, flour, sugar, and salt in the bowl of a mixer fitted with a paddle and mix until it comes together. Press into an 8 X 8-inch pan and transfer to the oven. Bake until the edges are just beginning to brown, about 15 to 18 minutes.

To make the topping: Place all the ingredients in a medium-size bowl and mix until everything is completely incorporated. It will have a slightly gluey texture, but have no fear; you are doing it right.

Place the topping on the shortbread and transfer to the oven. Bake until the topping is set and just beginning to turn golden, about 35-45 minutes. Cool in the pan and cut into 12 to 16 bars.

Variation: Strawberry Rhubarb Shortbread: substitute 1 cup diced strawberries for ½ cup rhubarb.

From “The Bake Sale Cookbook” by Sally Sampson

kbucky's notes: I just mix up the shortbread in the food processor and this recipe goes together really fast! So yummy--the tart rhubarb and the buttery shortbread.


Well, I agree with kbucky. Using the food processor made this recipe a breeze. It was very tasty, the butteryness of the shortbread combined with the fruit layer balanced well and kept the recipe from being too rich. We served it with a touch of whipped cream on top, and I would definitely do that again. M. and I debated serving it with ice cream but decided that we thought it would be much and overpower the dessert. But the touch of creaminess from the whipped cream complimented it well.

All in all, the taste testers at the dinner enjoyed it (and were left with the leftovers - ha!) and I would make it again (especially given how quick and easy but delicious it was).


Technorati Tags: , , ,

A farewell to an old friend...


Ah ... the memories. The many sleepy evenings when you made us tasty espresso with a crema to die for. Now its time to share the wealth.

This was our old coffee maker. It was cute, it used Nespresso pods and enabled us to switch from decaf to a variety of coffees from cup to cup. M. became quite the mean coffee maker with our trusty machine by his side.

But now we have a new one. And not just any new one. But a fancy-schmancy coffee maker that does everything except grow the beans. Although give it time on that one. M. works in an office which for the longest time was relatively unused. Many people work from home or visit the office only once or twice a week in his line of work. So, he spent long hours working with relatively few people around. Long hours require caffeine for ultimate productivity so he and the fancy-schmancy coffee maker that ground the beans and made espressos/lattes/cappucinos all at the touch of a button became quite good friends.

Fast forward a couple years, and the powers that be at M.'s office weren't satisfied with the fancy-schmancy coffee machine. It was time for a fancier-schmancier coffee machine. And they offered M. his caffeinated office friend - to bring home. So M. did.

And here it is. Mr. Fancy Schmancy coffee machine himself residing in our humble abode. There is something so cool about hearing the beans being ground, the coffee being made and not having to do much more than push a button (or two).

The kicker of the whole story is that I'm not that big on coffee. I've always been much more of a tea drinker myself. But I'm learning.....

And the question on everyone's mind - what will happen to our old trusty coffee machine? It will be on its way to a new home where it will be loved and used often. It will be winging (okay trucking) its way to Florida shortly where it will become the object of my parents' undying caffeinated affection.

So there is a happy ending to the story....

Sunday, June 25, 2006

A variation on a classic.....


Mojitos have become quite the "it" drink in the past few years, at least here in New York City. At first you'd only find them at specific bars or restaurants but now you'd be hard pressed not to find a bar or restaurant with some form of mojito on the menu. I first encountered the mojito about ten years ago when my family was living in Havana, Cuba. My father works for the State Department as a foreign service diplomat, and so my family has travelled from country to country during my childhood/teenage years. We moved to Cuba in time for my senior year of high school (which I spent in boarding school) but I visited Havana on vacations. At first I wasn't much interested in mojitos (not being a drinker yet) but as the years went on they became more and more appealing.

Imagine my surprise a few years later when they exploded onto the New York bar scene, and people everywhere began talking about this hip new drink. And it was nothing but the little old mojito.

You have to hand it to the Cuban people. Living in an (often) horrendously hot tropical paradise, they created a drink that is refreshing in its minty soda watery goodness, but also provides a kick enough to get conversations flowing and proverbial parties started. M. and I are big fans, and have tried a variety of recipes. This one hails from PJWine Drinks - a magazine we receive from a large wine warehouse that M. often orders wine from. Since we live in New York City without a car, ordering things like wine which are heavy to carry can be a challenge. And since both M. and I took a class all about wine during college - tasting wine is important to us. M. found this warehouse with a suitable selection, and will order a couple cases from time to time so as to keep his oenophile taste buds happy. And, a little perk is this magazine which arrives seasonally but has yielded some gems of recipes for both drinks and food.

Ultra Mojito
Makes 1 drink

A great Mojito has to be the definitive fresh mint cocktail. In this double-mint-enhanced version, fresh mint leaves are first muddled, then classic ingredients and a mint-infused syrup are shaken in.

2 sprigs fresh mint
3/4 ounce Mint Syrup (recipe below)
3/4 ounce fresh lime juice
2 ounces Bacardi Limon rum
Splash chilled soda water

Tear mint sprigs and drop into a cocktail shaker. Add syrup and muddle well. Add lime juice and rum. Filla a large glass with ice, and then transfer ice to shaker and shake vigorously. Pour entire contents into the large glass and top with a splash of soda.

Mint Syrup
Makes about 3 cups (enough for about 30 drinks)

1 cup coarsely chopped mint sprigs with stems
2 cups sugar
2 cups boiling water

Place mint and sugar in heatproof container. Pour boiling water over mixture and stir until sugar is completely dissolved. Let steep 30 minutes, then strain. Store refrigerated until needed.


M. was the mojito maker yesterday. He ended up upping the lime juice to suit our tastes. And the proportions of the mojito components (syrup, mint etc) are certainly adjustable depending on the customer. Also, I would think (unless you're having a party) perhaps halving the mint syrup recipe might be a good idea. Our fridge is now stocked with several containers of syrup (one of which spilled a little - that syrup is so sticky!) and it would seem apparent that mojitos are going to be the house drink for some time to come, or at least until that syrup is all gone.

I guess there are worse things...


Technorati Tags: , ,

A recipe from the past....

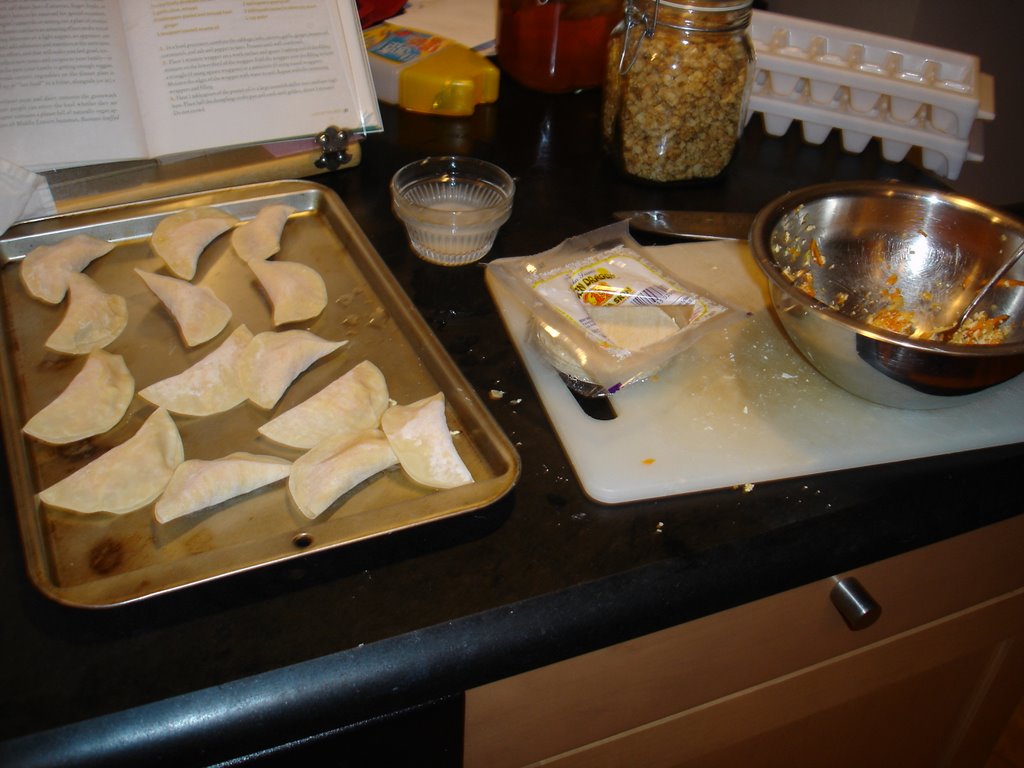
Okay, so we had the miso-glazed eggplant to start my attempt at an elegant Saturday night meal. But what to accompany? I wasn't feeling in a pad thai mood, nor was I really feeling like tofu. Then, I suddenly remembered a recipe I'd made at home several years before. M. wasn't with me on that particular trip, but I remembered loving this particular dish that my mother and I made together. The recipe came out of a Vietnamese-Thai cookbook she received that Christmas, and this was the recipe we tried to break it in. I copied the recipe, but I didn't record the name of the cookbook. So that remains a mystery.

I'm not sure what made me think of this recipe yesterday, but I did. It involves chopping - so much chopping - that I recommend cheating and using pre-shredded carrots and cabbage (as I did) if available. There are many components to the dish but they come together so nicely! M. was very impressed (although very hungry by the time I actually got the dish to the table). This is not a quick weeknight meal but a meal you might make when you really want to enjoy the process of cooking (or at least chopping). Otherwise you'll lose your mind!


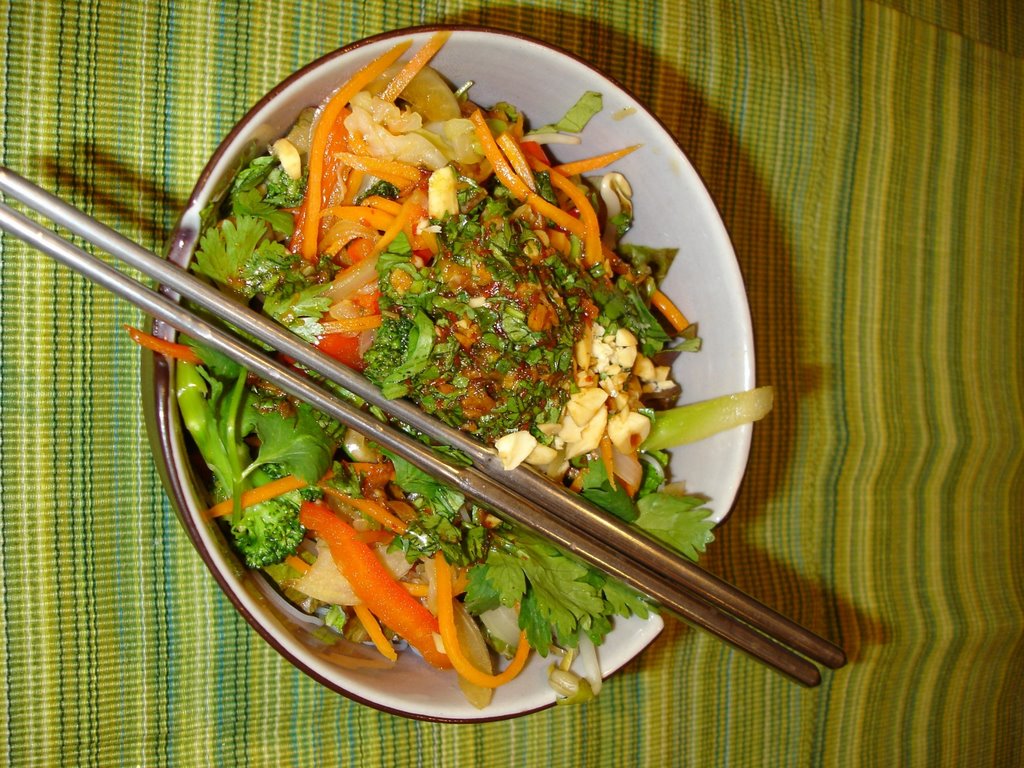
Warm Vegetables on Cool Noodles

Serves 4 (We'll be getting at least 6 servings out of this dish)

Notes from author - Of all the vegetarian dishes I have cooked - and there are many- this is my all-time favorite. It's simple and straightforward, but the flavors are intense and lively. Make sure you have all the ingredients preapred before you start to cook. The actual cooking time for this dish is only minutes.

Noodles

1/2 pound dried rice vermicelli boiled in water for 4-5 minutes, rinsed and drained
2 cups bean sprouts
1/2 small cucumber, seeded and julienned
1/4 cup fresh mint leaves, cut in half
3 romaine lettuce leaves shredded

Topping
1 cup julienned carrots
2 cups broccoli florets, cut into small thin pieces
2 tablespoons of vegetable oil
1 small yellow onion sliced
6 dried black mushrooms, soaked in hot water for thirty minutes, stemmed and thinly sliced
(I used shiitake)
2 cups shredded Napa cabbage
1 medium bell pepper, julienned
3 tablespoons soy sauce
2 teaspoons chopped roasted peanuts

Accompaniment
1 cup cilantro-lime soy sauce (see additional recipe)


After the rice vermicelli have cooled, gently toss with the bean sprouts, cucumber, mint and lettuce until well blended. Set aside.

Bring water to a rolling boil in a medium pot. Using sieve with handle, blanch the carrots and broccoli until colors turn (about 10 seconds). Shock in ice water immediately. Drain, and set aside.

Just before serving, heat the oil in a large wok or skillet over high heat. Wait for pan to get very hot, almost smoking. Carefully add the onion (oil may splatter) and stir until it begins to soften (about 30 seconds). Add the mushrooms and saute for one minute. Add the carrots, broccoli, cabbage and bell pepper and stir-fry for 2-3 more minutes. Vegetables should be very hot and sizzling. Push the vegetables to one side of the pan and add soy sauce to the open area to create a distinctive fragrance. Then continue stirring vegetables for another minute and remove from heat.

To serve, place noodle mixture in individual soup or pasta bowls. Top with stirfried vegetables. Garnish with peanuts. Invite each gues to drizzle 3 tablespoons of cilantro-lime soy sauce on the noodles and toss gently before eating.

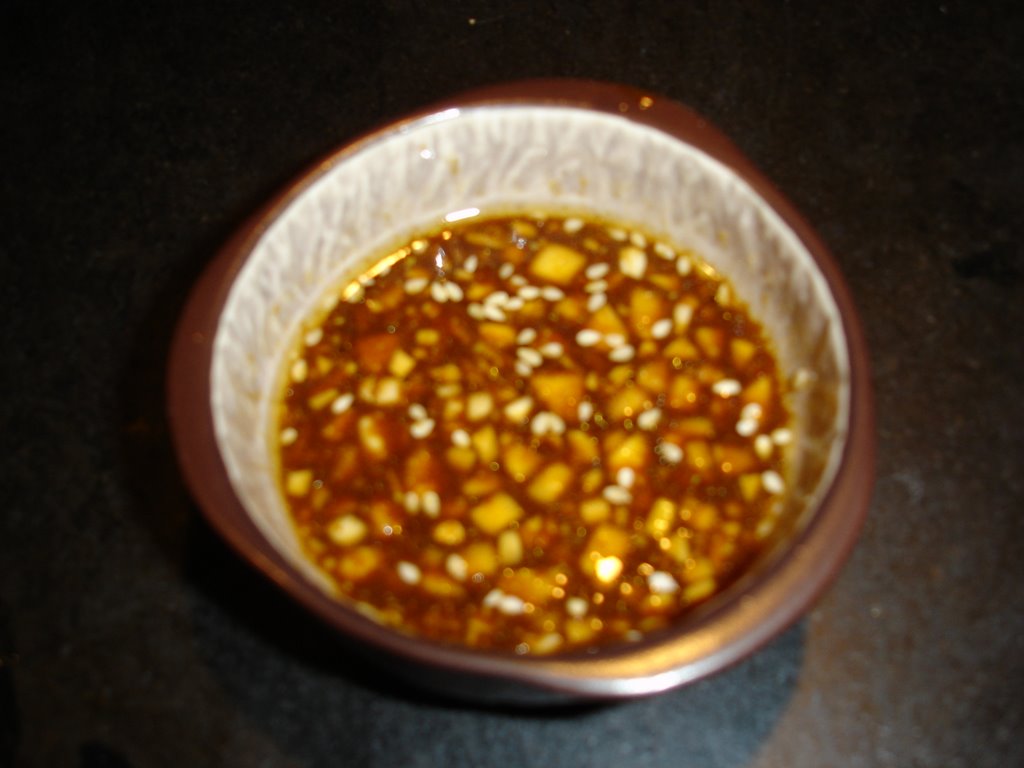
Cilantro-Lime Soy Sauce
makes about 2/3 cup

Using soy sauce as the base, the smashed ginger, chilies, garlic and lime juice make this sauce particularly memorable.

1 clove garlic
2 fresh thai bird chilies and/or 1 teaspoon of ground chili paste (I went with the paste, and added 1.5 teaspoons which was possibly a bit much for us)
1 1 inch piece of fresh giner, peeled and thinly sliced
2 tablespoons of finely chopped cilantro
1/4 cup soy sauce
2 tablespoons fresh lime juice with pulp
3 tablespoons of water
2 tablespoons of sugar

Place garlic, chiles, chili paste and ginger in a mortar and pound to a paste. Transfer paste into a glass jar with a tight-fitting lid and add remaining ingredients. Mix well until sugar is dissolved. To serve, pour into small ramekins. Sauce will keep in refridgerator for up to two weeks.


So yes, a meal with a lot of chopping and prep work. Was it as good as I remembered? Yes. Will I make it again tomorrow? No. But will I make it again some other lazy Saturday? Yes.

Technorati Tags: , , ,

Cooking Overdrive!

Well, I got a little ambitious in the kitchen yesterday. Apparently having a new blog is motivating me to new and greater cooking heights (which was the intention so I guess the plan is working).

On Friday night M. and I had dinner at a Japanese fusion restaurant called Taku. We both ordered the 30 prix-fixe so as to sample a complete menu (after determining that the chef would be willing to create a vegetarian main dish option for me). My starter was a fried eggplant in miso sauce which reminded me of a dish I used to make at home that was somewhat similar. And so I kept thinking about that dish, dredged up the recipe and decided to make it for dinner on Saturday. Its an old Cooking Light recipe that I found in the Best of Cooking Light 4 (a collection I bought at the supermarket at some point).


Miso-Garlic Broiled Eggplant

Miso, garlic and crushed red pepper add intense flavor to this dish, which you can also serve as a side.

1/4 cup mirin
3 tablespoons yellow miso (soybean paste)
2 teaspoons grated peeled ginger
1 teaspoon dark sesame oil
1/2 teaspoon crushed red pepper
2 garlic cloves minced
4 Japanese eggplants, cut diagonally into 1/2-inch-thick slices (about 1 lb)
Cooking spray
1 tablespoon sesame seeds
1/4 cup thinly sliced green onions

1. Preheat broiler.
2. Combine first 6 ingredients, stirring with a whisk. Arrange eggplant slices on a baking sheet coated with cooking spray. Spread mirin misture evenly over eggplant slices; sprinkle with sesame seeds. Broil 8 minutes or until topping is golden. Place eggplant slices on a platter; sprinkle with onions.

Yield - 4 servings.

Calories - 115, Fat 3.3 g, Protein - 3.3 g, Carb - 16.1, Fiber - 4 g,Chol - 0, Iron - 1.1 mg, Sodium 475 mg, Calc - 46 mg


The rest of the meal at Taku was pretty tasty, but not hands-down-we-must-go-again-tomorrow-amazing. I'd like to go back again for a "tapas-style" meal because they had some amazing looking vegan spring rolls and some fried tofu sticks served with a chipotle mayo sauce that sounded intriguing. But would I do the price fixe again? Probably not. M. was similarly indifferent, although we were both taken by his dessert which was vanilla ice cream with "green tea fluff" which was like a green tea whipped cream. Mmmmm....

Taku
(718) 488-6269
116 Smith St
Brooklyn, NY 11201


Technorati Tags: , ,

Friday, June 23, 2006

Cooking Light Lavender Tea Cake

This Wednesday I made the CL Lavender Tea Cake. We were going to a friend's apartment for dinner, and I gleefully offered to make dessert. Whenever we go to this particular friend's for dinner, we always bring a course. So if she and her boyfriend come to us, she'll often bring dessert or appetizers. Since we went to them this time, I brought dessert.

M. and I joined a CSA (Community Supported Agriculture) organization right here in Cobble Hill. We have mixed feelings about it so far - the yield is pitifully small for our veggie heavy needs. But, we get to try new things. The first new thing we tried were chive blossoms - which we crumbled in salads. It was interesting, but not spectacular. This week's new and exciting item was lavender. So I searched for a lavender recipe to make.

This cake was excellent. You can fool yourself into thinking its relatively good for you because its from Cooking Light, however barring the yogurt instead of oil - not much was light about it. But the plus side was that it had a rich taste to it, and didn't lack in flavor the way recipes that slash butter often can. Maybe that was the yogurt at work. I added a touch more lavender - maybe three and a half tablespoons but that didn't seem to detract from the taste. The lavender remained present but not too overwhelming. All the tasters at the dinner loved it, and I thought it was great. I would definitely make it again (and might to use up the lavender) although M. is dreaming of a lavender creme brulee so that might have to come first. But, it is a big bunch of lavender ....

Of course, I don't have a picture because I hadn't had my blog idea yet. But here's the recipe...

Glazed Lavender Tea Cake

A perfect vehicle for the beginner lavender cook, this subtly sweet, delicate tea cake is great for breakfast, dessert, or a snack.


Cake:
1 cup granulated sugar
5 tablespoons butter or stick margarine, softened
1/2 teaspoon vanilla extract
1 large egg
1 large egg white
1 3/4 cups all-purpose flour
1 teaspoon baking powder
1/4 teaspoon baking soda
1/4 teaspoon salt
1 cup plain fat-free yogurt
2 tablespoons finely chopped fresh lavender leaves
Cooking spray

Glaze:
1/3 cup sifted powdered sugar
1 teaspoon water
1/4 teaspoon vanilla extract

Preheat oven to 350°.
To prepare cake, beat granulated sugar, butter, and 1/2 teaspoon vanilla at medium speed of a mixer until well-blended (about 5 minutes). Add egg and egg white, 1 at a time; beat well after each addition. Lightly spoon flour into dry measuring cups; level with a knife. Combine flour, baking powder, baking soda, and salt; stir well. Add flour mixture to sugar mixture alternately with yogurt, beginning and ending with flour mixture. Stir in lavender.

Pour the batter into an 8-inch loaf pan coated with cooking spray. Bake at 350° for 1 hour or until a wooden pick inserted in center comes out clean.

To prepare glaze, combine powdered sugar and remaining ingredients. Spread over hot cake. Cool in pan 20 minutes on a wire rack; remove from pan. Cool completely on wire rack.

Yield: 10 servings (serving size: 1 slice).

Technorati Tags: , ,

Introducing Helios


Since I'm still getting started, I figured I should make this introduction. And, its not like I cooked or baked anything in the last hour since I posted. This is Helios, the third member of my little family. Just me, M. and Helios. And a very important one since he lets me borrow his name in for my online public persona. He's very agreeable like that.

Helios doesn't really like having his picture taken - hence the squinty eyed glare. I think this picture was taken right after we moved into our new apartment. I can see I'm going to have to work on taking better pictures if they'll be posted - apologies for the wine bottle closeup! But this is Helios doing one of his favorite things. Sitting on something not meant for him to sit on - in this case a dishtowel meant for drying dishes.

I guess it is the little pleasures in life that matter most....

A venture into the blogging world....

Well, I'll give this a try. I'm not the most tech savvy so we'll see how things go. Now that school's out for the summer, and I'm trying to get myself excited about cooking again... a blog seemed like a good way to get motivated. We'll see if it works, or if it lurks in the shadows of the internet for all eternity.

The picture above is where I live. Brooklyn New York. No, I don't live in the middle of the bridge. But I do live a few minutes away from it - about ten minutes walk or so. My husband and I moved here a year ago from the West Village and we love the neighborhood. We're kind of in between several cool neighborhoods - Cobble Hill, Boerum Hill, Brooklyn Heights and not too far from Cobble Hill's neighbor Carroll Gardens. There are tons of fun shops (both food and non-food) as well as restaurants. M and I are slowly working our way through as many as we can (given that we don't eat out more than once or twice a week). There are some amazing Middle Eastern stores close by - the area has a strong middle eastern influence which I love since I think Middle Eastern food is one of the most veggie friendly cuisines out there.

Technorati Tags: